Start with KAVIA AI
Transform Enterprise Software Development Process with AI-Powered Tools. This comprehensive guide will walk you through everything you need to know to get started with KAVIA AI.
What you'll learn
- •How to sign up and set up your KAVIA AI account
- •Creating your first web application from scratch
- •Working with existing codebases and repositories
- •Best practices and important considerations
Sign into KAVIA AI
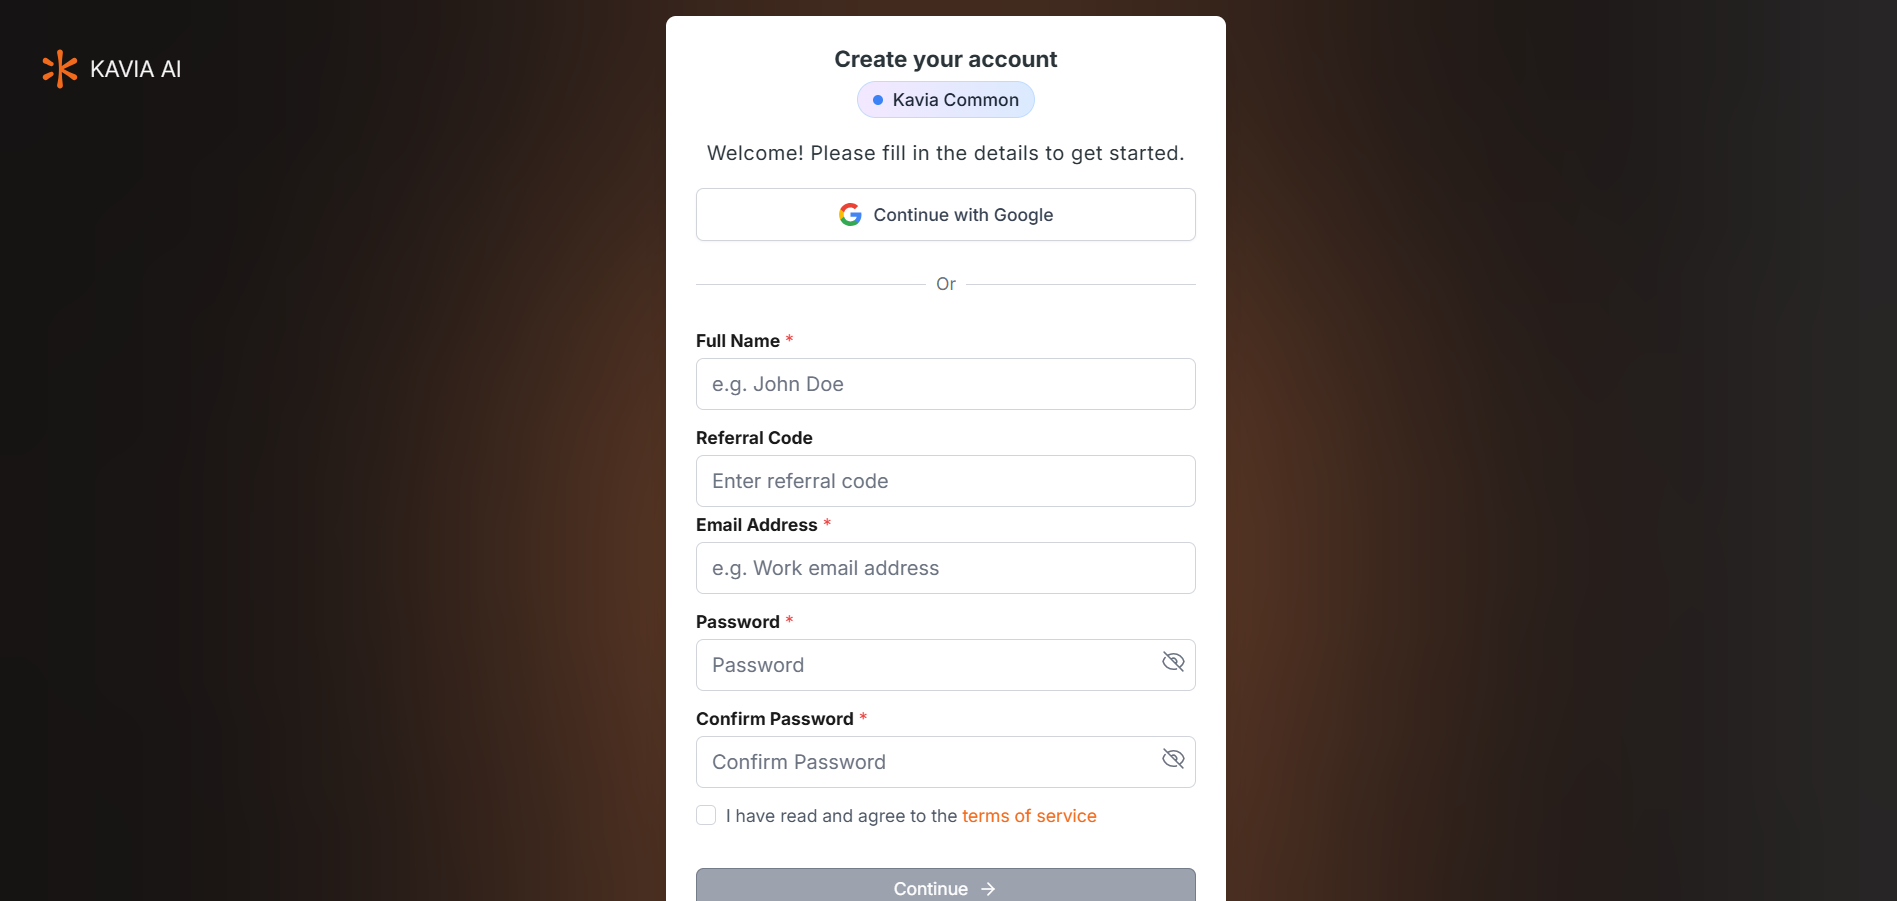
To get started with KAVIA AI, you'll need to create an account. Follow these steps:
- 1Add your Referral Code → Sign into KAVIA AI with a verifiable email id.
Two Step Verification and Sign in
- 1Enable your access through set password link received via Welcome Mail
- 2Login to the portal using the Login URL in the Welcome Mail
Create your first Web APP
Let's walk through the process of creating a simple website using KAVIA. For this example, we'll build a basic web-based app.
1Start from the Home Screen
To begin, navigate to the Home section from the left sidebar. At the center of the screen, you'll be prompted with "What do you want to build today?"—ensure the Apps tab is selected. Then, scroll down to choose the type of application; for this tutorial, select Web as the application type and React as the framework.
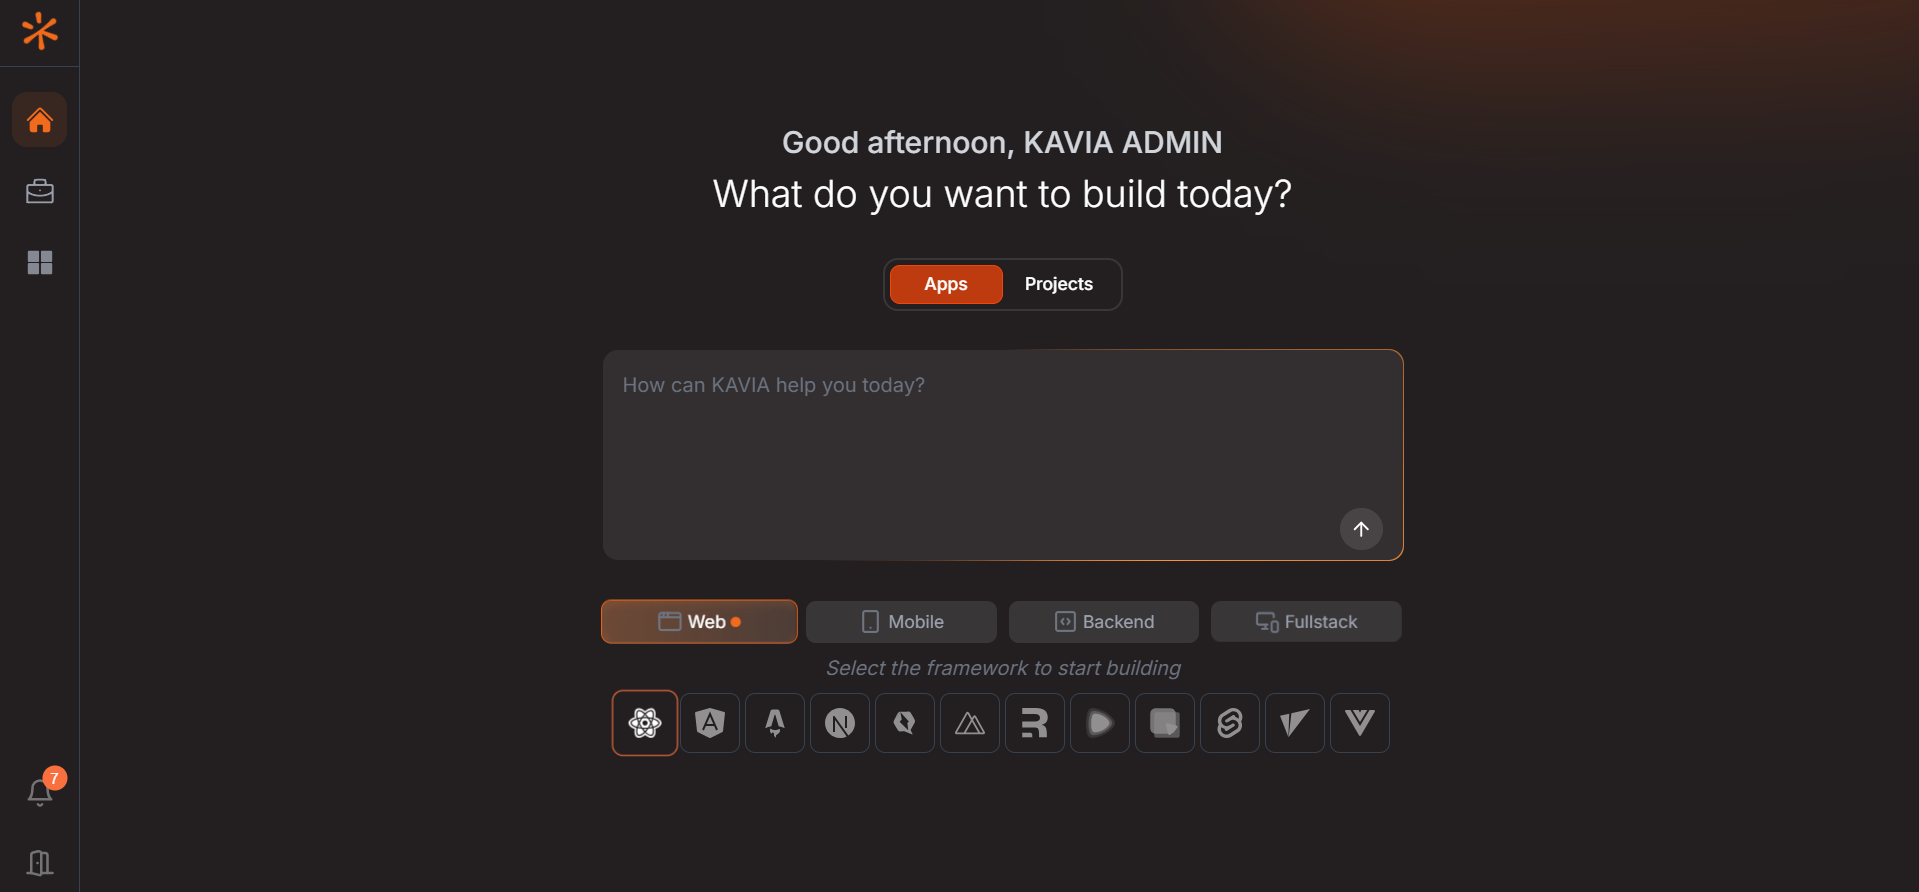
2Enter Your Prompt
In the input box, describe the app you want to create. In this tutorial, I will enter the following prompt and Select Web because i am going to make a web application and select React as the stack and Click the Arrow Icon:
"Create a modern, responsive personal portfolio website for a freelance architect.
The site should include the following sections: Home, About Me, Projects,
Skills, Contact. Each section should be accessible via a navigation bar.
The Projects section should display 3 sample projects with images, titles,
and short descriptions. The Contact section should include a form with fields
for Name, Email, Subject, and Message. Style the site with a clean, minimal
design using modern fonts and subtle animations. Make it mobile-friendly
and accessible."
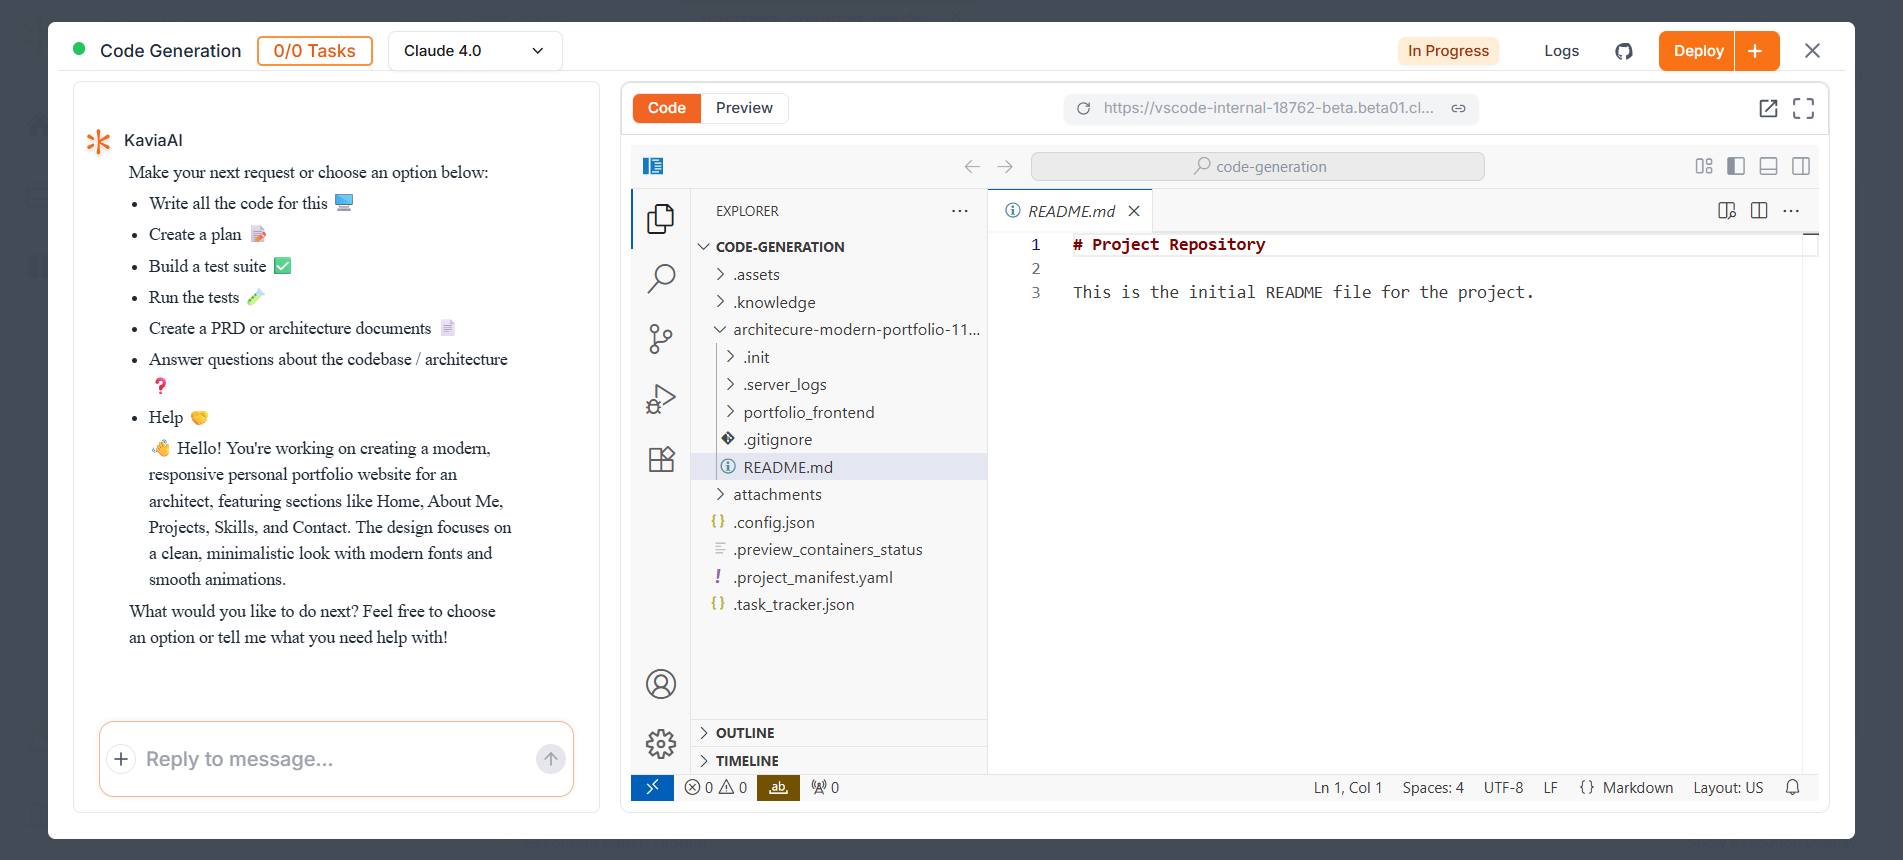
KAVIA will process your request and begin building the application automatically, complete with frontend and backend code (if required), UI layout, and logic.
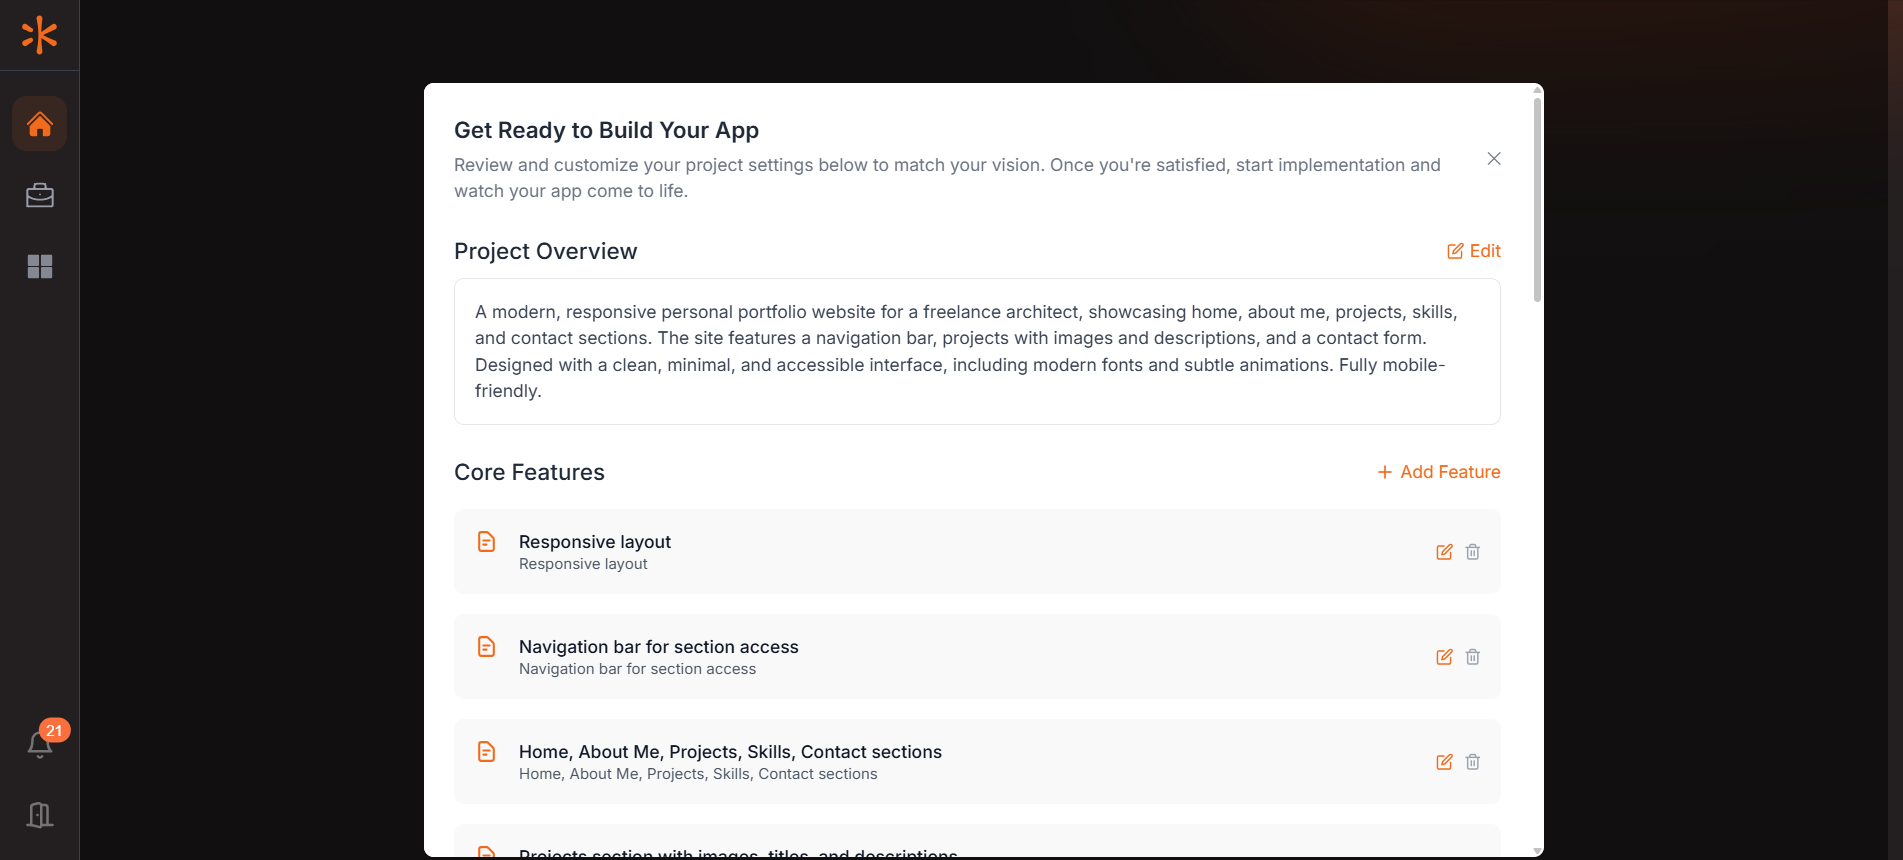
3Confirm Project Overview and Core features
Would you like to Use your own Github Account for the projects?
In the Third-Party Integrations section, connect your GitHub account by selecting it from the dropdown. If it's not listed, click "Add Account" to link it. Ensure the correct account is selected before moving forward with project implementation.
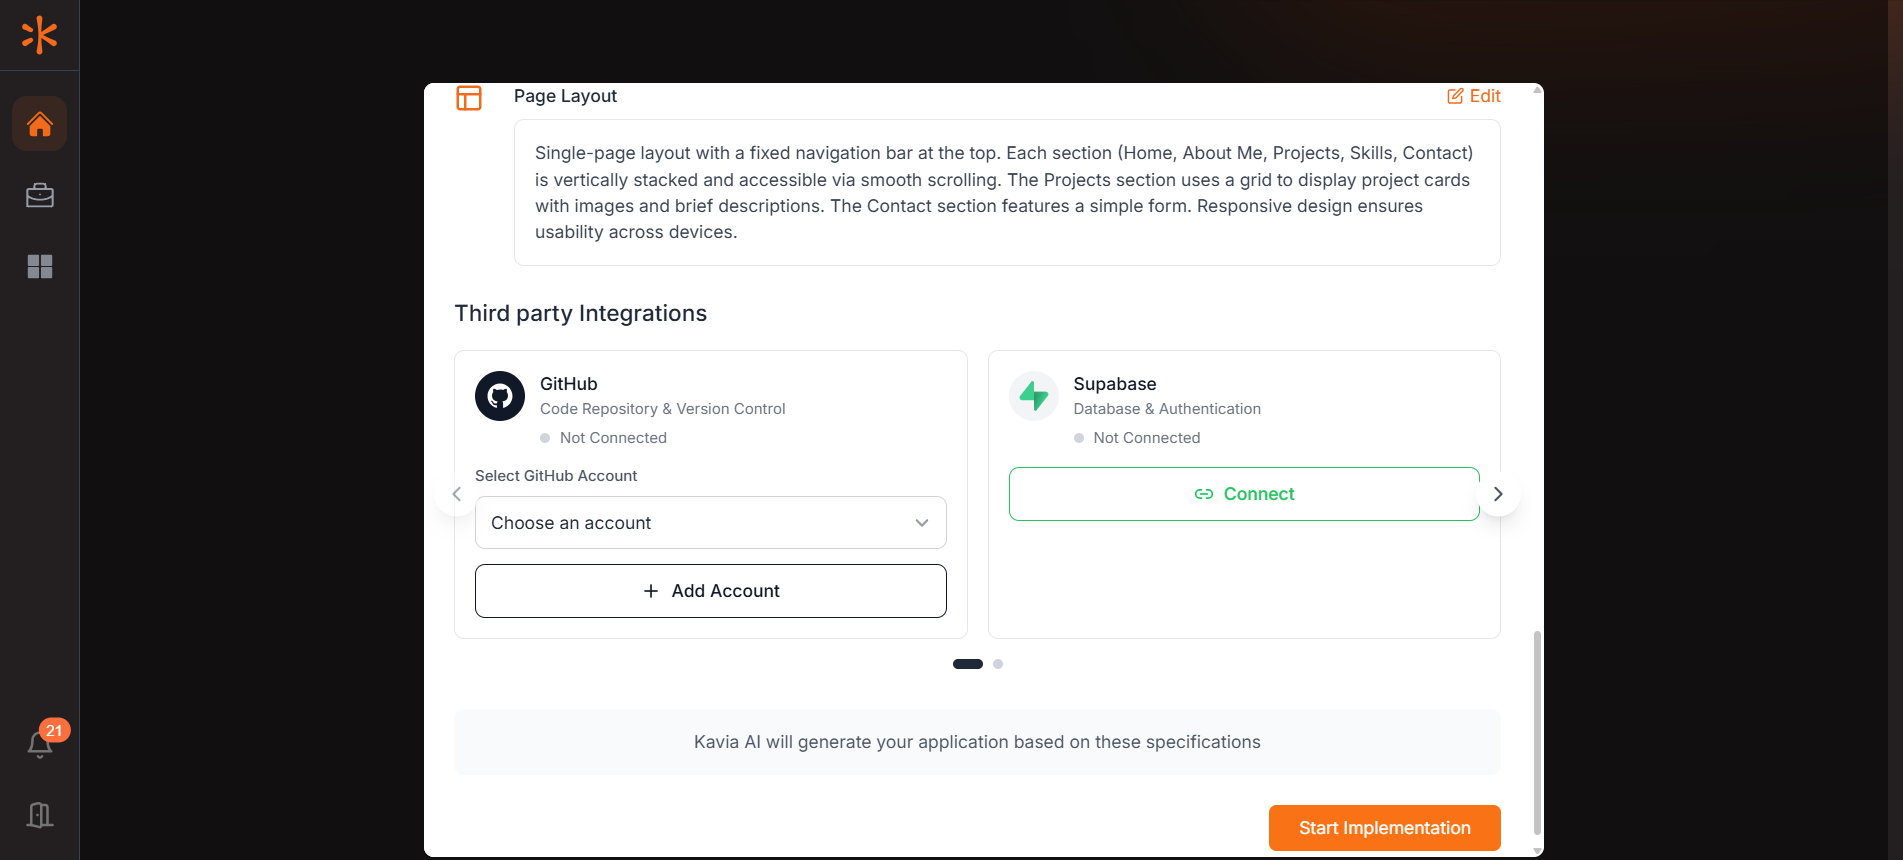
Want to connect your project with real time Database for storage?
To provision your app's database, connect your Supabase account by clicking the "Connect" button in the Supabase section. Supabase will handle database setup and management for your application.
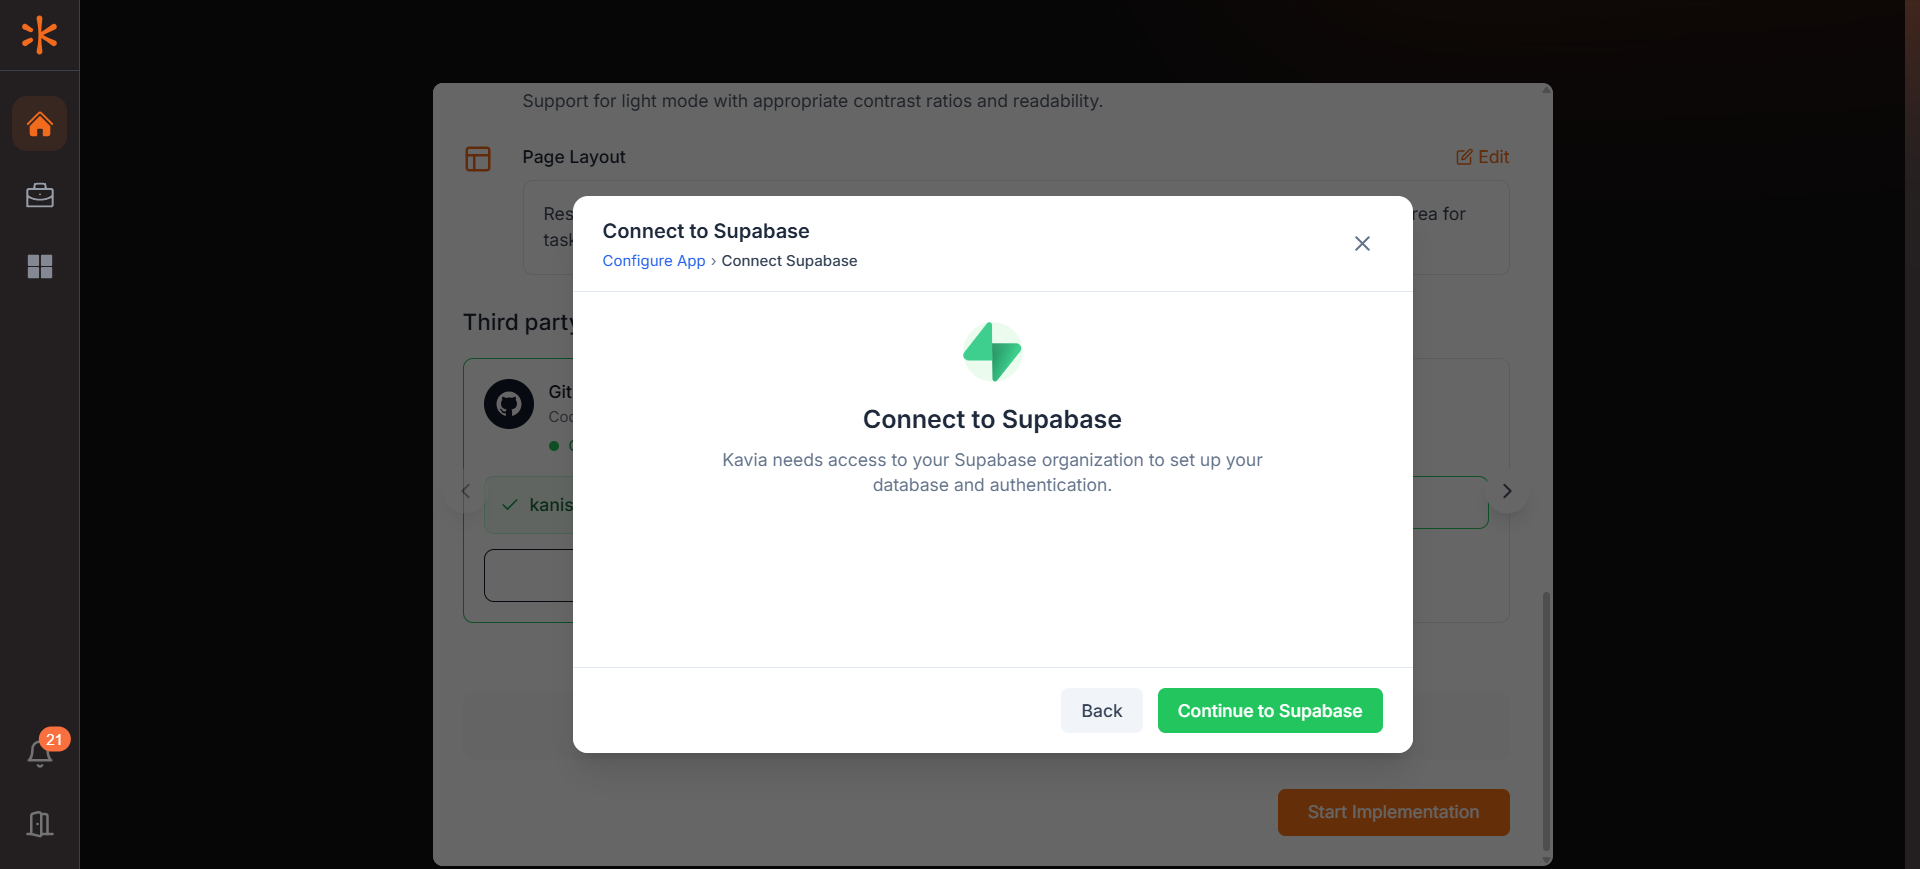
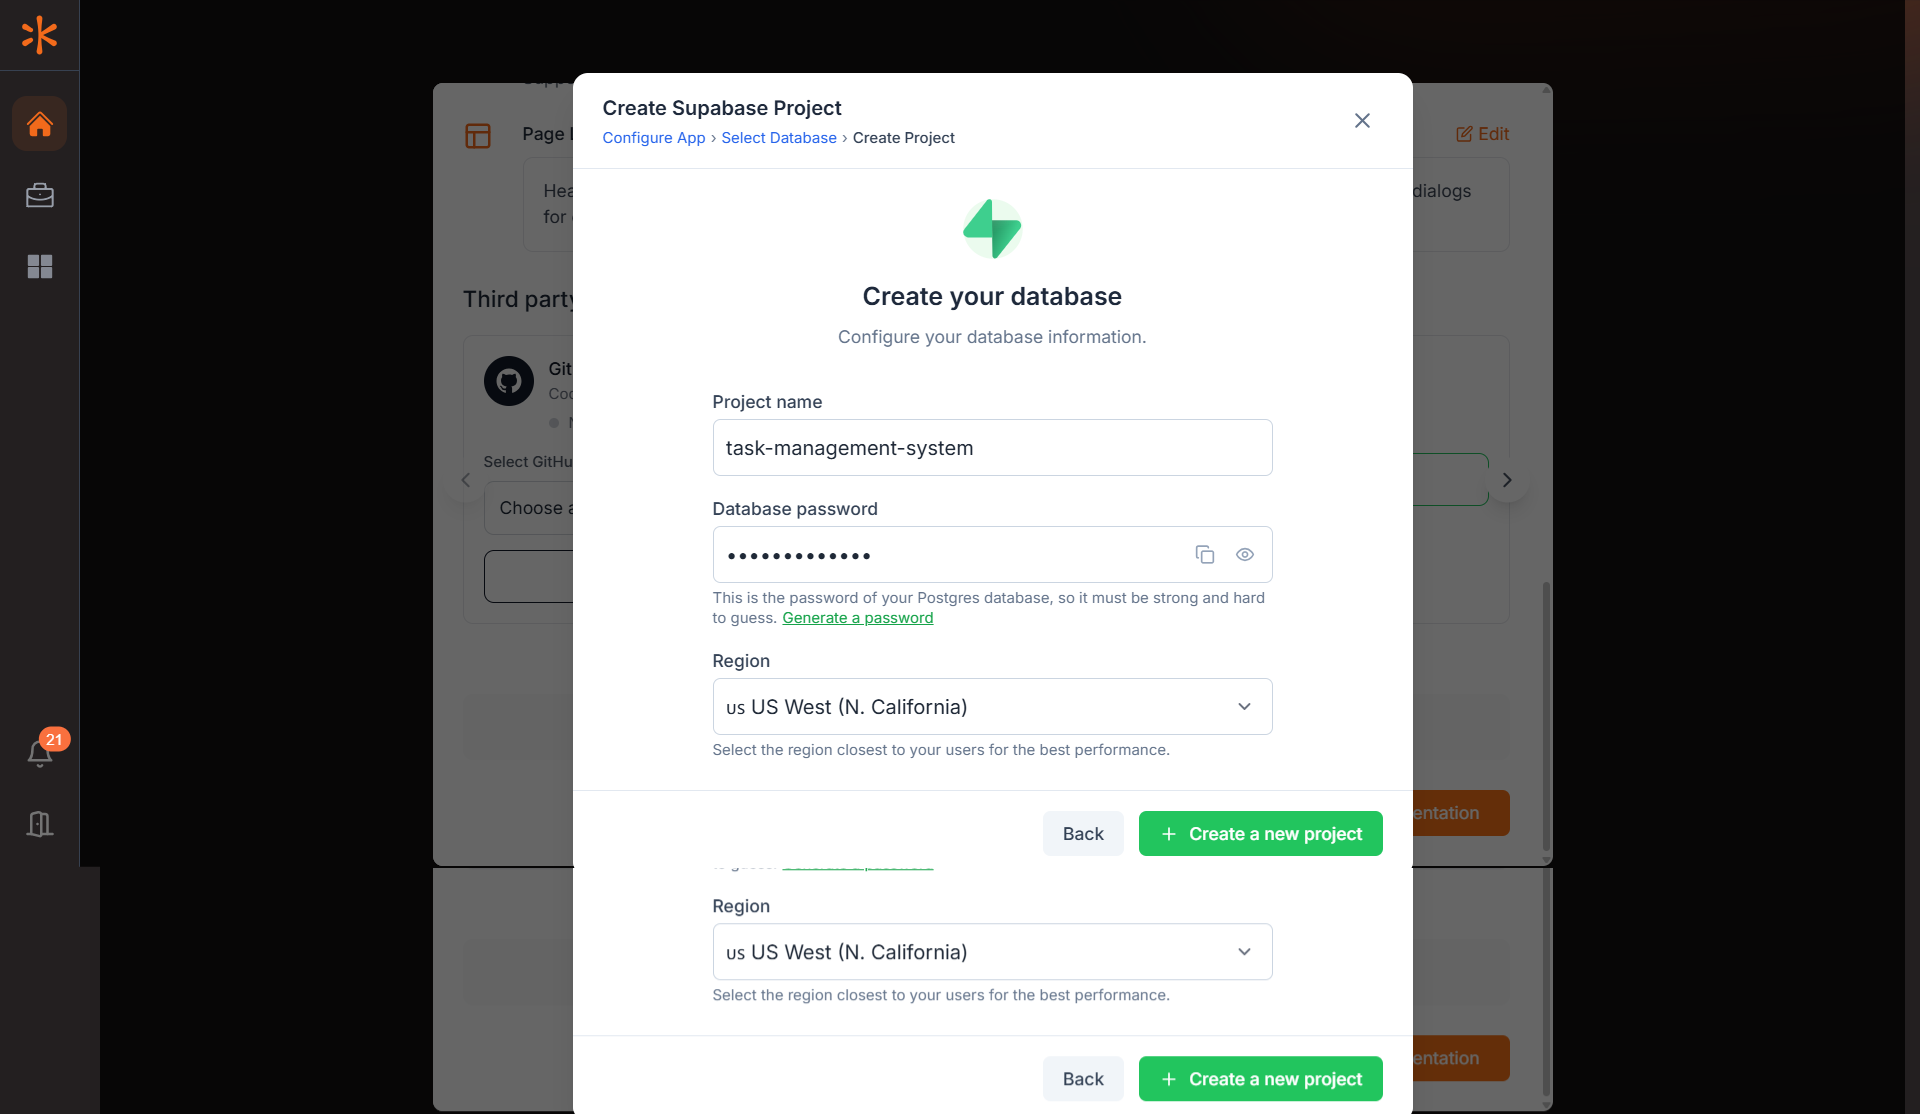
- •A popup will appear—click "Continue to Supabase" and complete the authentication process. Completing the process will Open another popup from kavia to select a project from Supabase.

- •Once connected, create a Supabase project by assigning a name and password.
6. Start Implementation
After confirming the features and Integrations, as per your requirement, click Start Implementation to begin building your application with KAVIA.
4Let KAVIA Prepare the Workspace
Click on Start Implementation and Wait for the initial setup to be complete
5Collaborate with KAVIA via Chat
Ideally, Start with Planning, by asking KAVIA to create a plan
Image or Document as input - If you have an image or document which you want KAVIA to use for your project, provide as input initially
Steps : Click on the + icon near chat → Upload files → Choose pdf, jpg, png or jpeg files as input

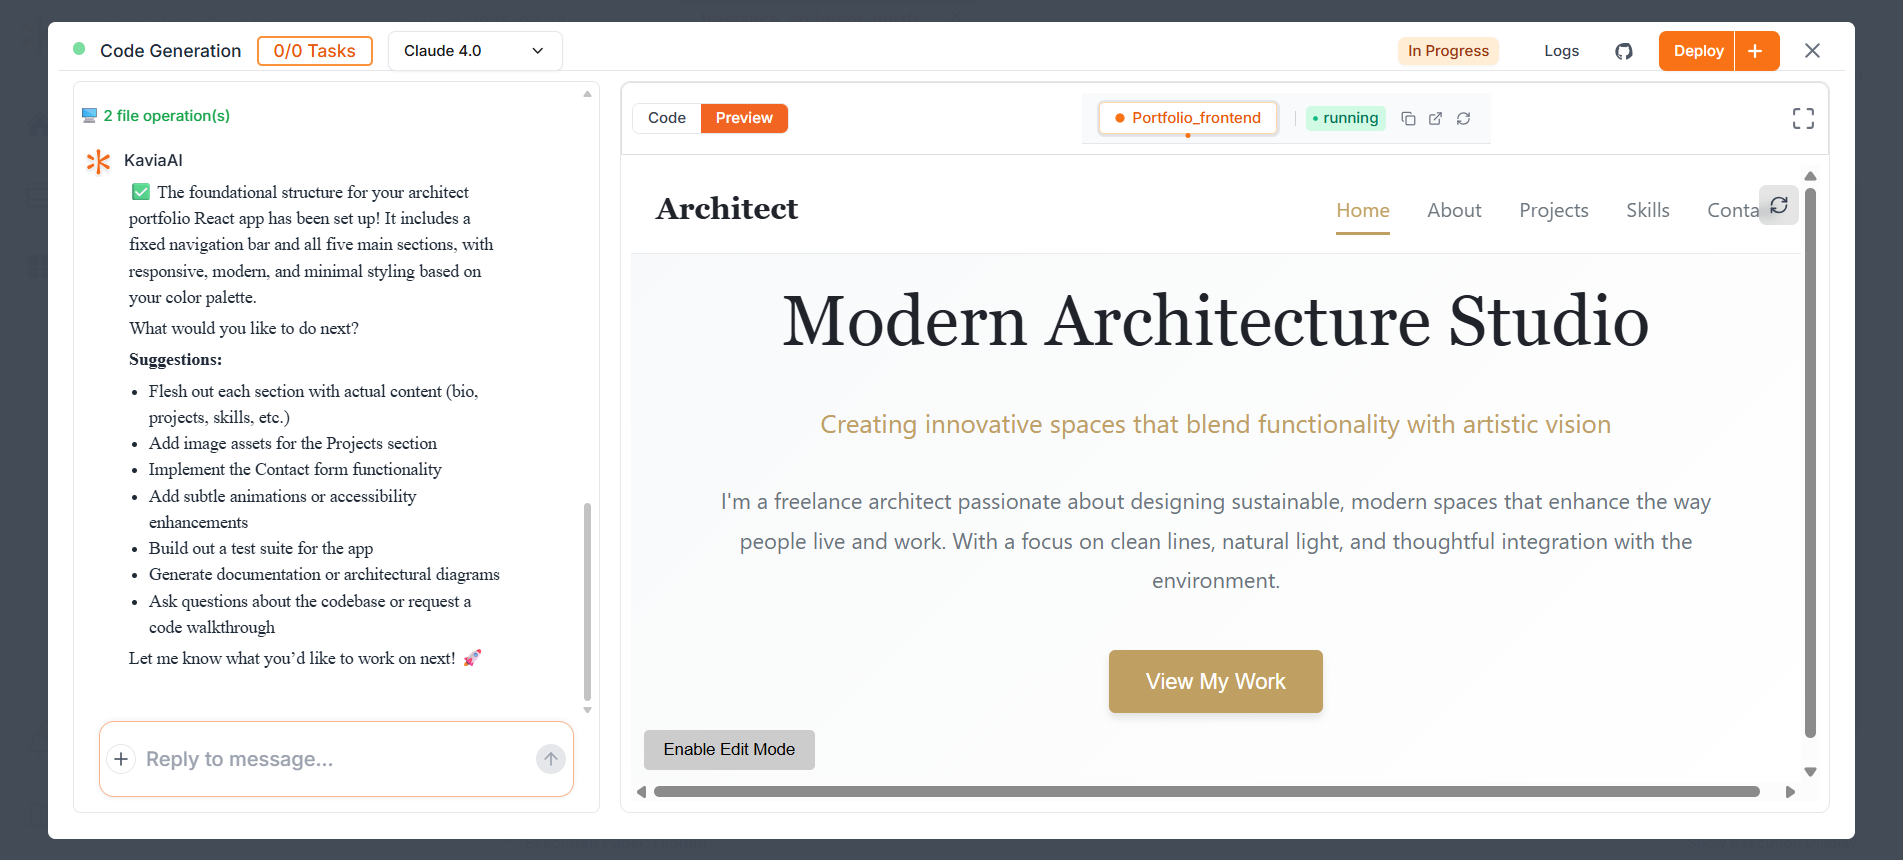
6Preview
Go to Preview to check the Live Application!
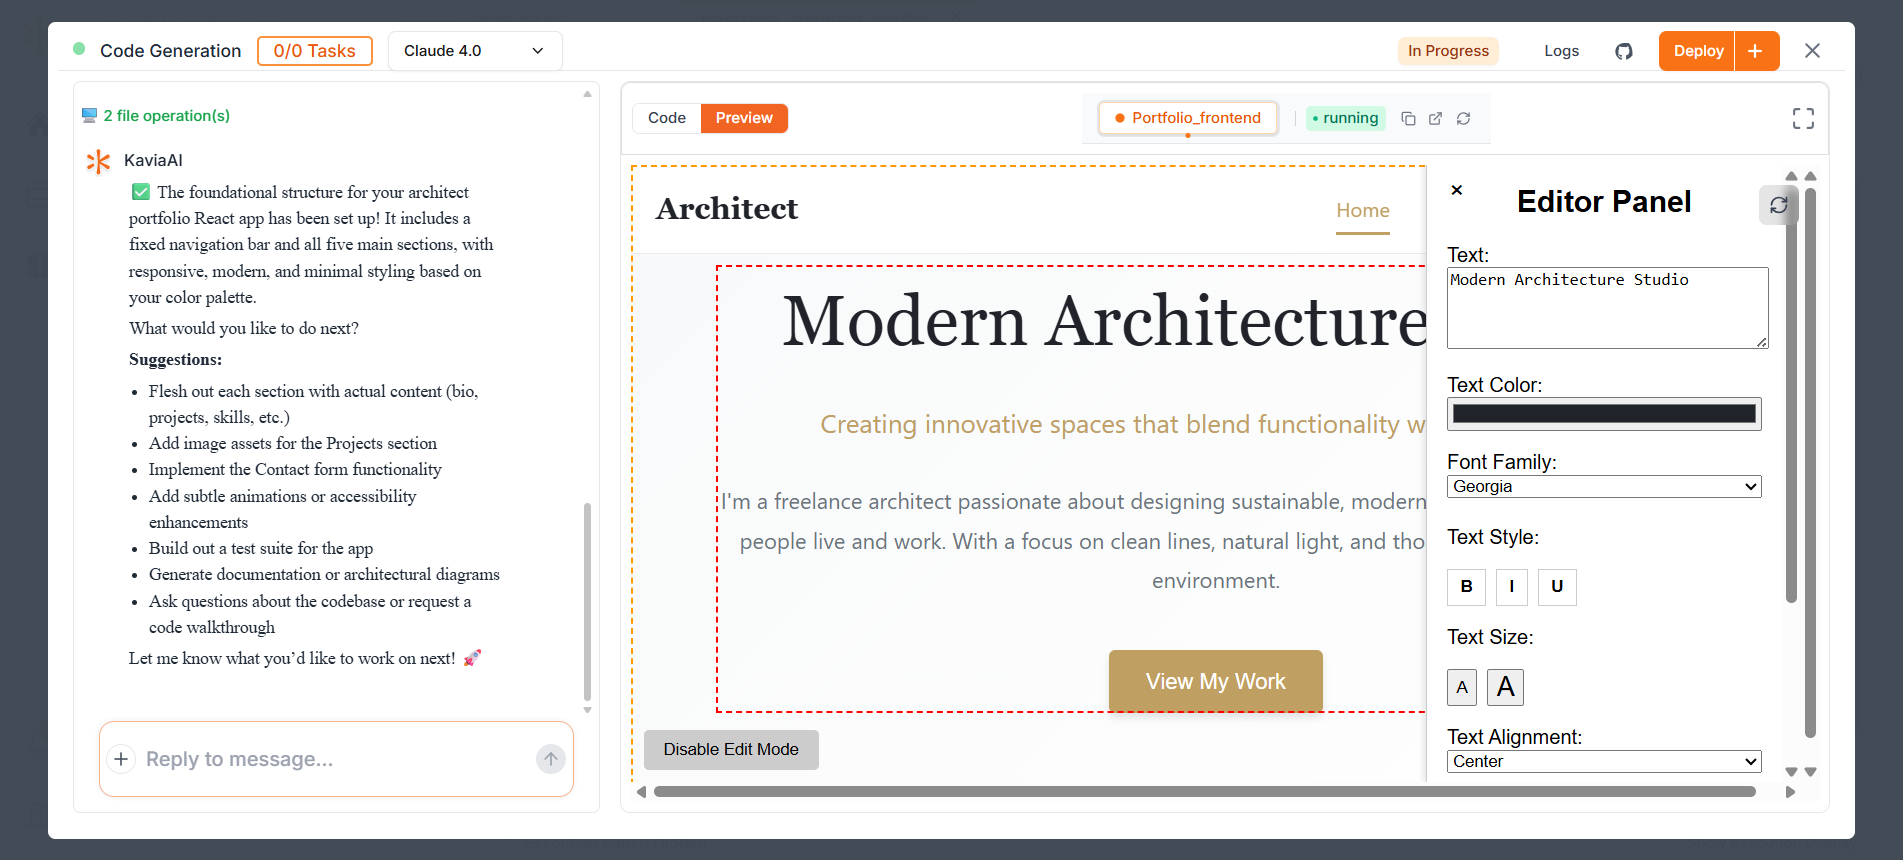
7Enabling the Edit Mode
Enabling Edit Mode lets you directly select and modify components in the preview without using chat commands, allowing precise design and functionality adjustments. Remember to save your changes, and once all edits are done, click Disable Edit Mode to resume regular project work.
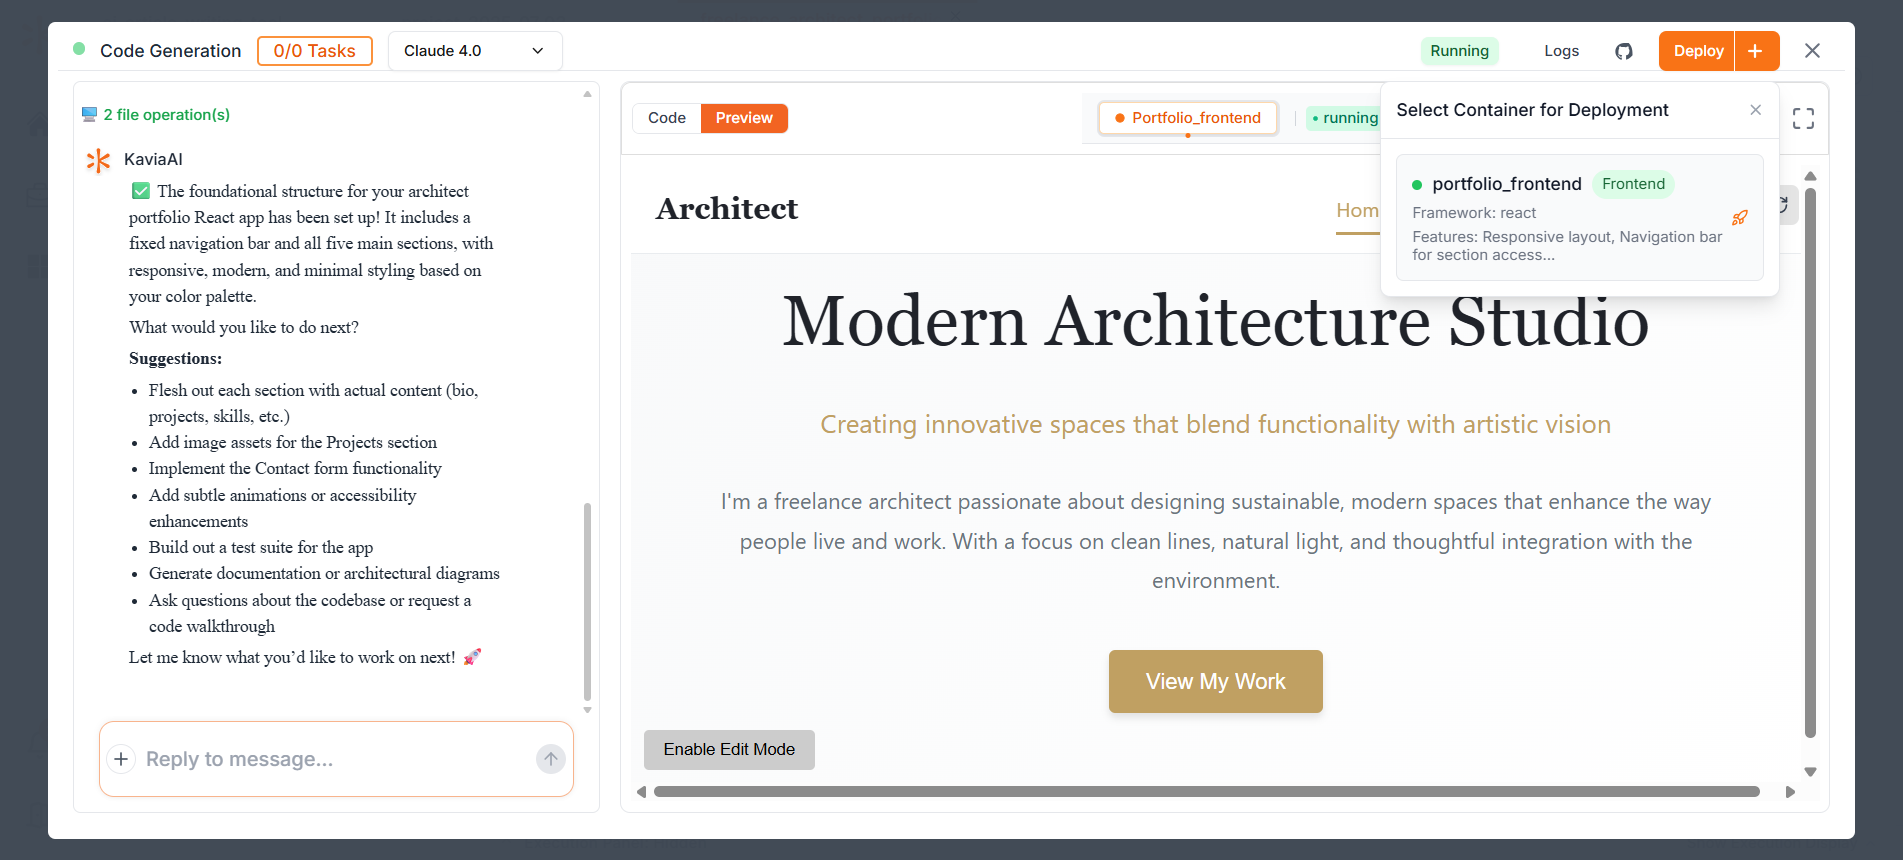
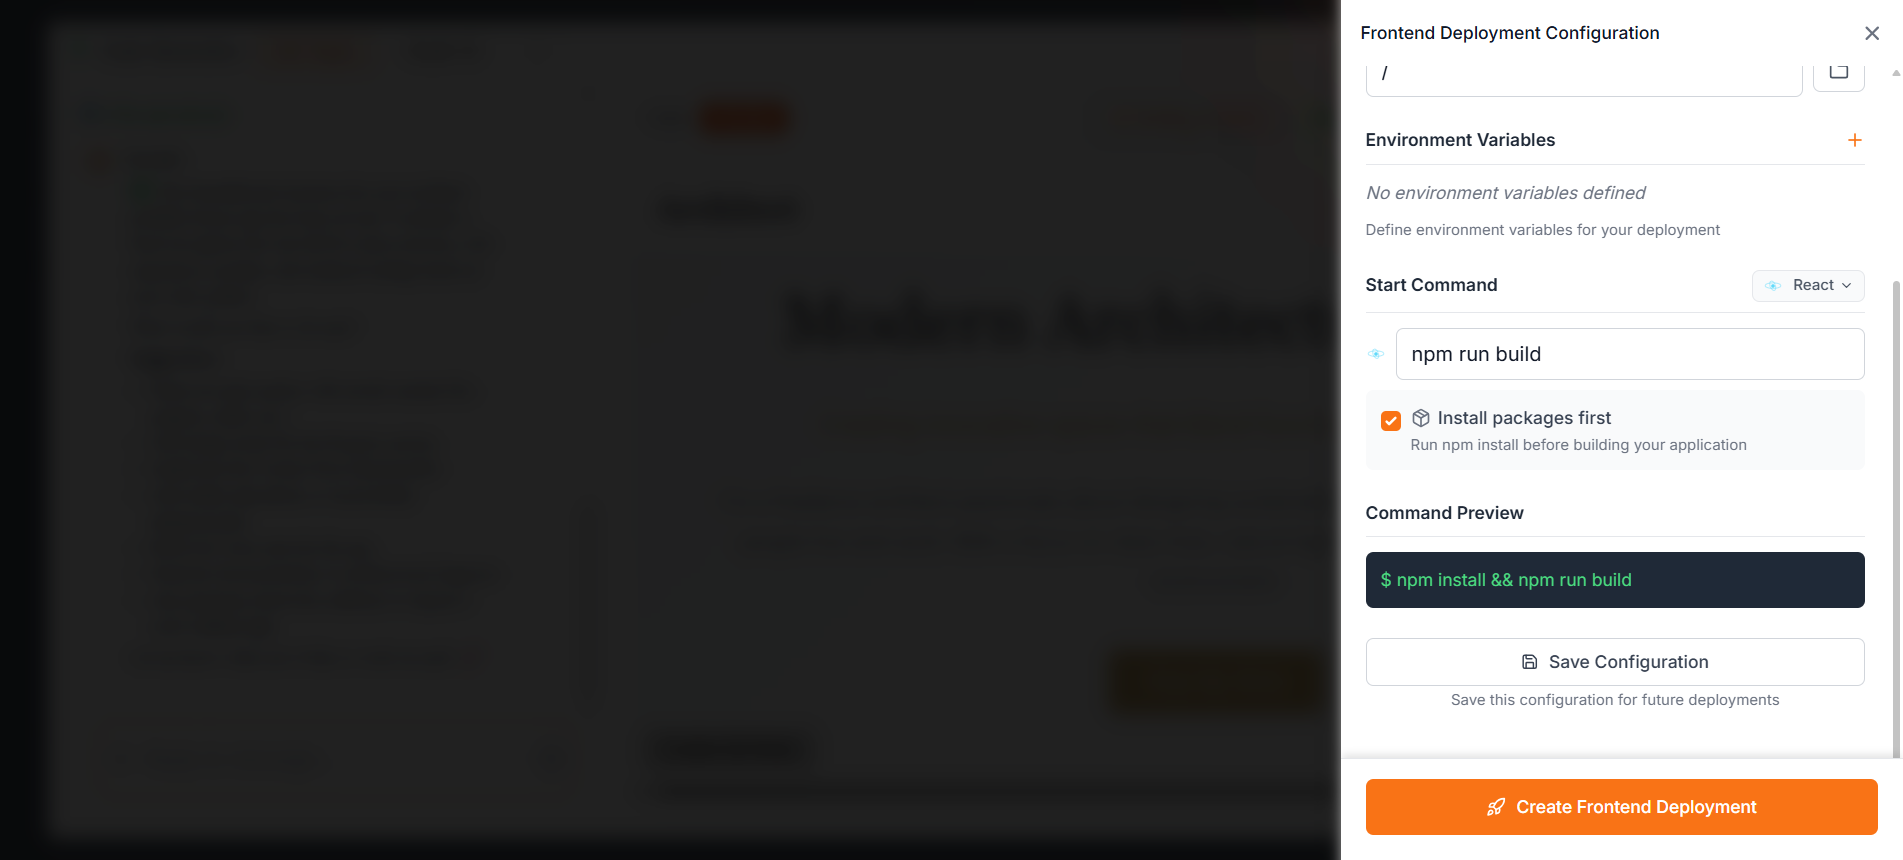
8Deployment
Click the + button located next to the Deploy button, then select the container from the dropdown. If you are working on a multi container project it will show them as well. In here we only see the one container and now we need to select it and then configure the settings and click Create Frontend Deployment. KAVIA will automatically deploy the app for you.
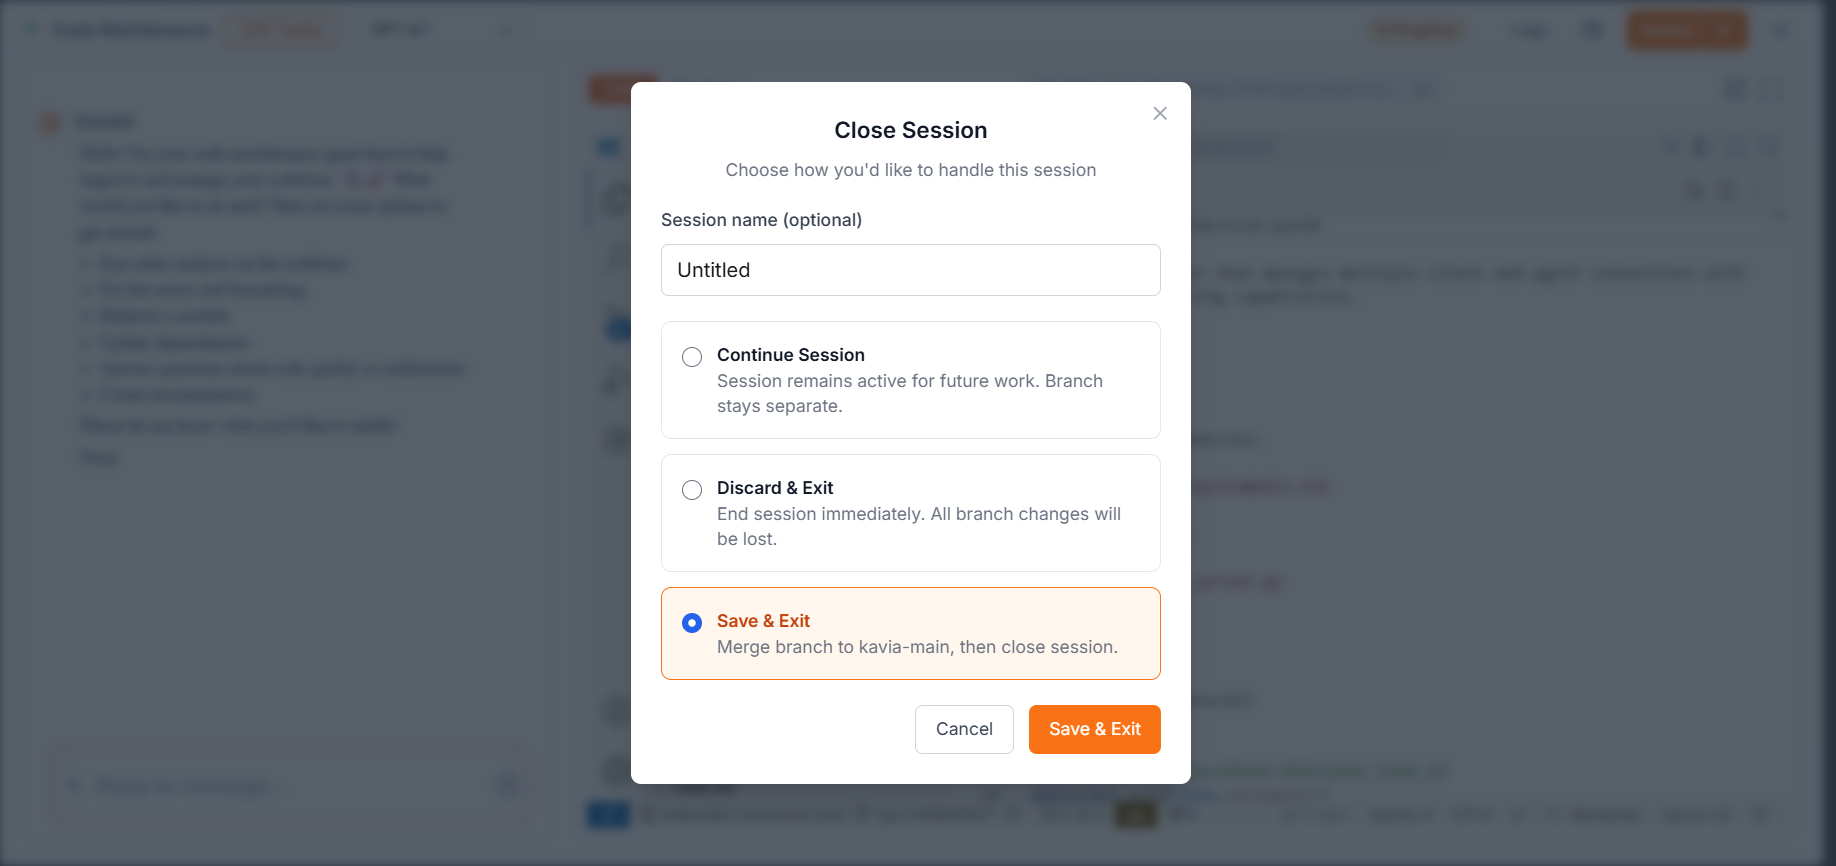
9Terminate
Choose:
- Save and Exit → if you have completed the required code implementation and it's finalized.
- Discard and Exit → if the session didn't achieve what you expected and you would like to discard it.
- Continue session → If you would like to improve and work on the session later.
INGEST EXISTING CODEBASE
Go to Project List icon below home icon → Click Import
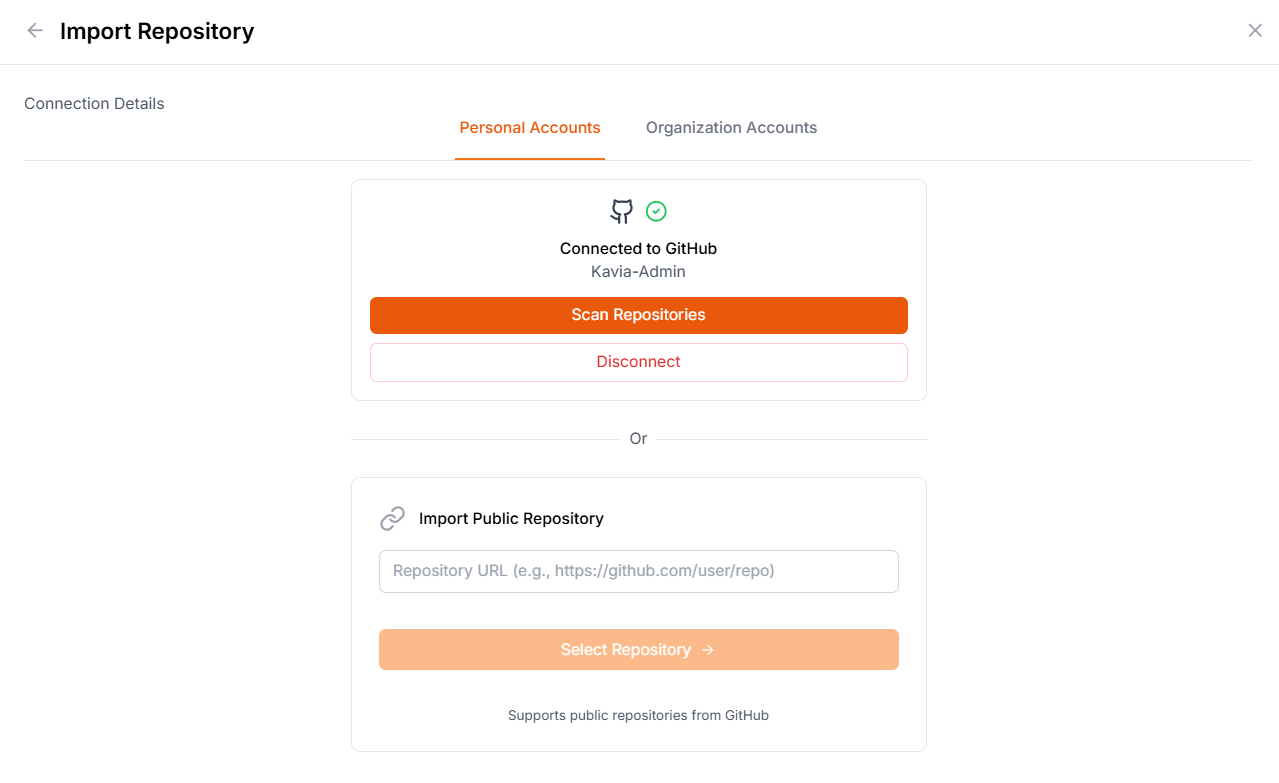
Provide Project Name and Description → Choose Github to select repo → Select Query (to understand your code) / Modify (to Modify your code with Prompts)
1. Basic Querying
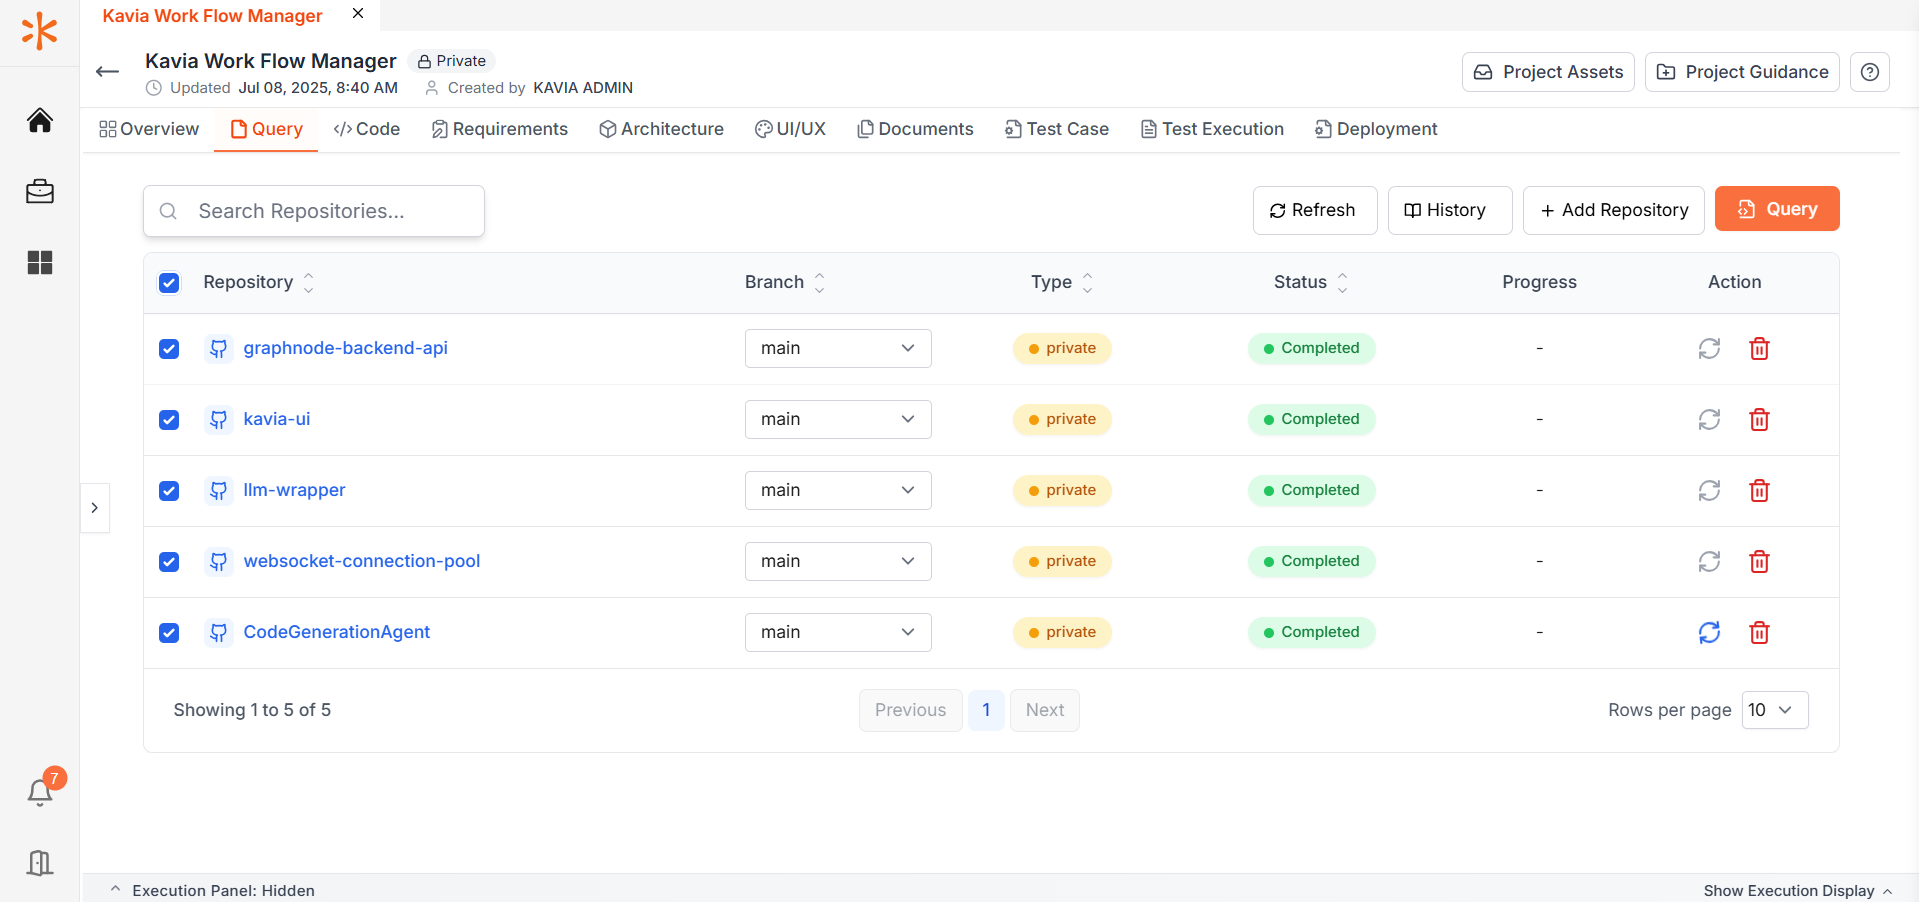
Select the Repositories → Query → Basic Query
Select the Model to do the querying → Clause 3.5 is best for Architecture / GPT 4.1 is cheap and best for reduced credit spending
Give a Prompt about the code → Visualize the Response on the Right Panel → Export or Save as required
2. Advanced Query
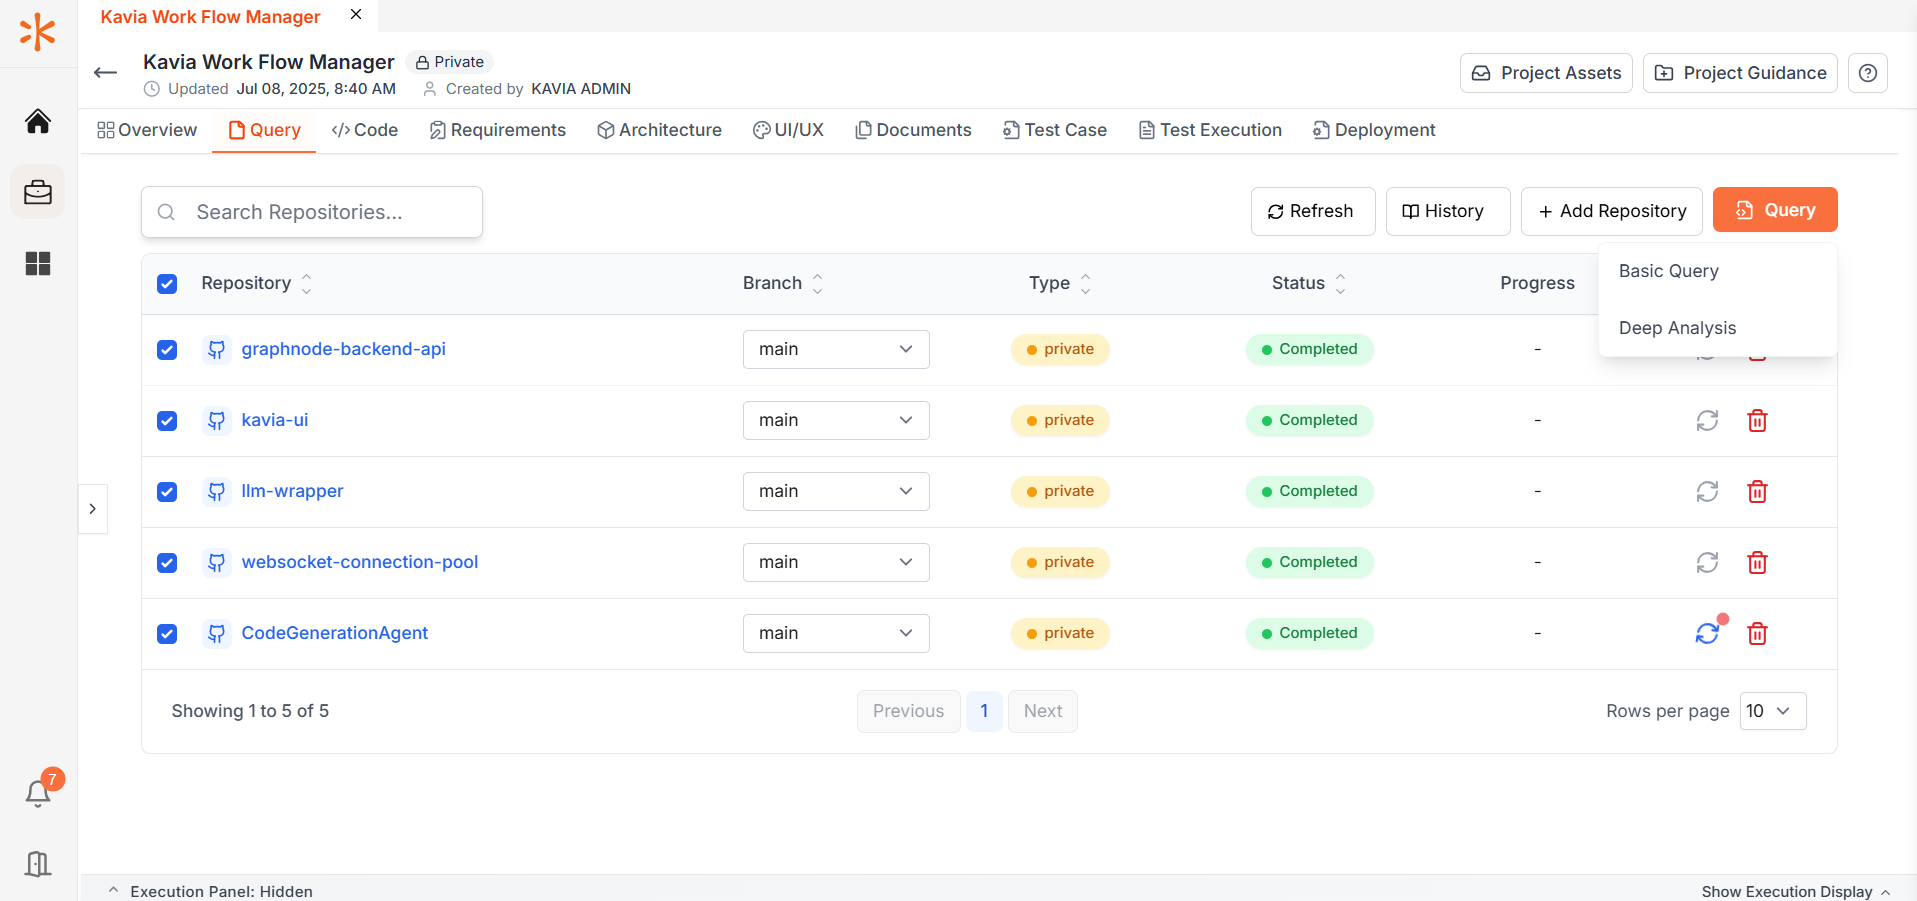
Go for Deep Analysis → Wait for the setup to complete → Provide prompt for the document you would like to generate.
3. Code Maintenance
Prefer Code Maintenance when you want to modify your code based on prompts
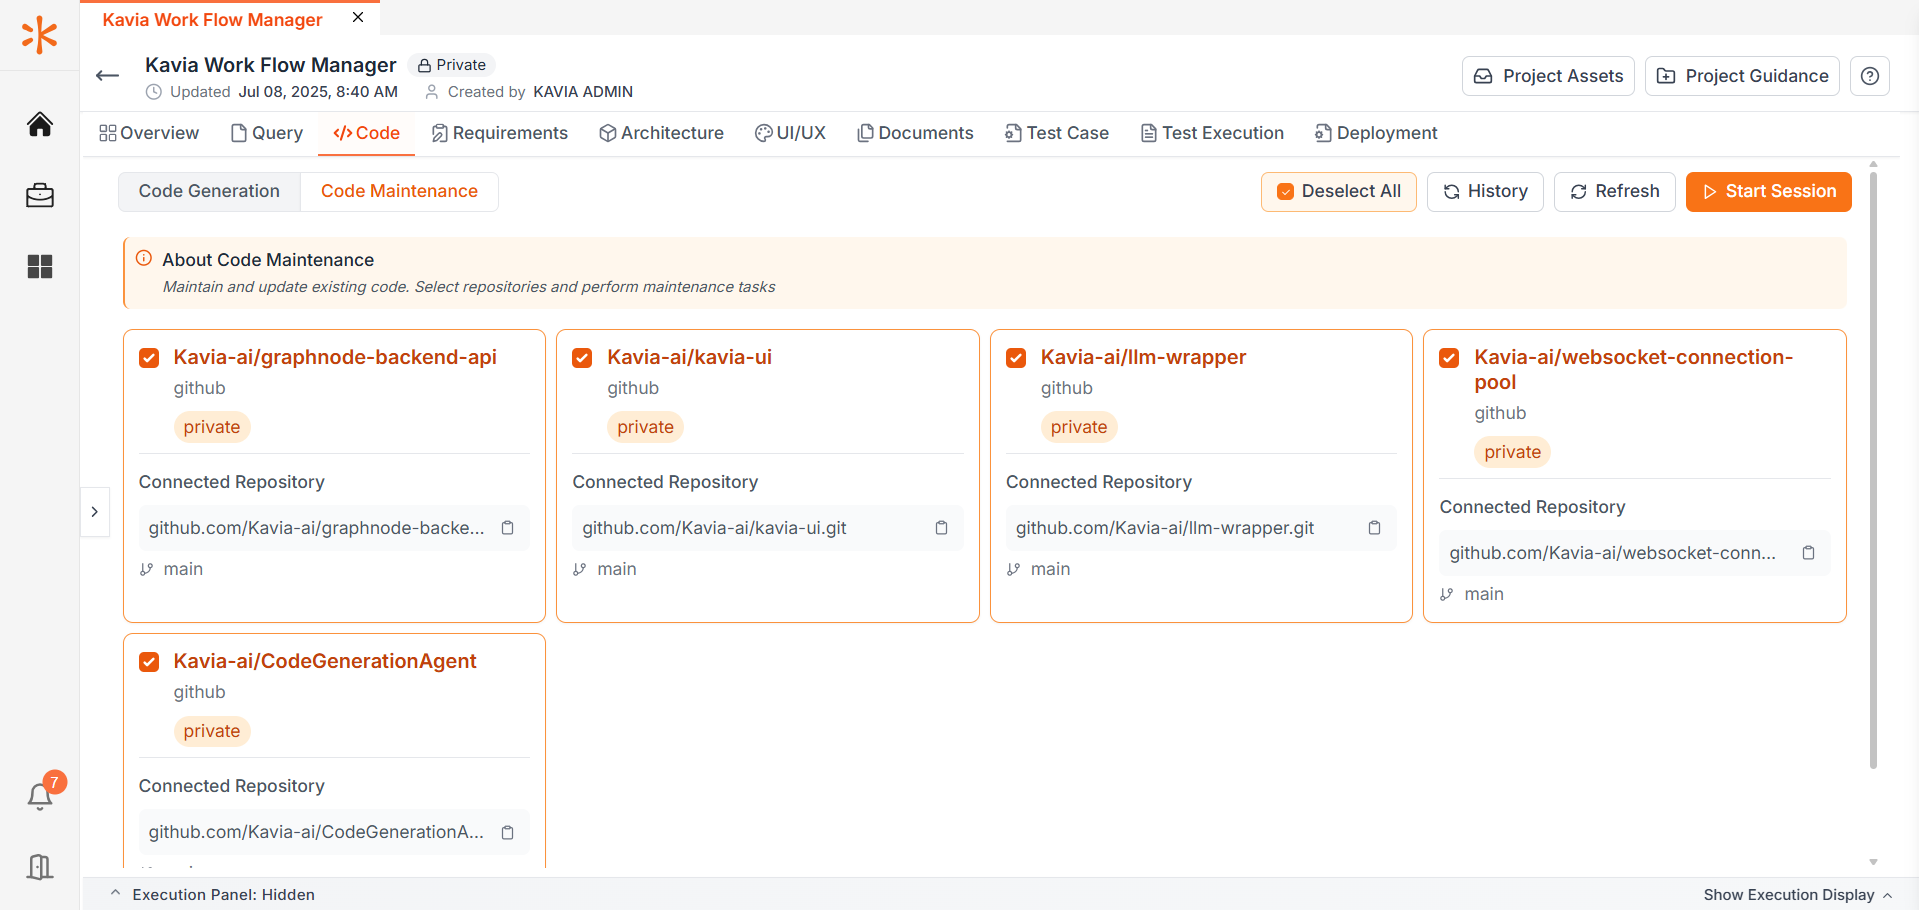
Select the repositories → Start session
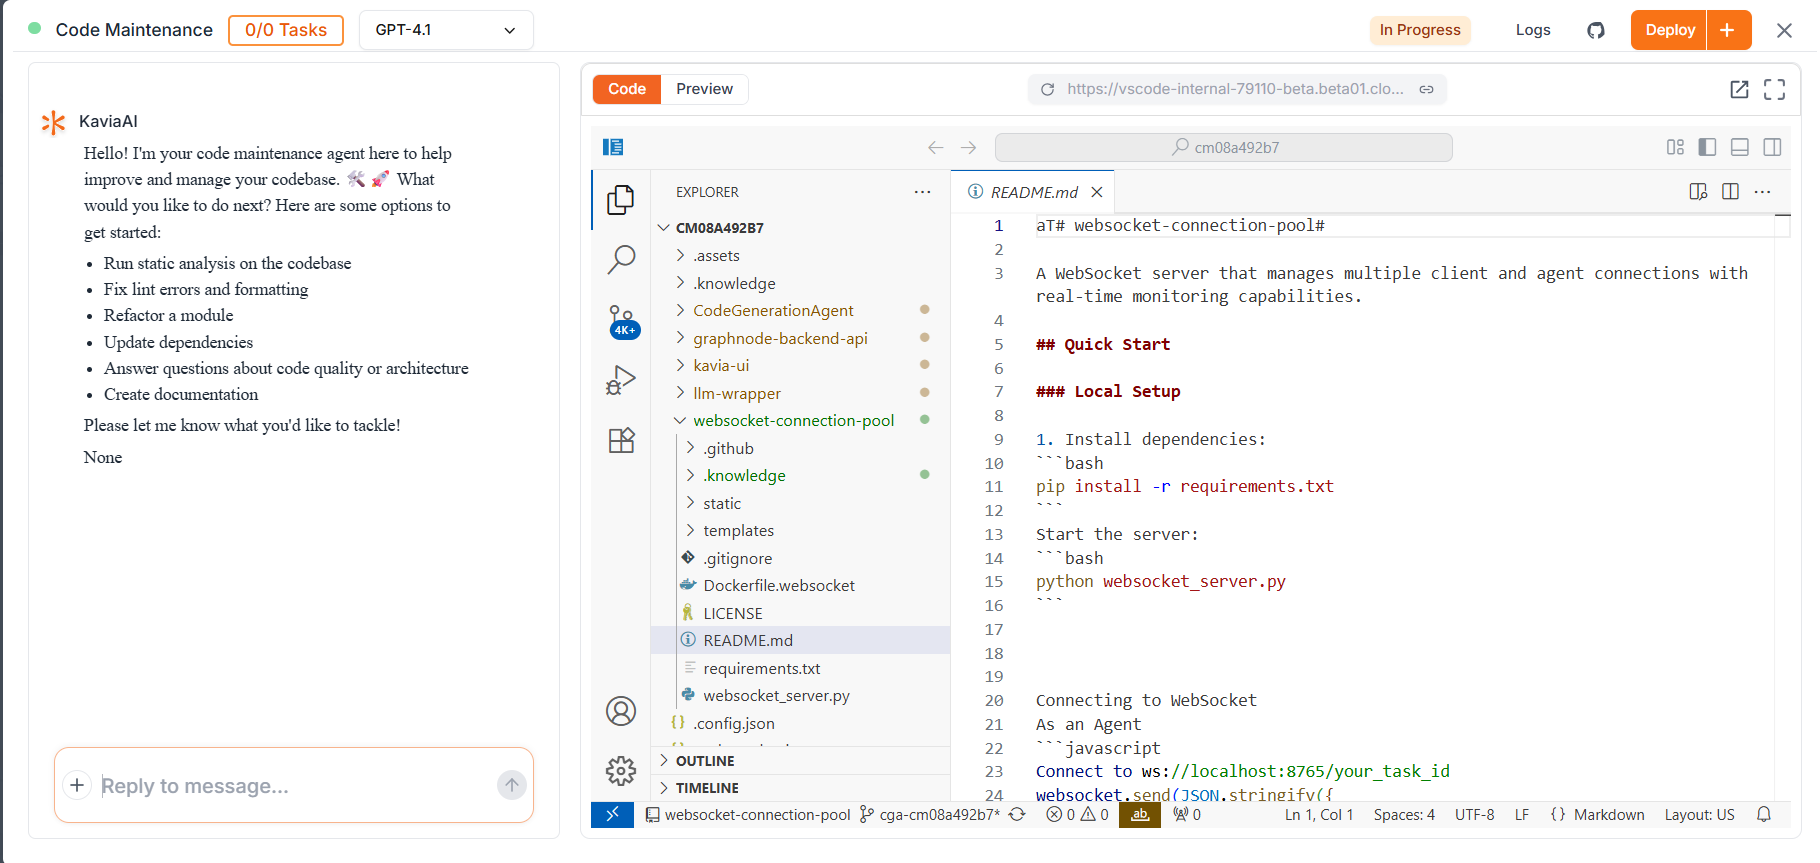
Start by giving your prompts on what's the task you want the agent to proceed with.
Preview is not supported for all frameworks, hence create a pull request and test the changes in your local.
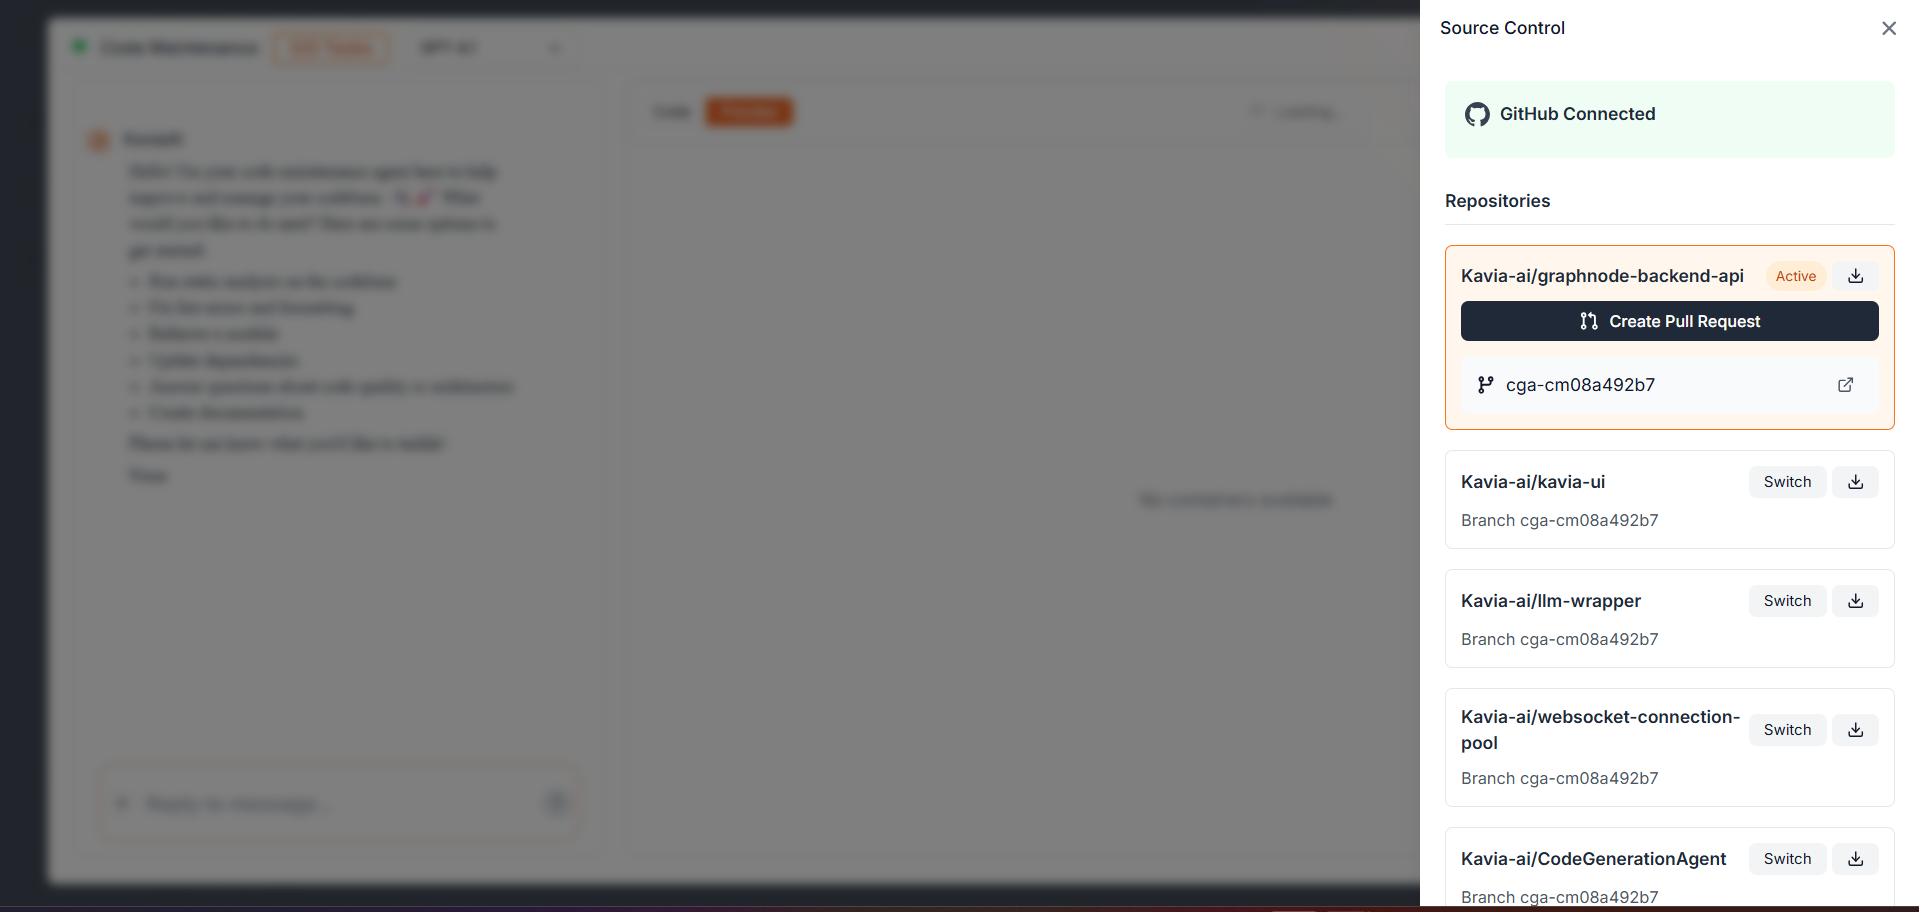
Click on Git icon to view Create PR.
NOTABLE POINTS
- 1.Session automatically ends after 30 minutes of Inactivity - Hence to save your code, terminate the session if not in use than leaving it open.
- 2.GPT 4.1 is the default Model and is the Cheap and Best option for Code Generation
- 3.You can try Full stack application, but expect intermittent issues, for best results, Proceed with Web app + Supabase Integration for real-time application