Gerrit Integration
Kavia supports direct integration with Gerrit for version control and repository synchronization. You can connect Gerrit to Kavia using two methods — either from the Project Welcome Screen when setting up a new project, or from the Admin Dashboard after your project has been created.
Method 1: Connect from the Project Welcome Screen
1
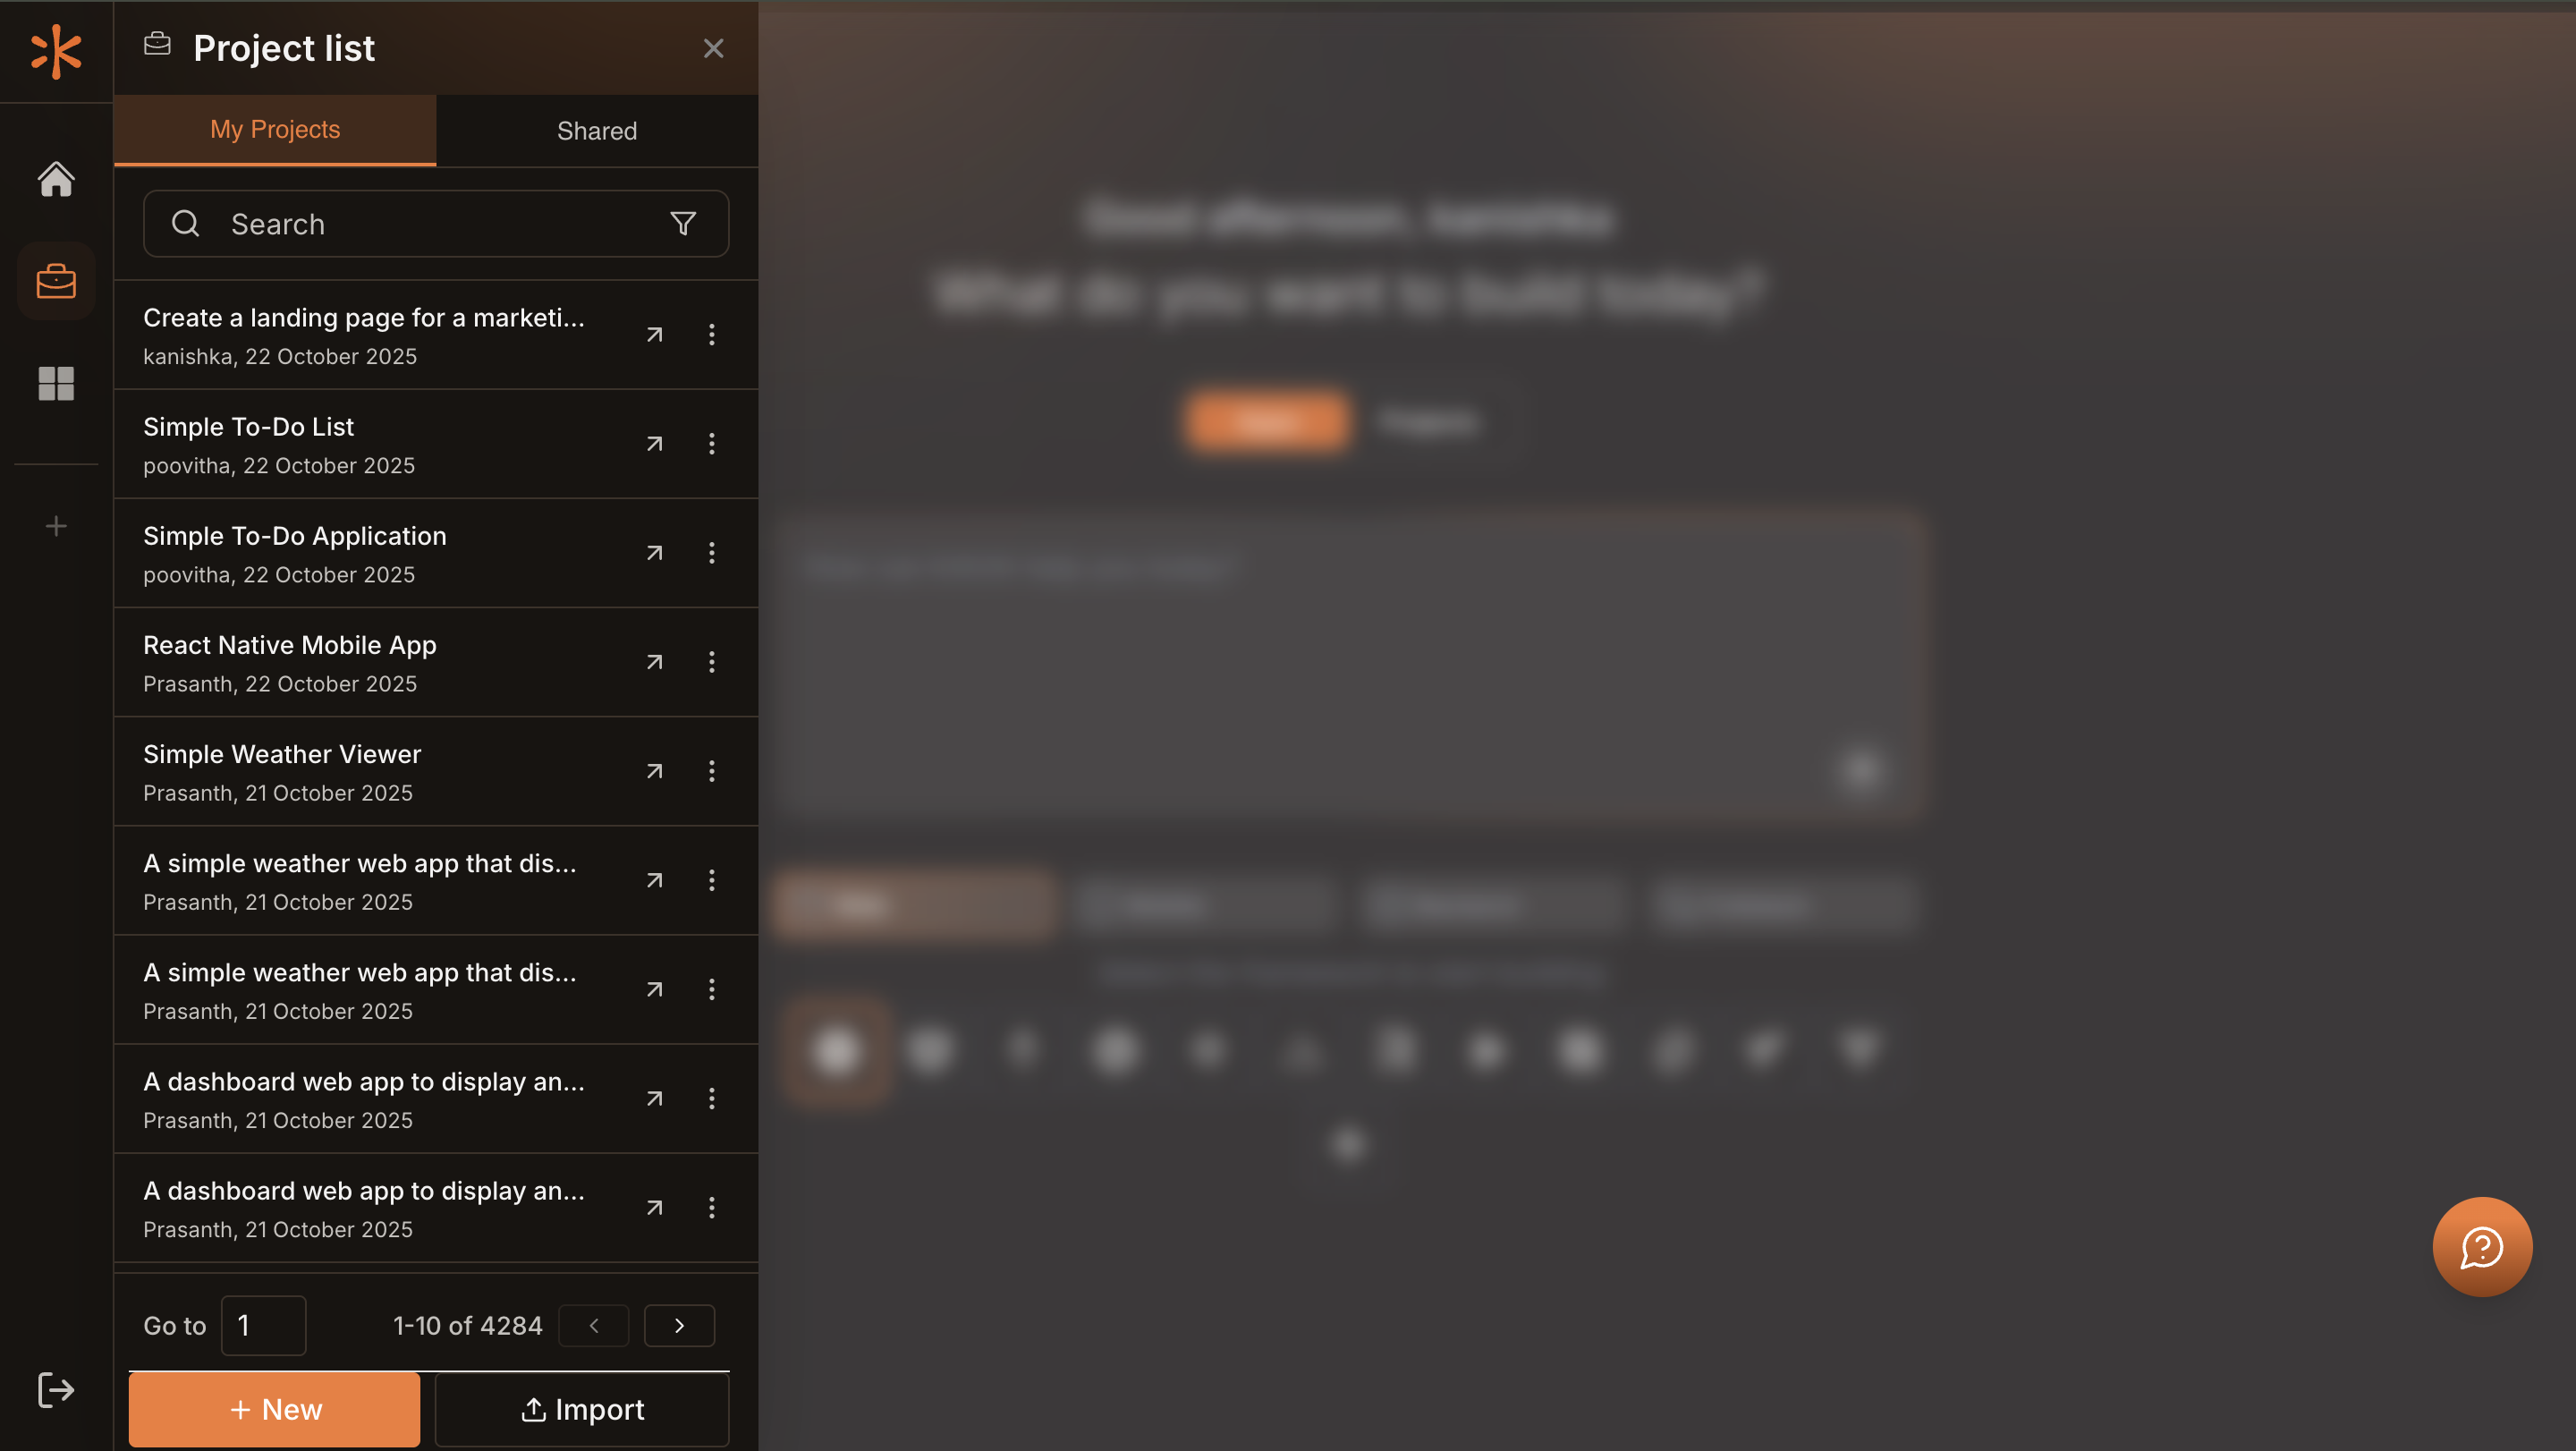
Create a new project
Log in to Kavia and start a new project by typing a short prompt that describes the application you want to build. Select whether it’s a web or mobile app, choose your preferred frameworks and tech stack, and click the arrow icon to proceed.
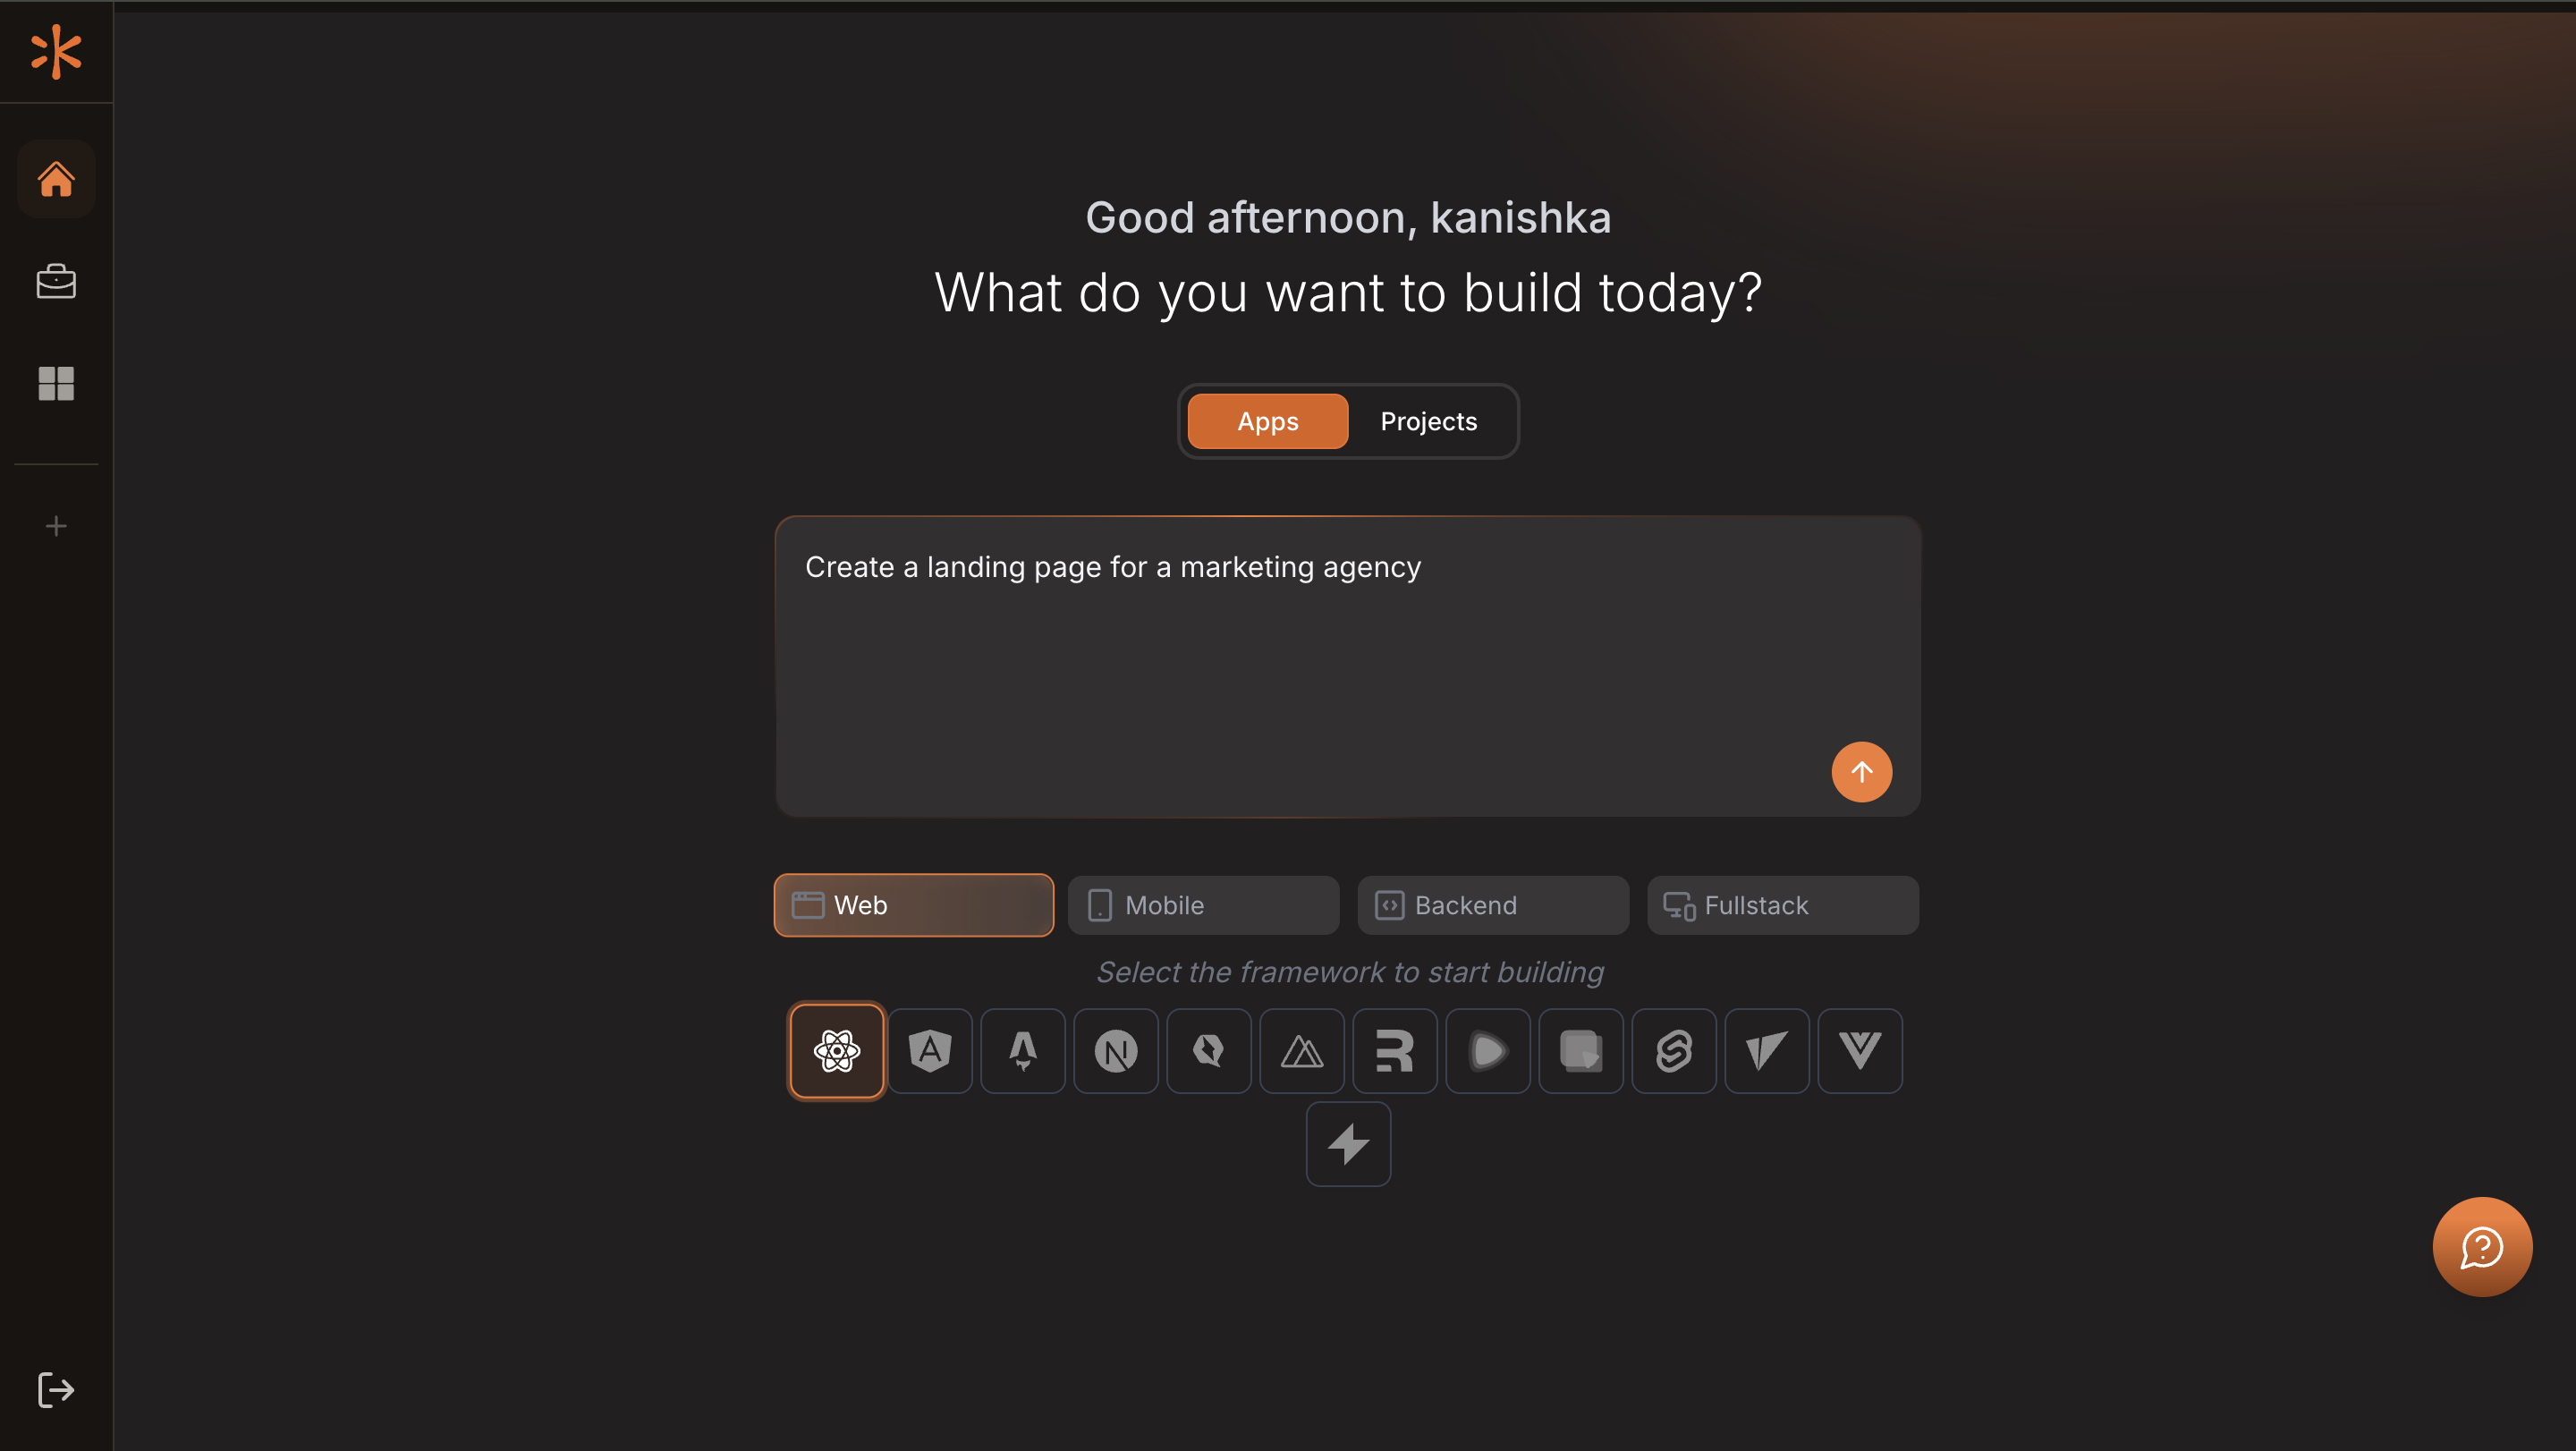
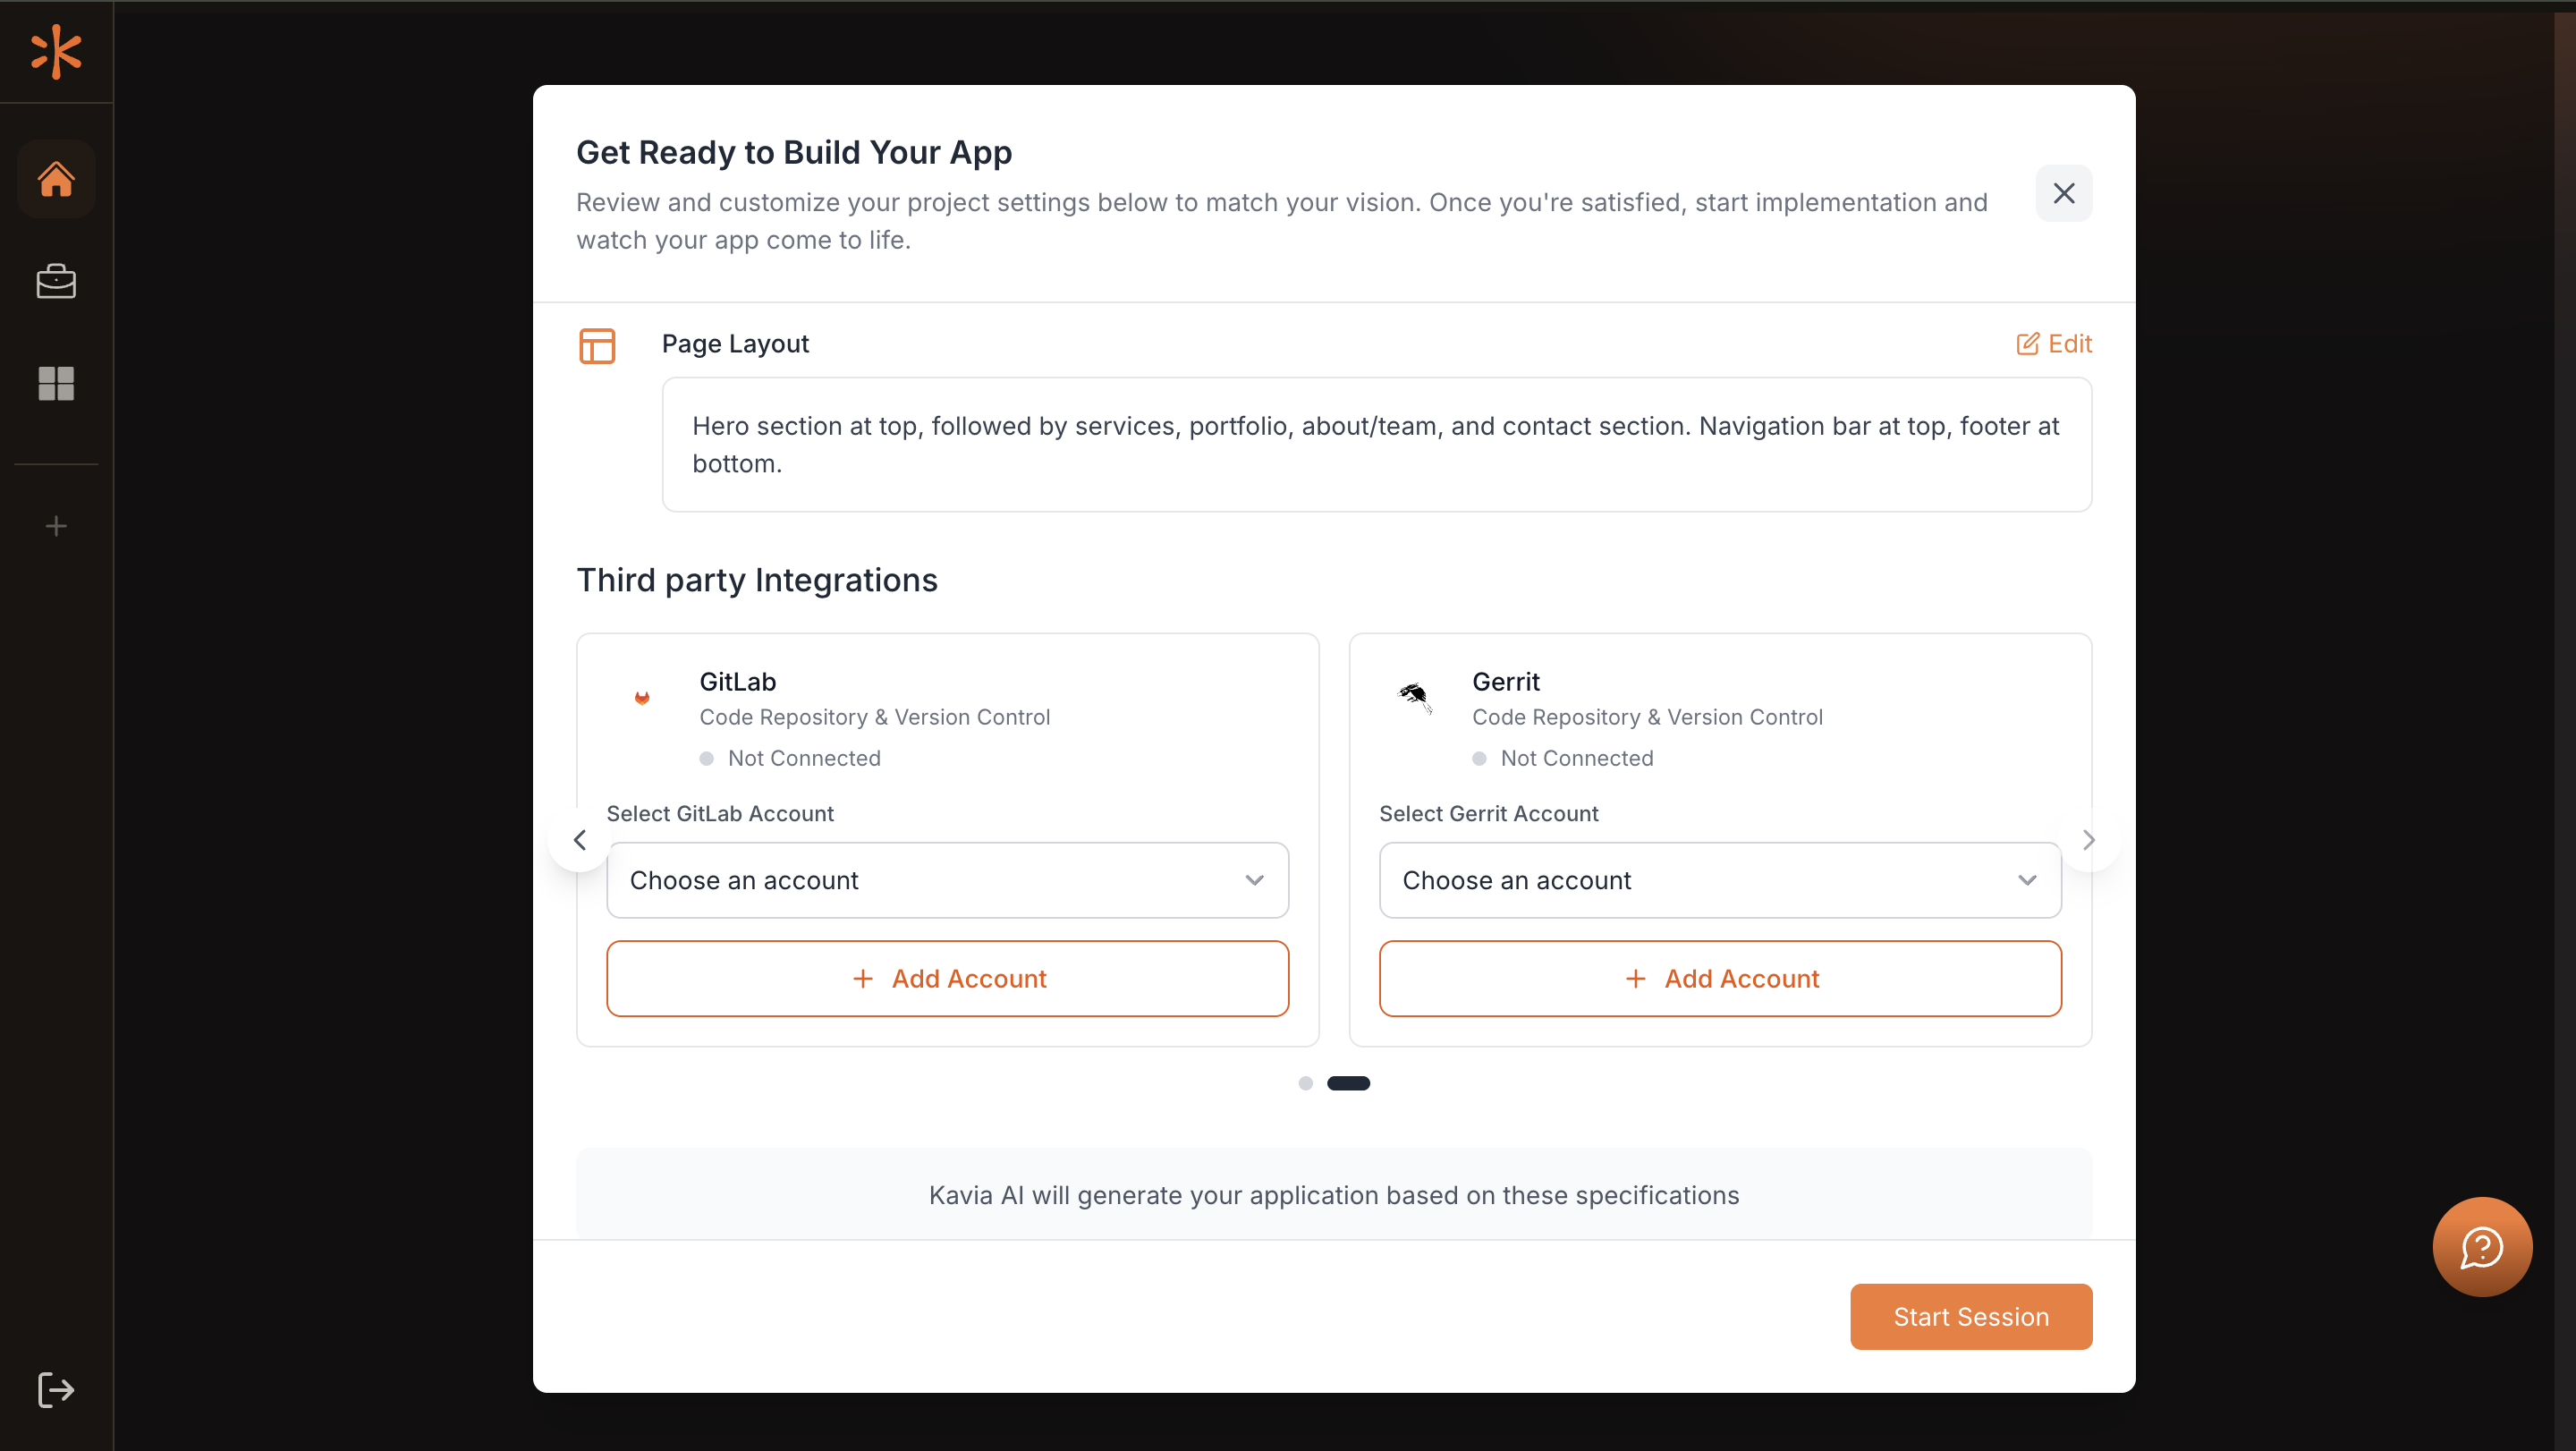
2
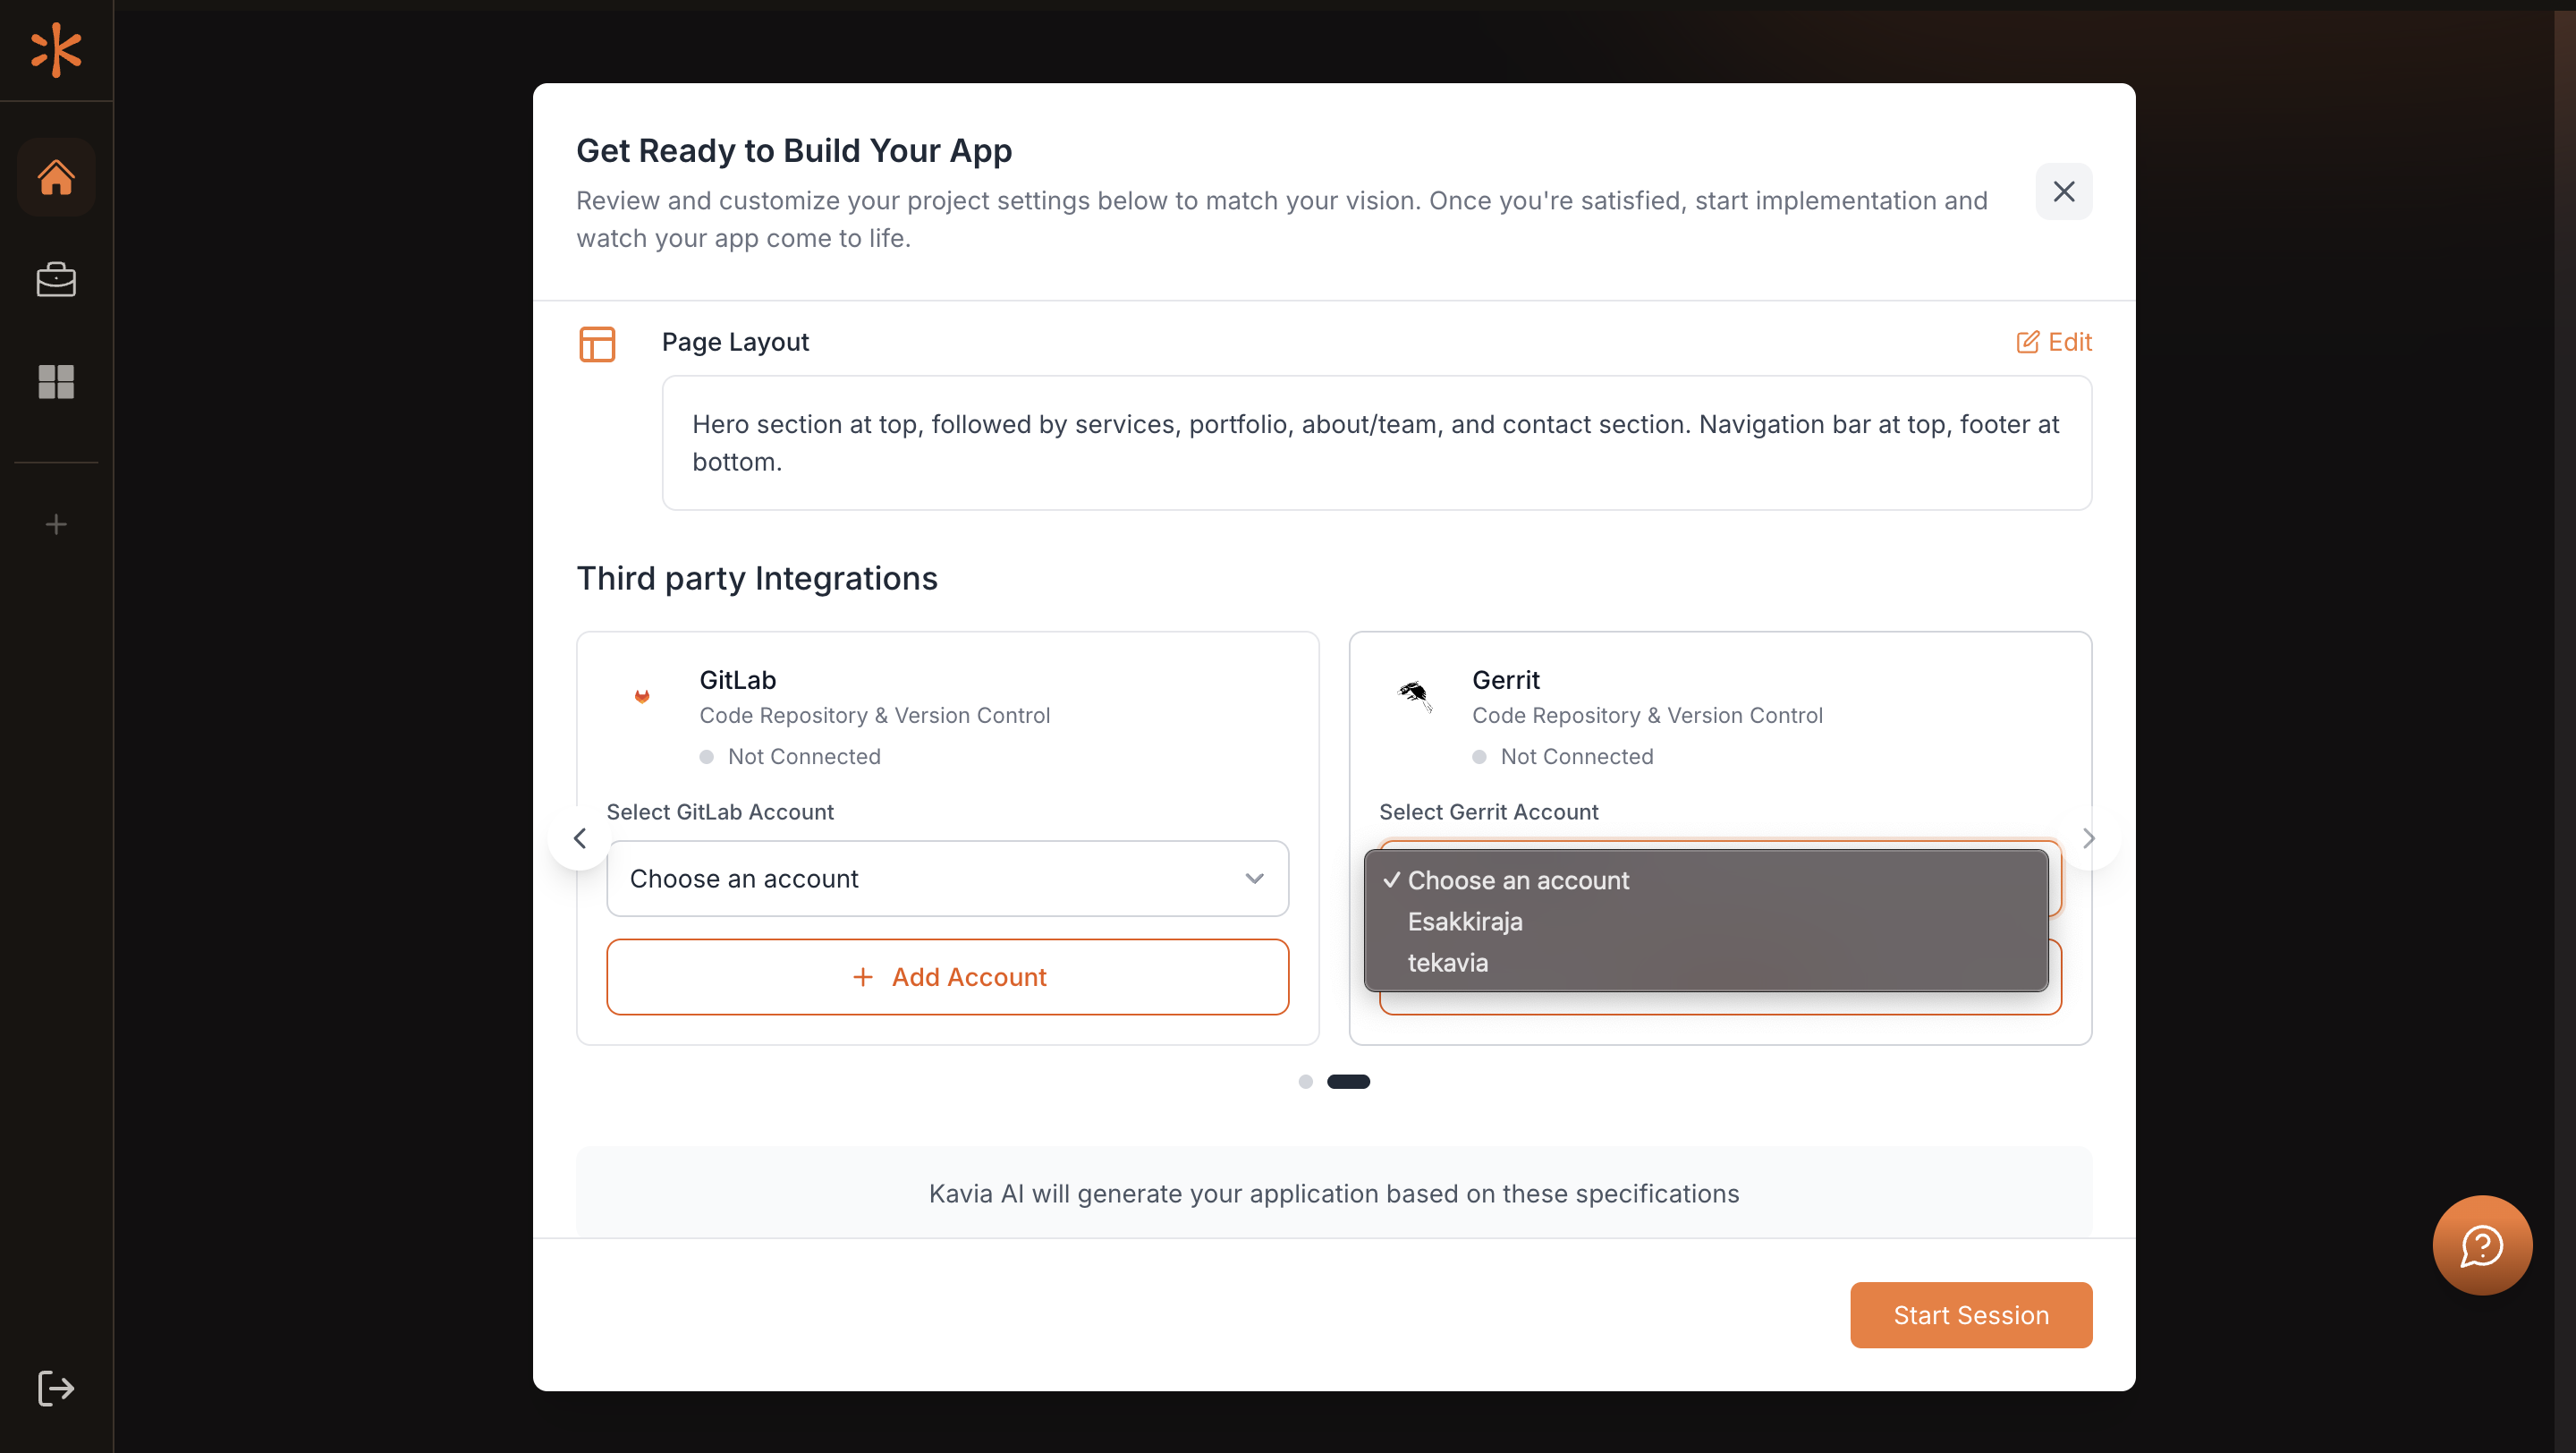
Third Party Integrations
You’ll arrive at the Project Welcome Screen, where you can refine key settings such as Project Overview, Core Features, Styling, and Integrations. Under the Integrations section, locate Gerrit and click Add Account.
3
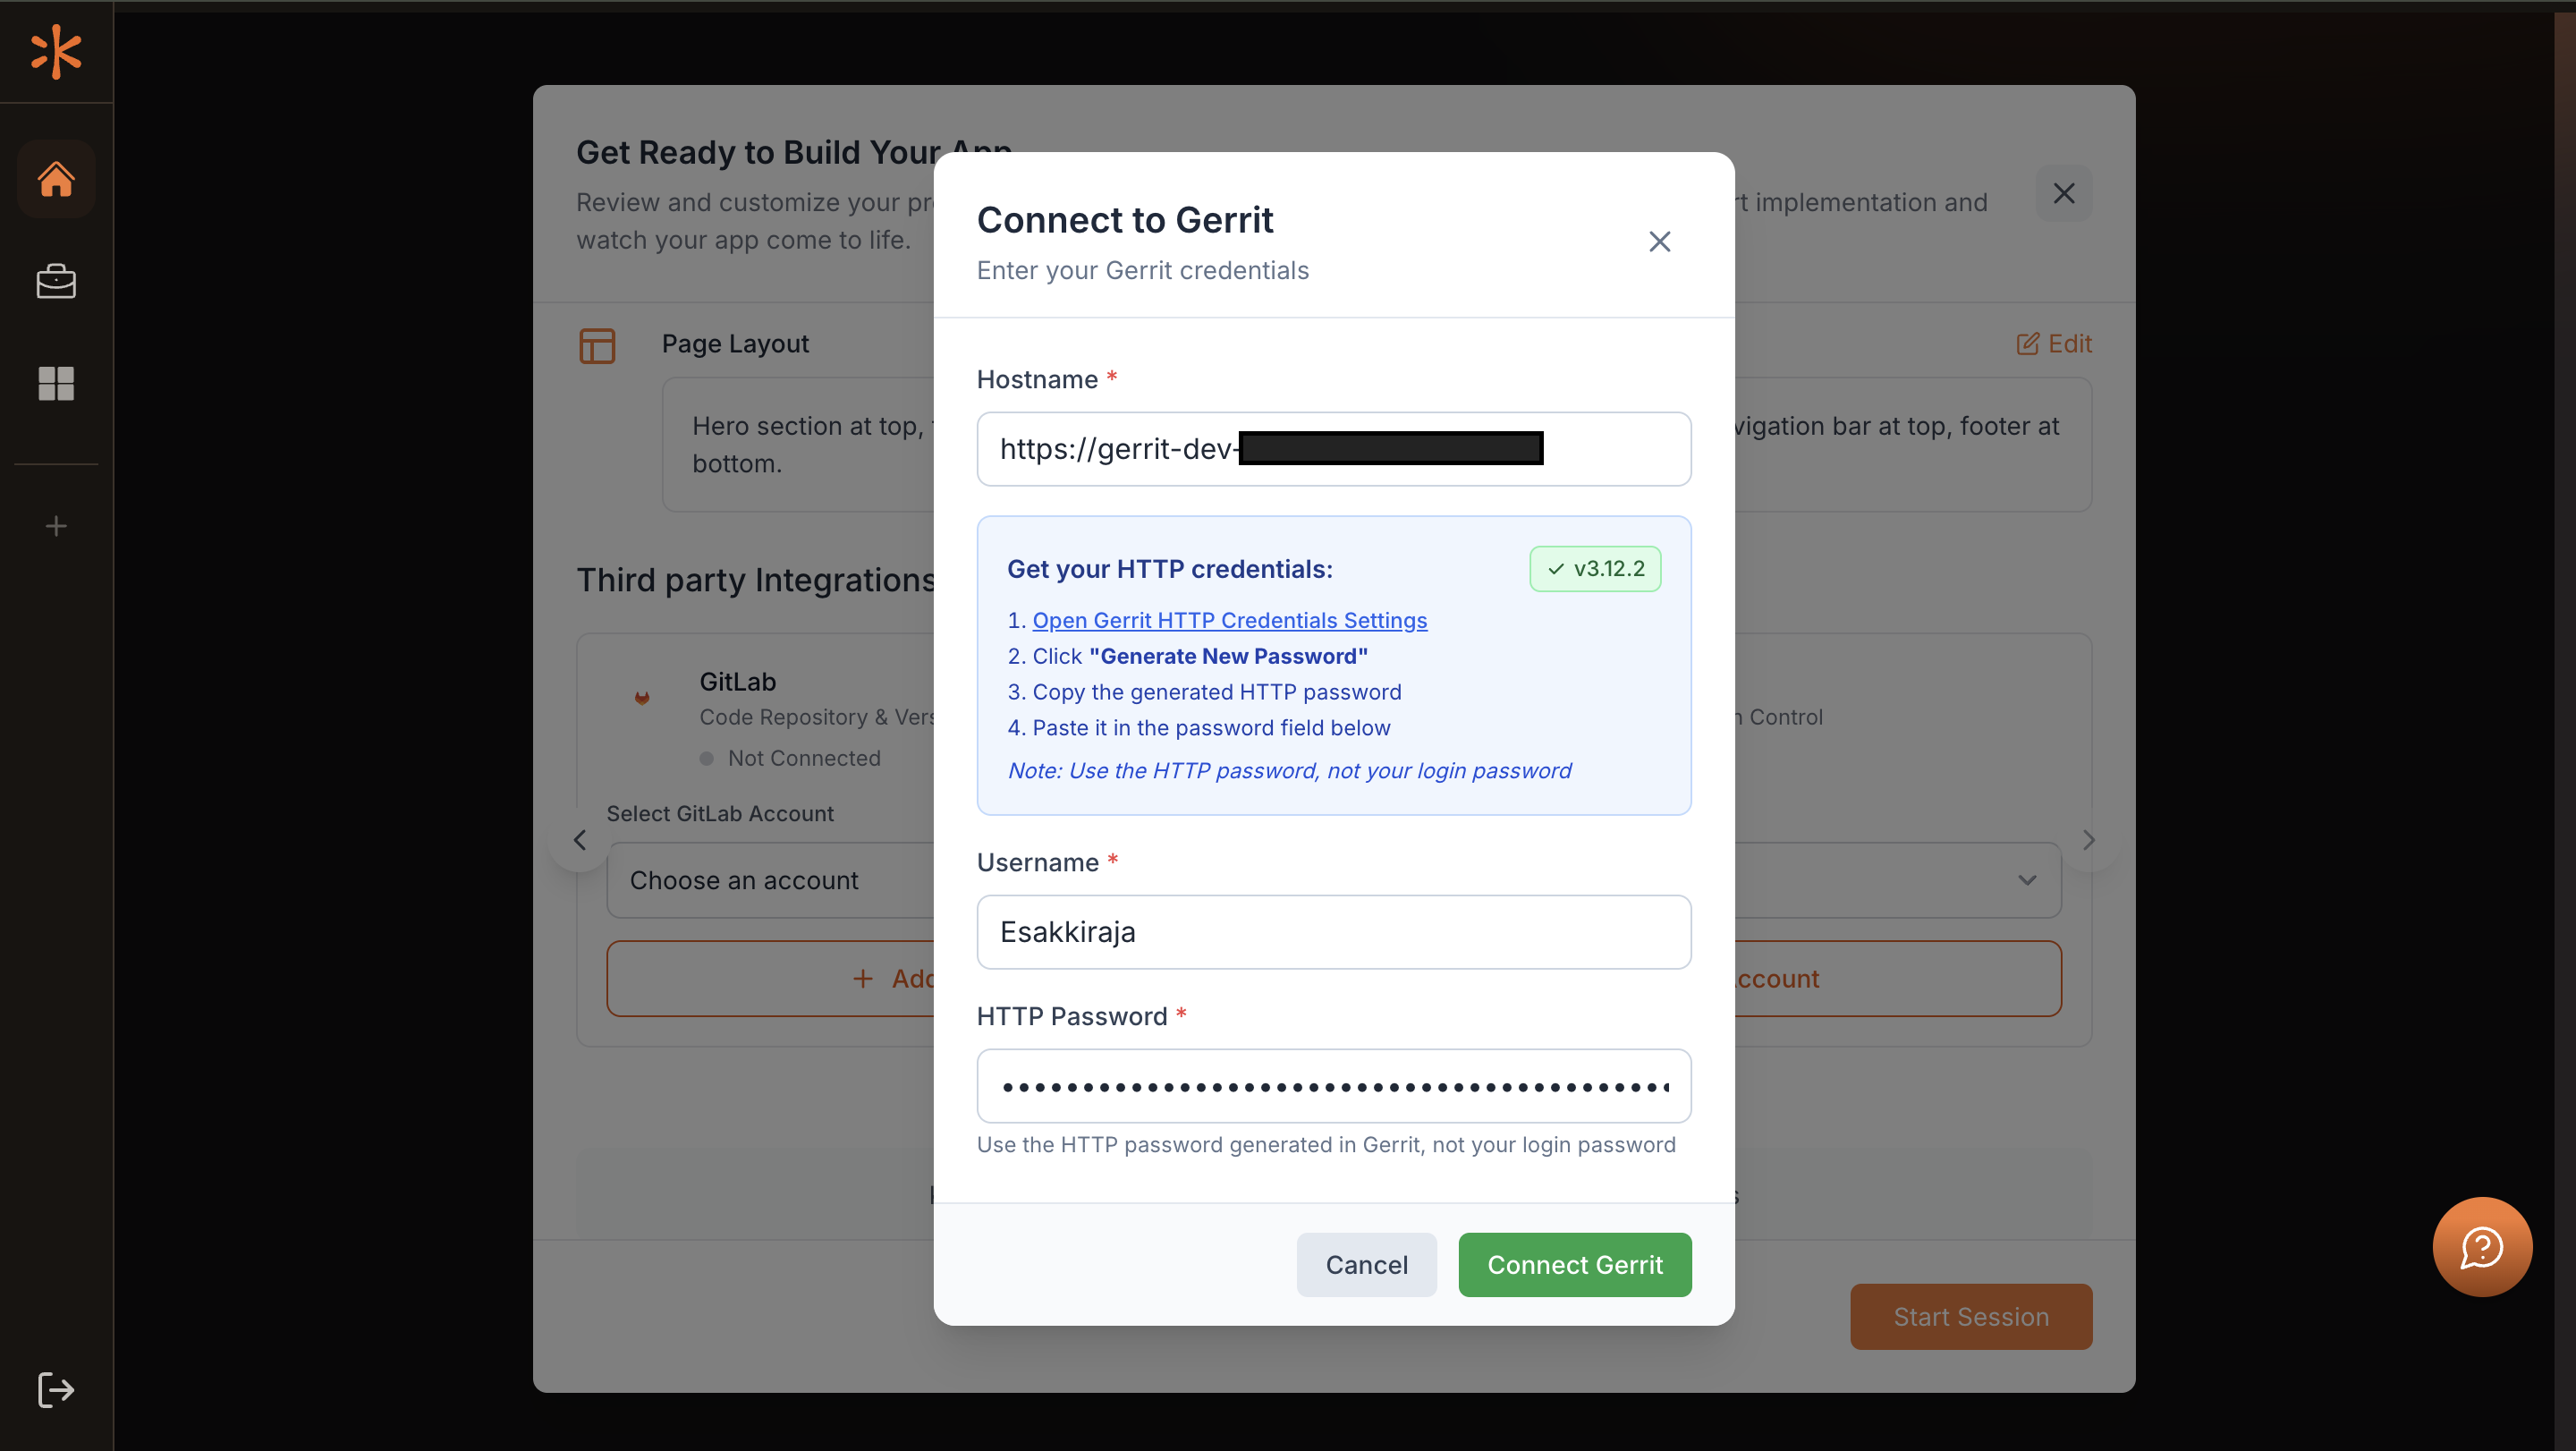
Add your Gerrit account
A form will appear where you’ll need to enter your Gerrit server URL, username, and access credentials (or API token). After filling in the details, click Connect Gerrit.
4
Confirm and select the connection
Once the connection is established, your Gerrit account will appear in the Connected Accounts dropdown. Select the connected account from the list and click Continue to finalize setup.
Kavia will now link your project to your Gerrit workspace, enabling repository access directly within your development environment.
Method 2: Connect from the Admin Dashboard
1
Access Admin Dashboard settings
From your Kavia workspace, navigate to the Admin Dashboard and click Settings.
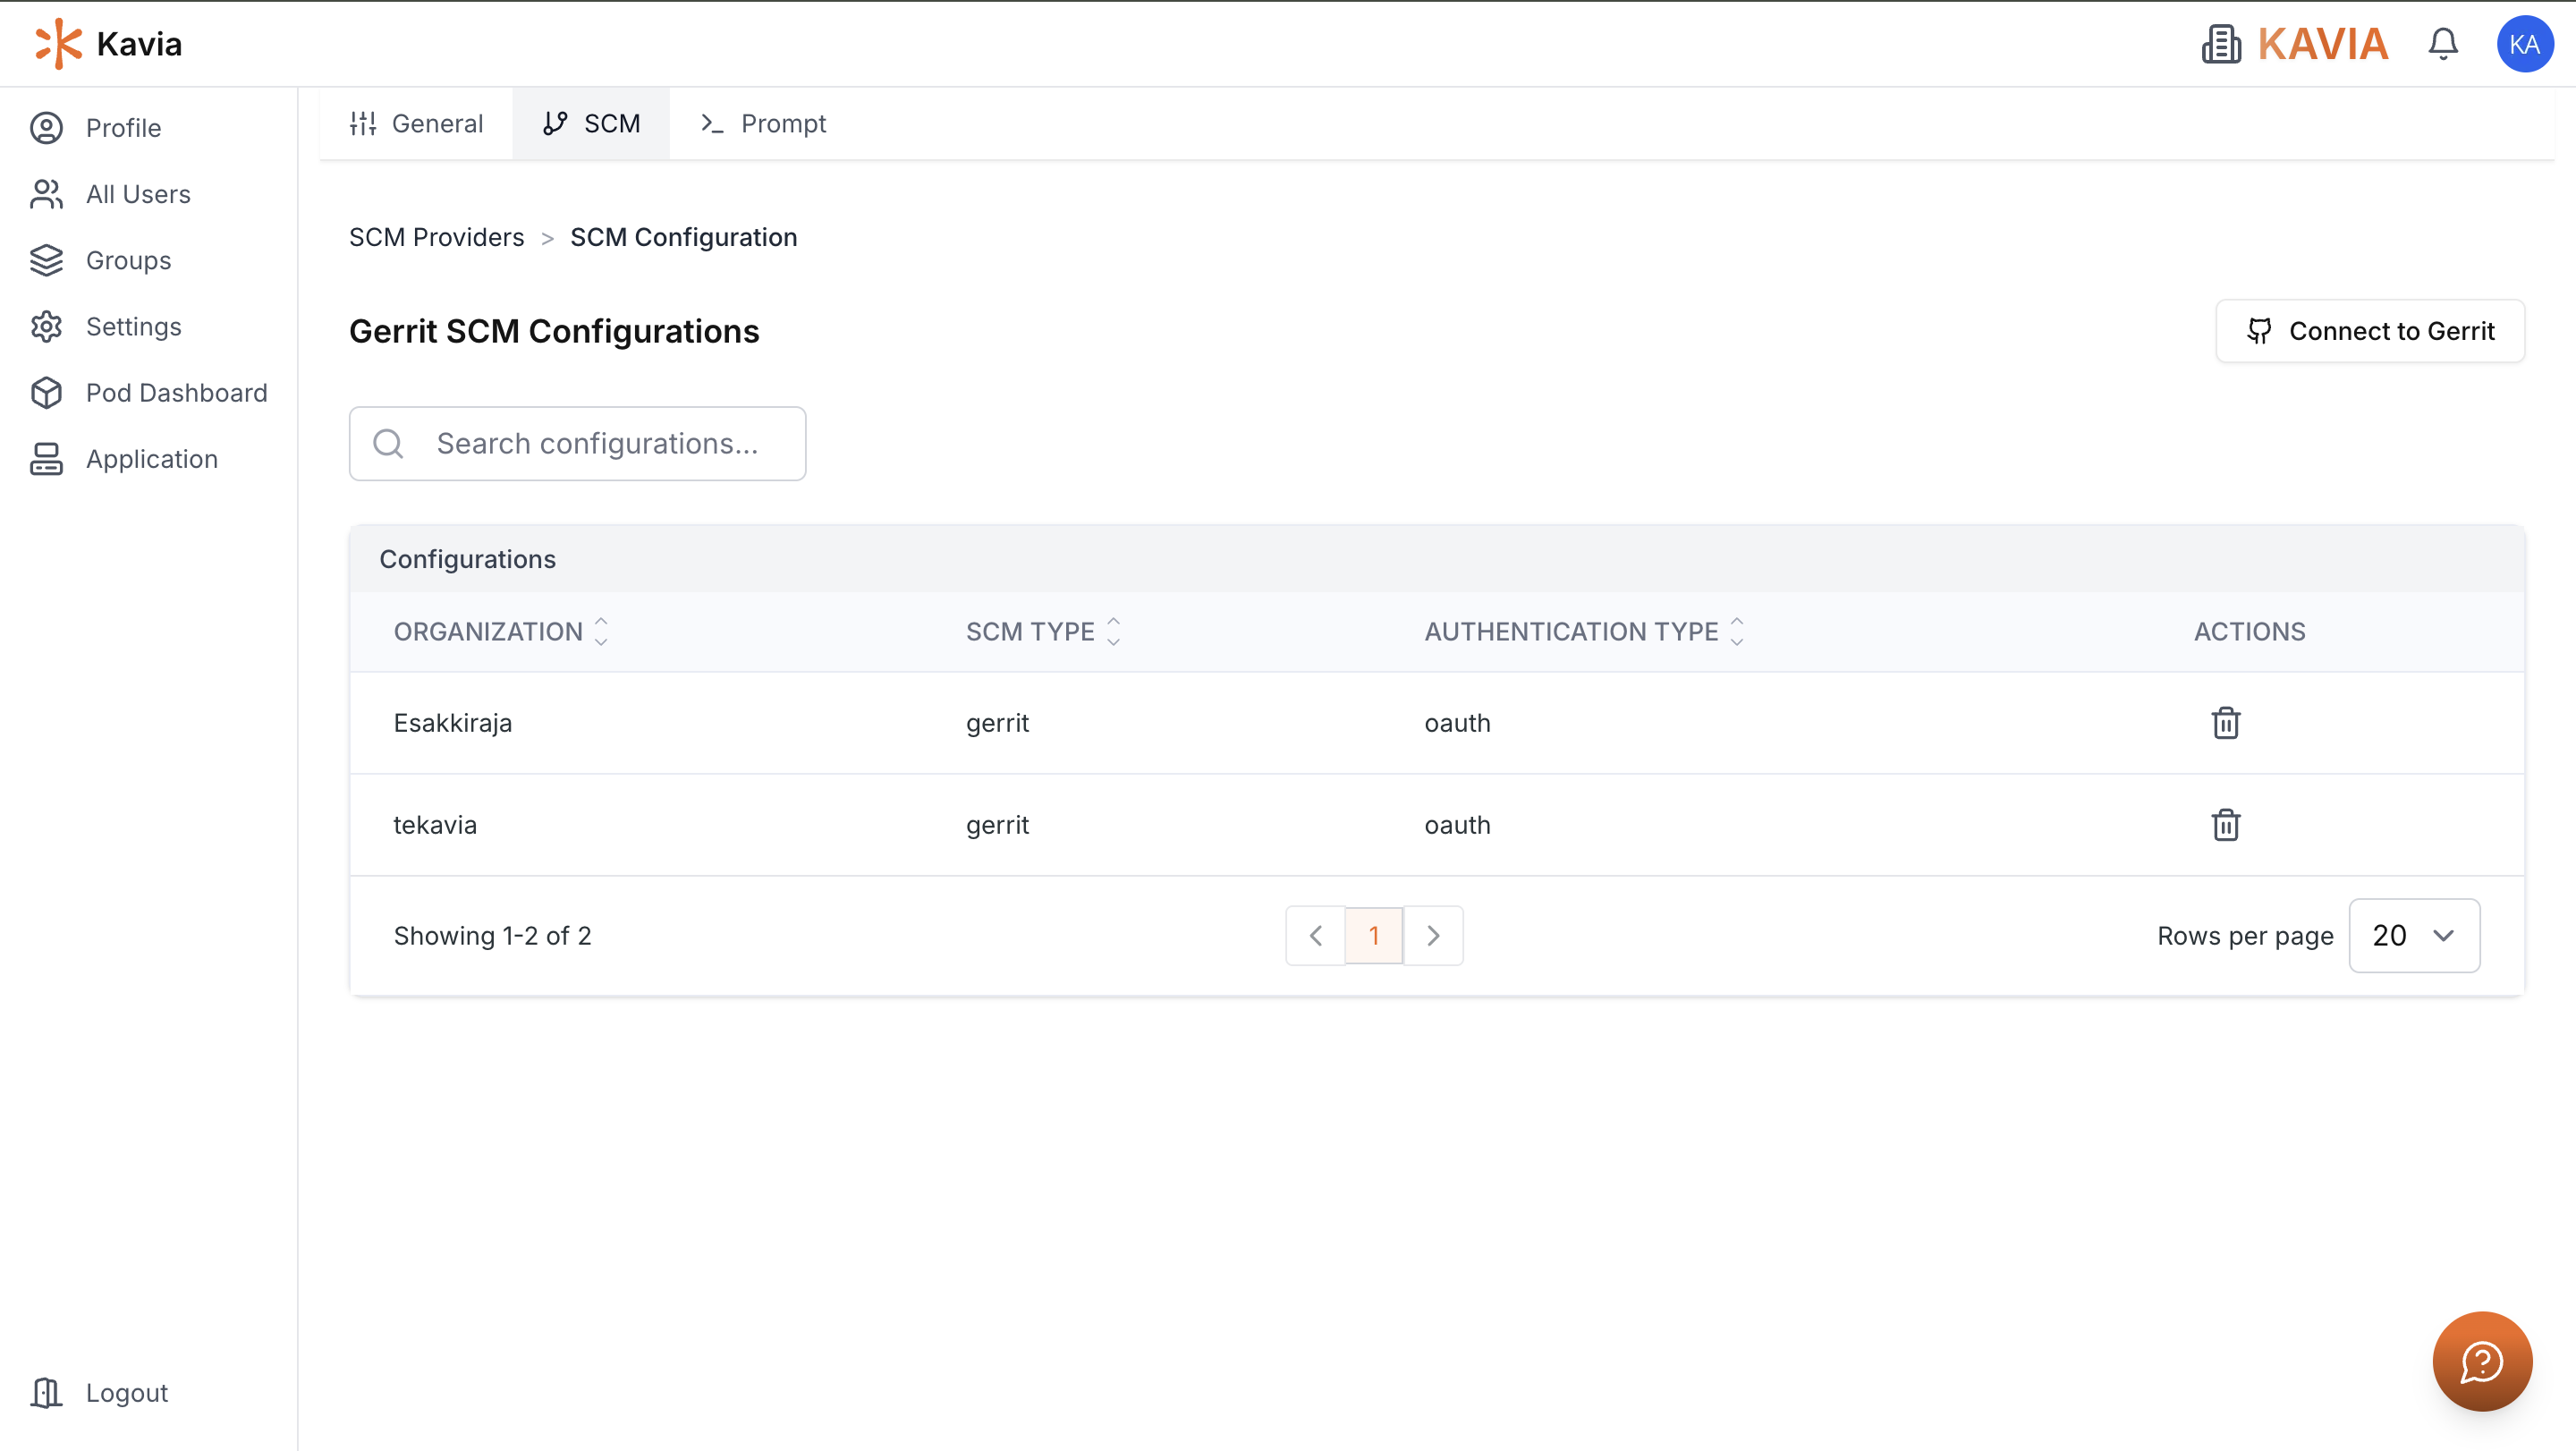
2
Source Control Integrations
Once inside settings, open the SCM tab to access available integrations.Under the list of SCM platforms, click Gerrit and then Connect to Gerrit.
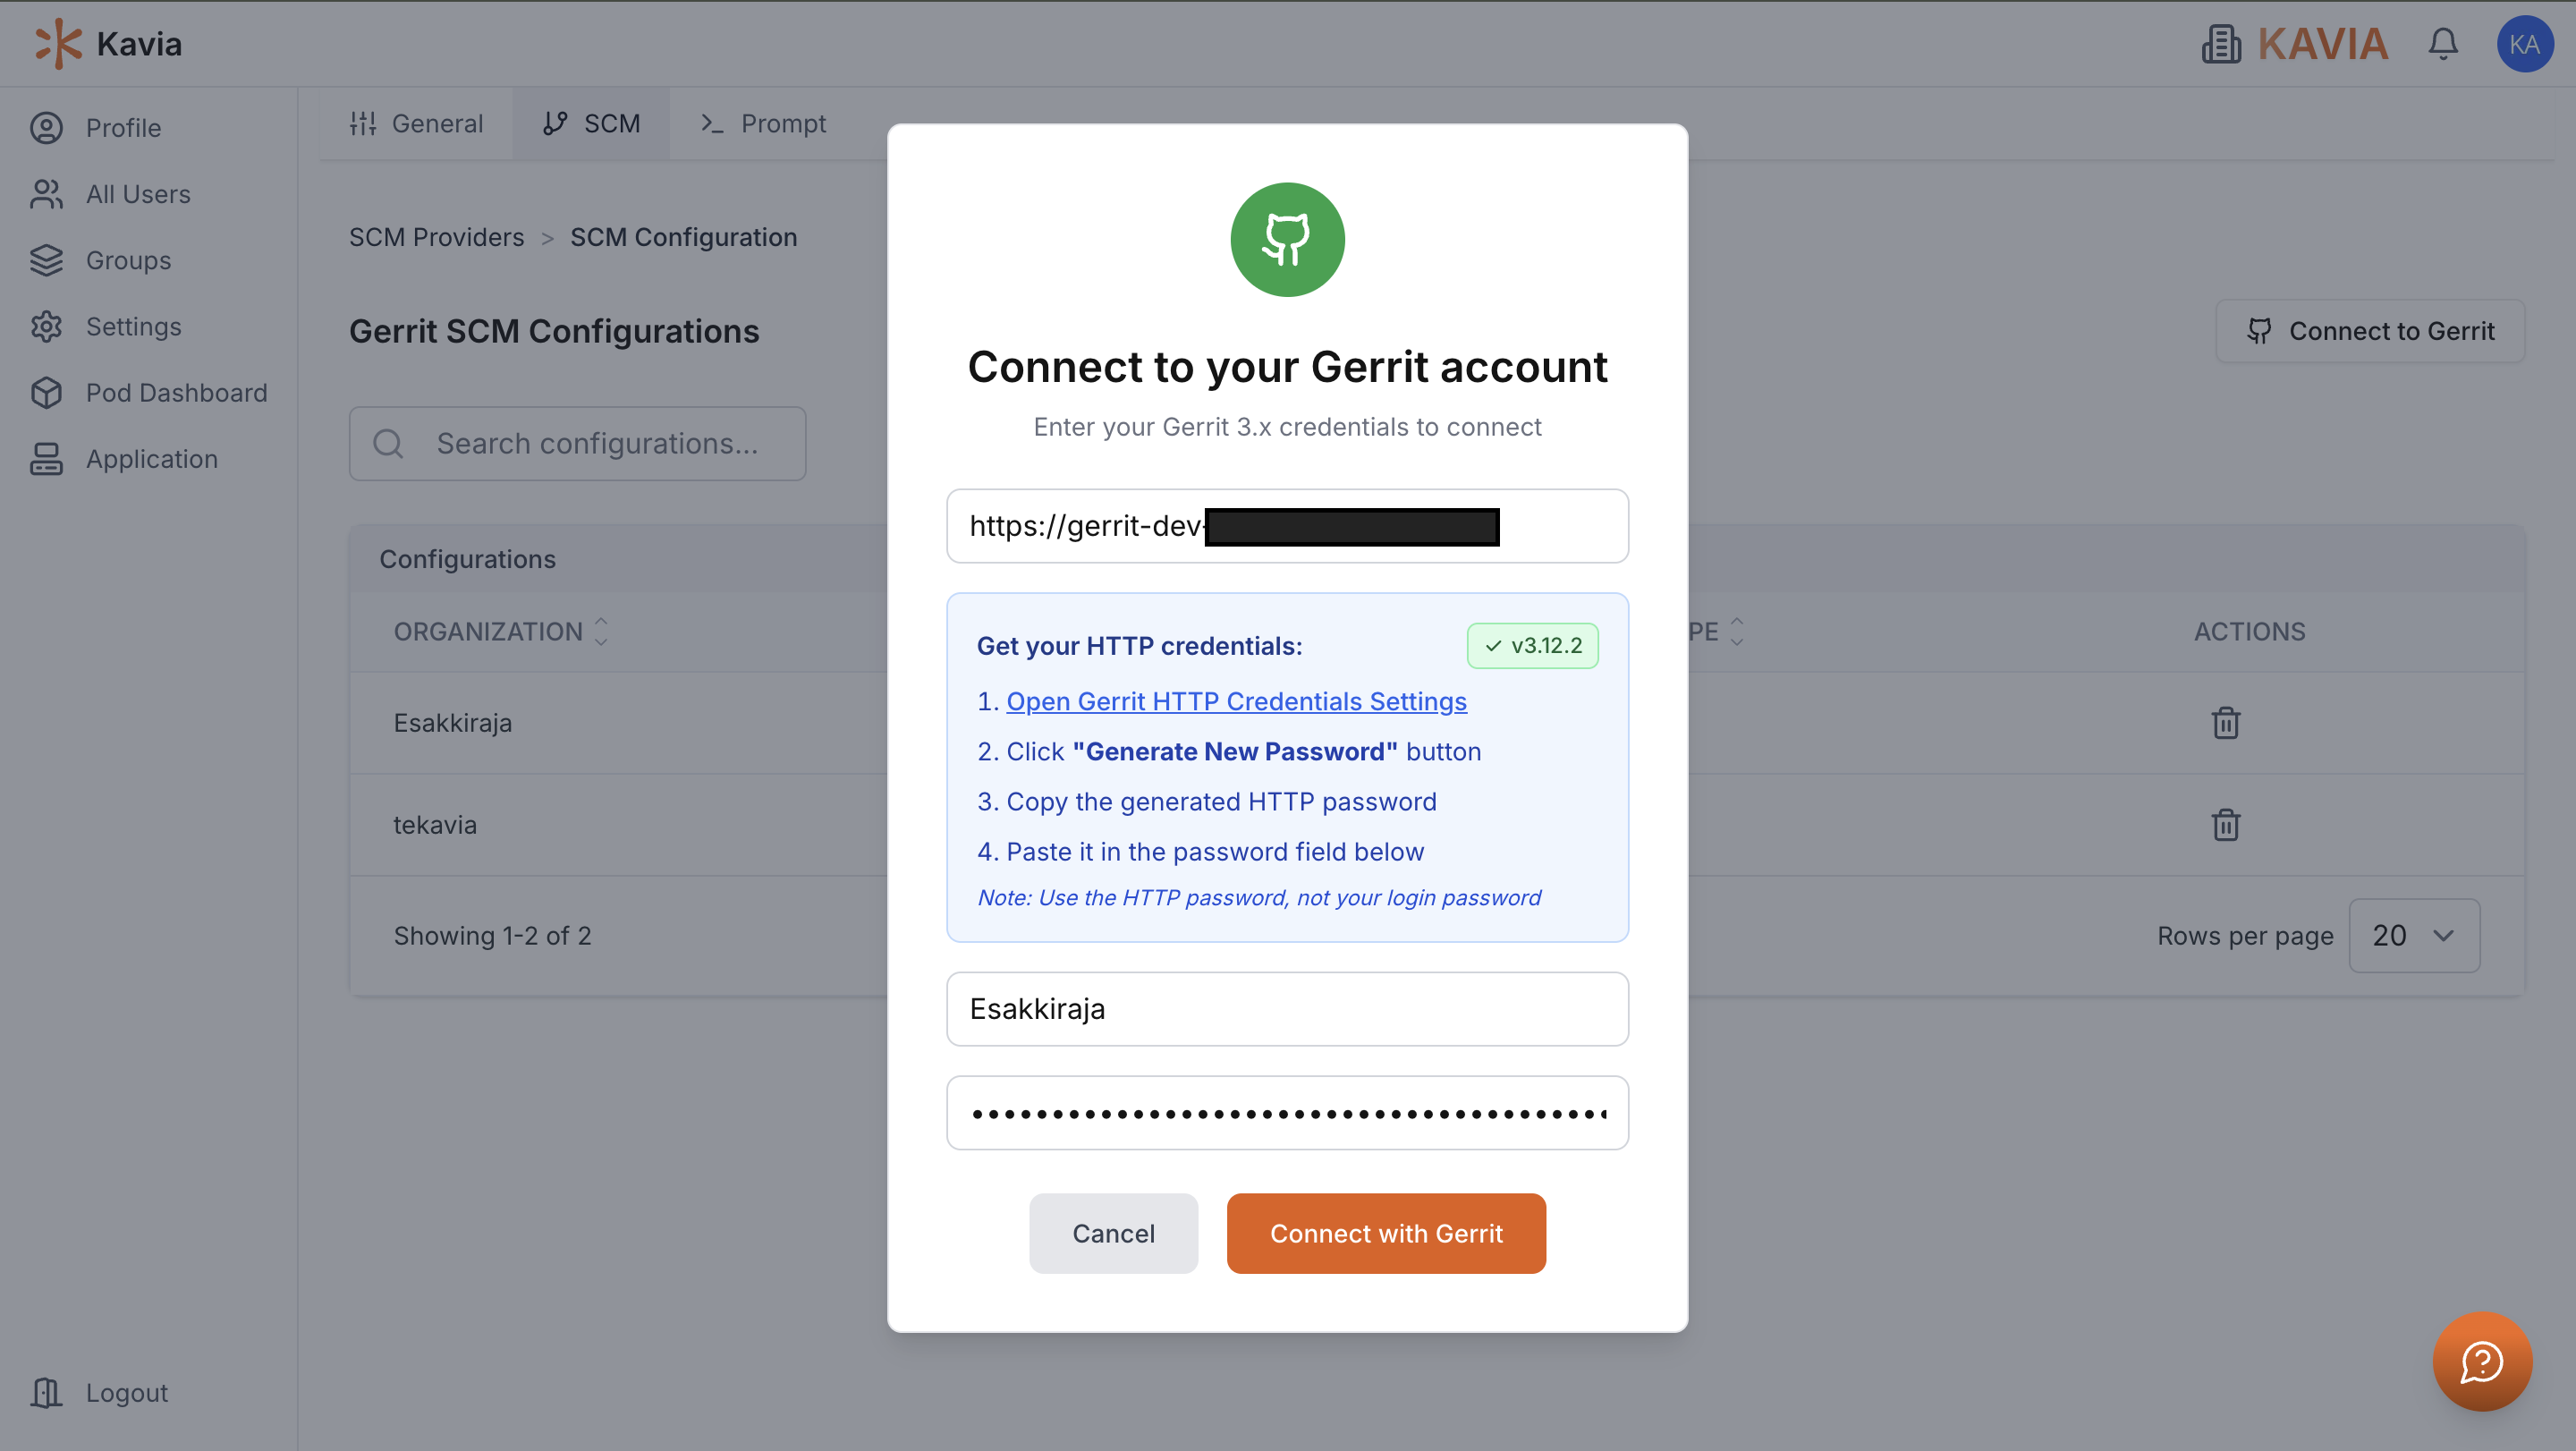
3
Connect Gerrit
Fill in the connection form with your Gerrit server details, username, and authentication credentials, then click Connect with Gerrit.
4
Open your project
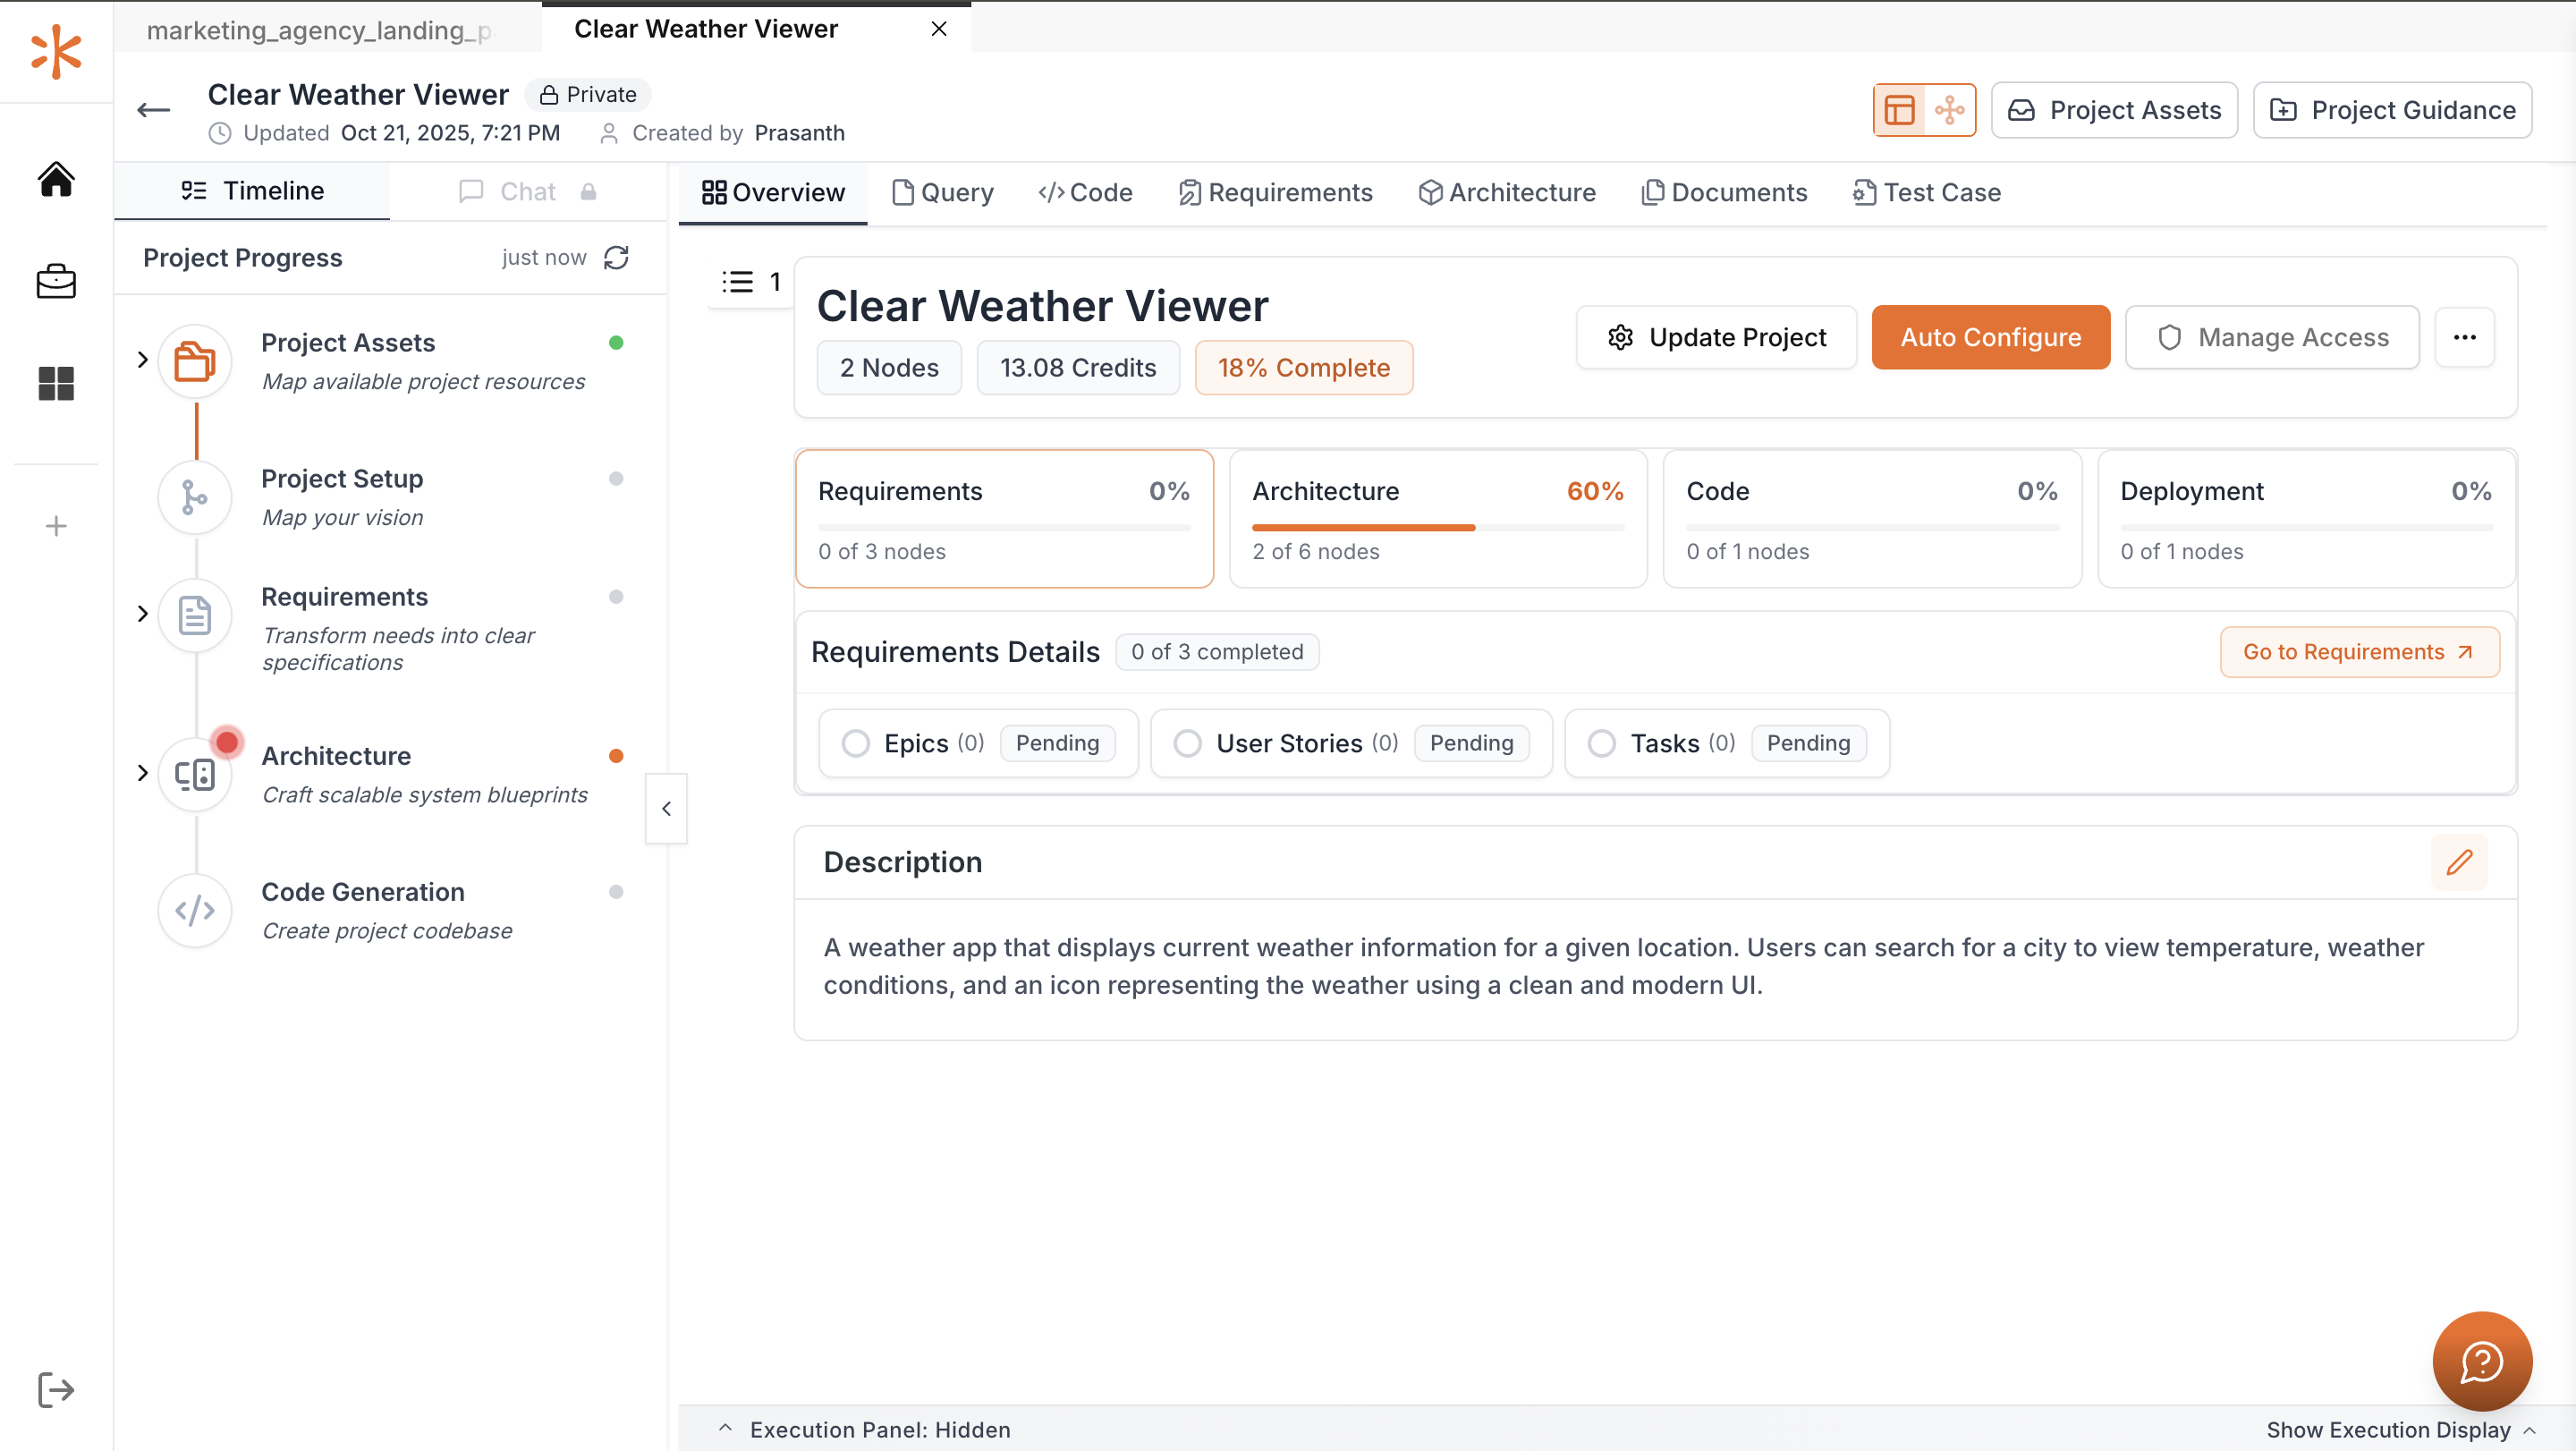
Go to the Projects section and select the project you want to associate with Gerrit.
This will open the Project Dashboard, where you can manage integrations and repositories.
5
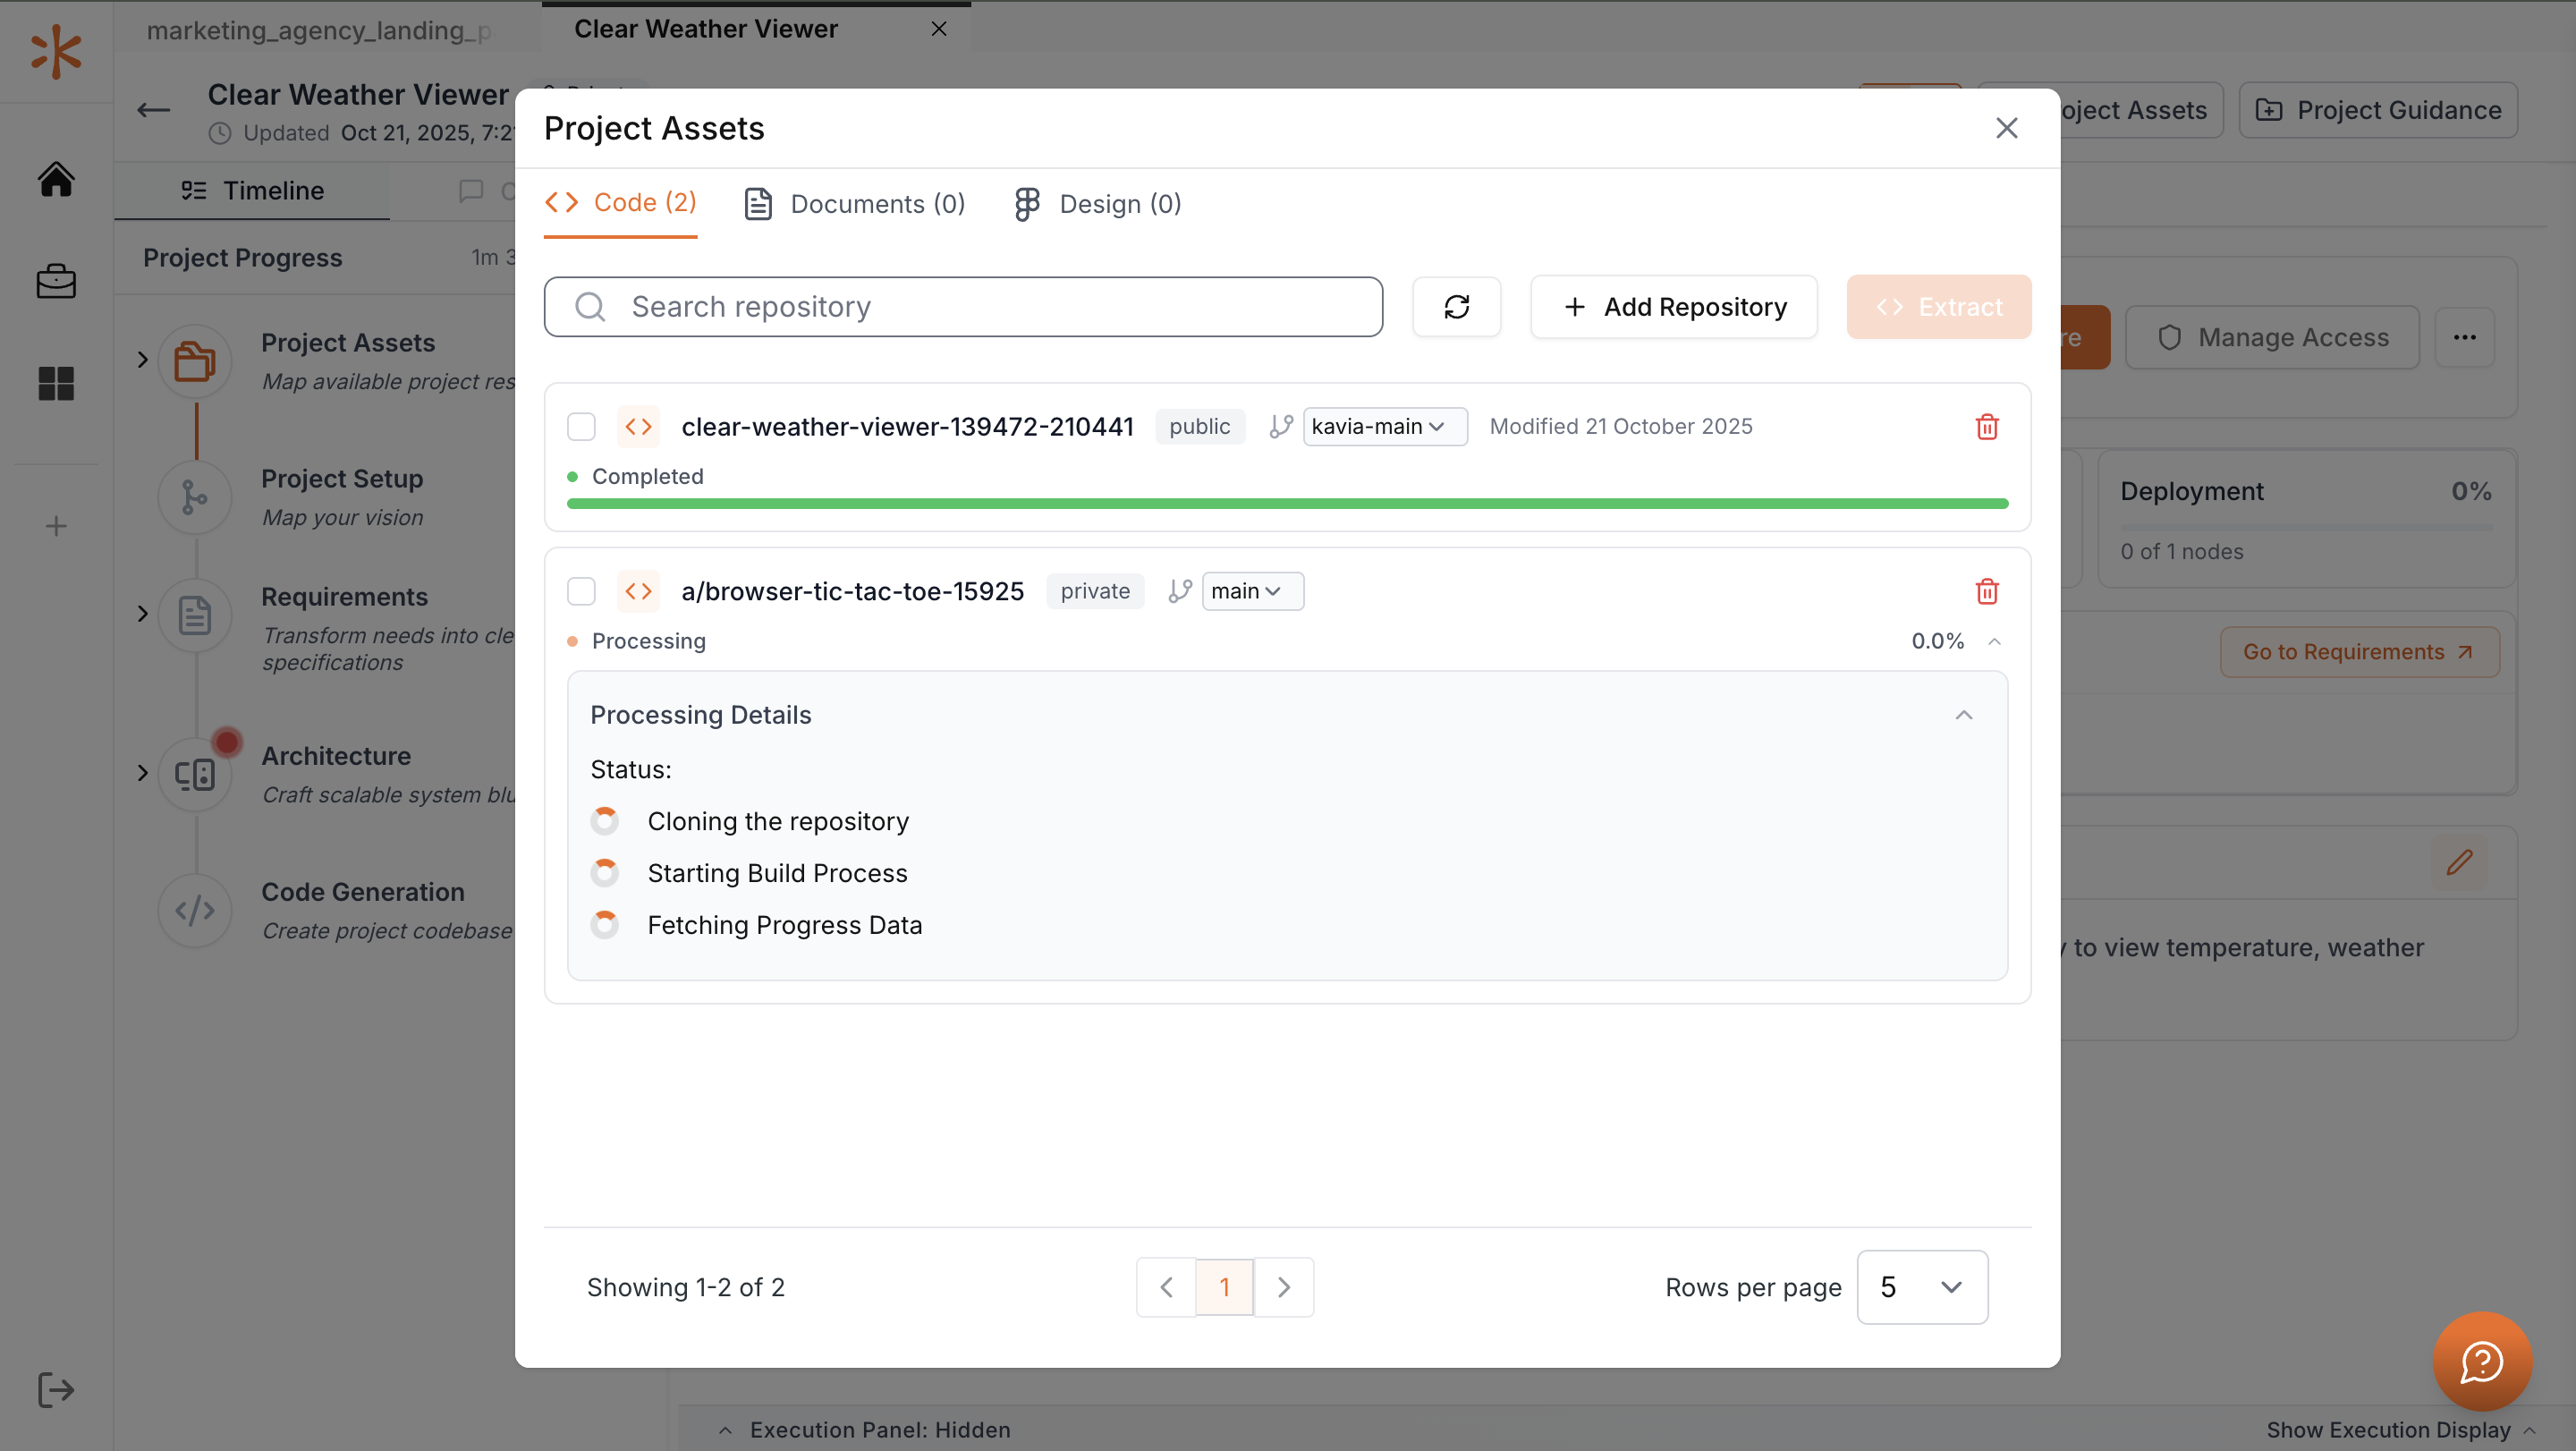
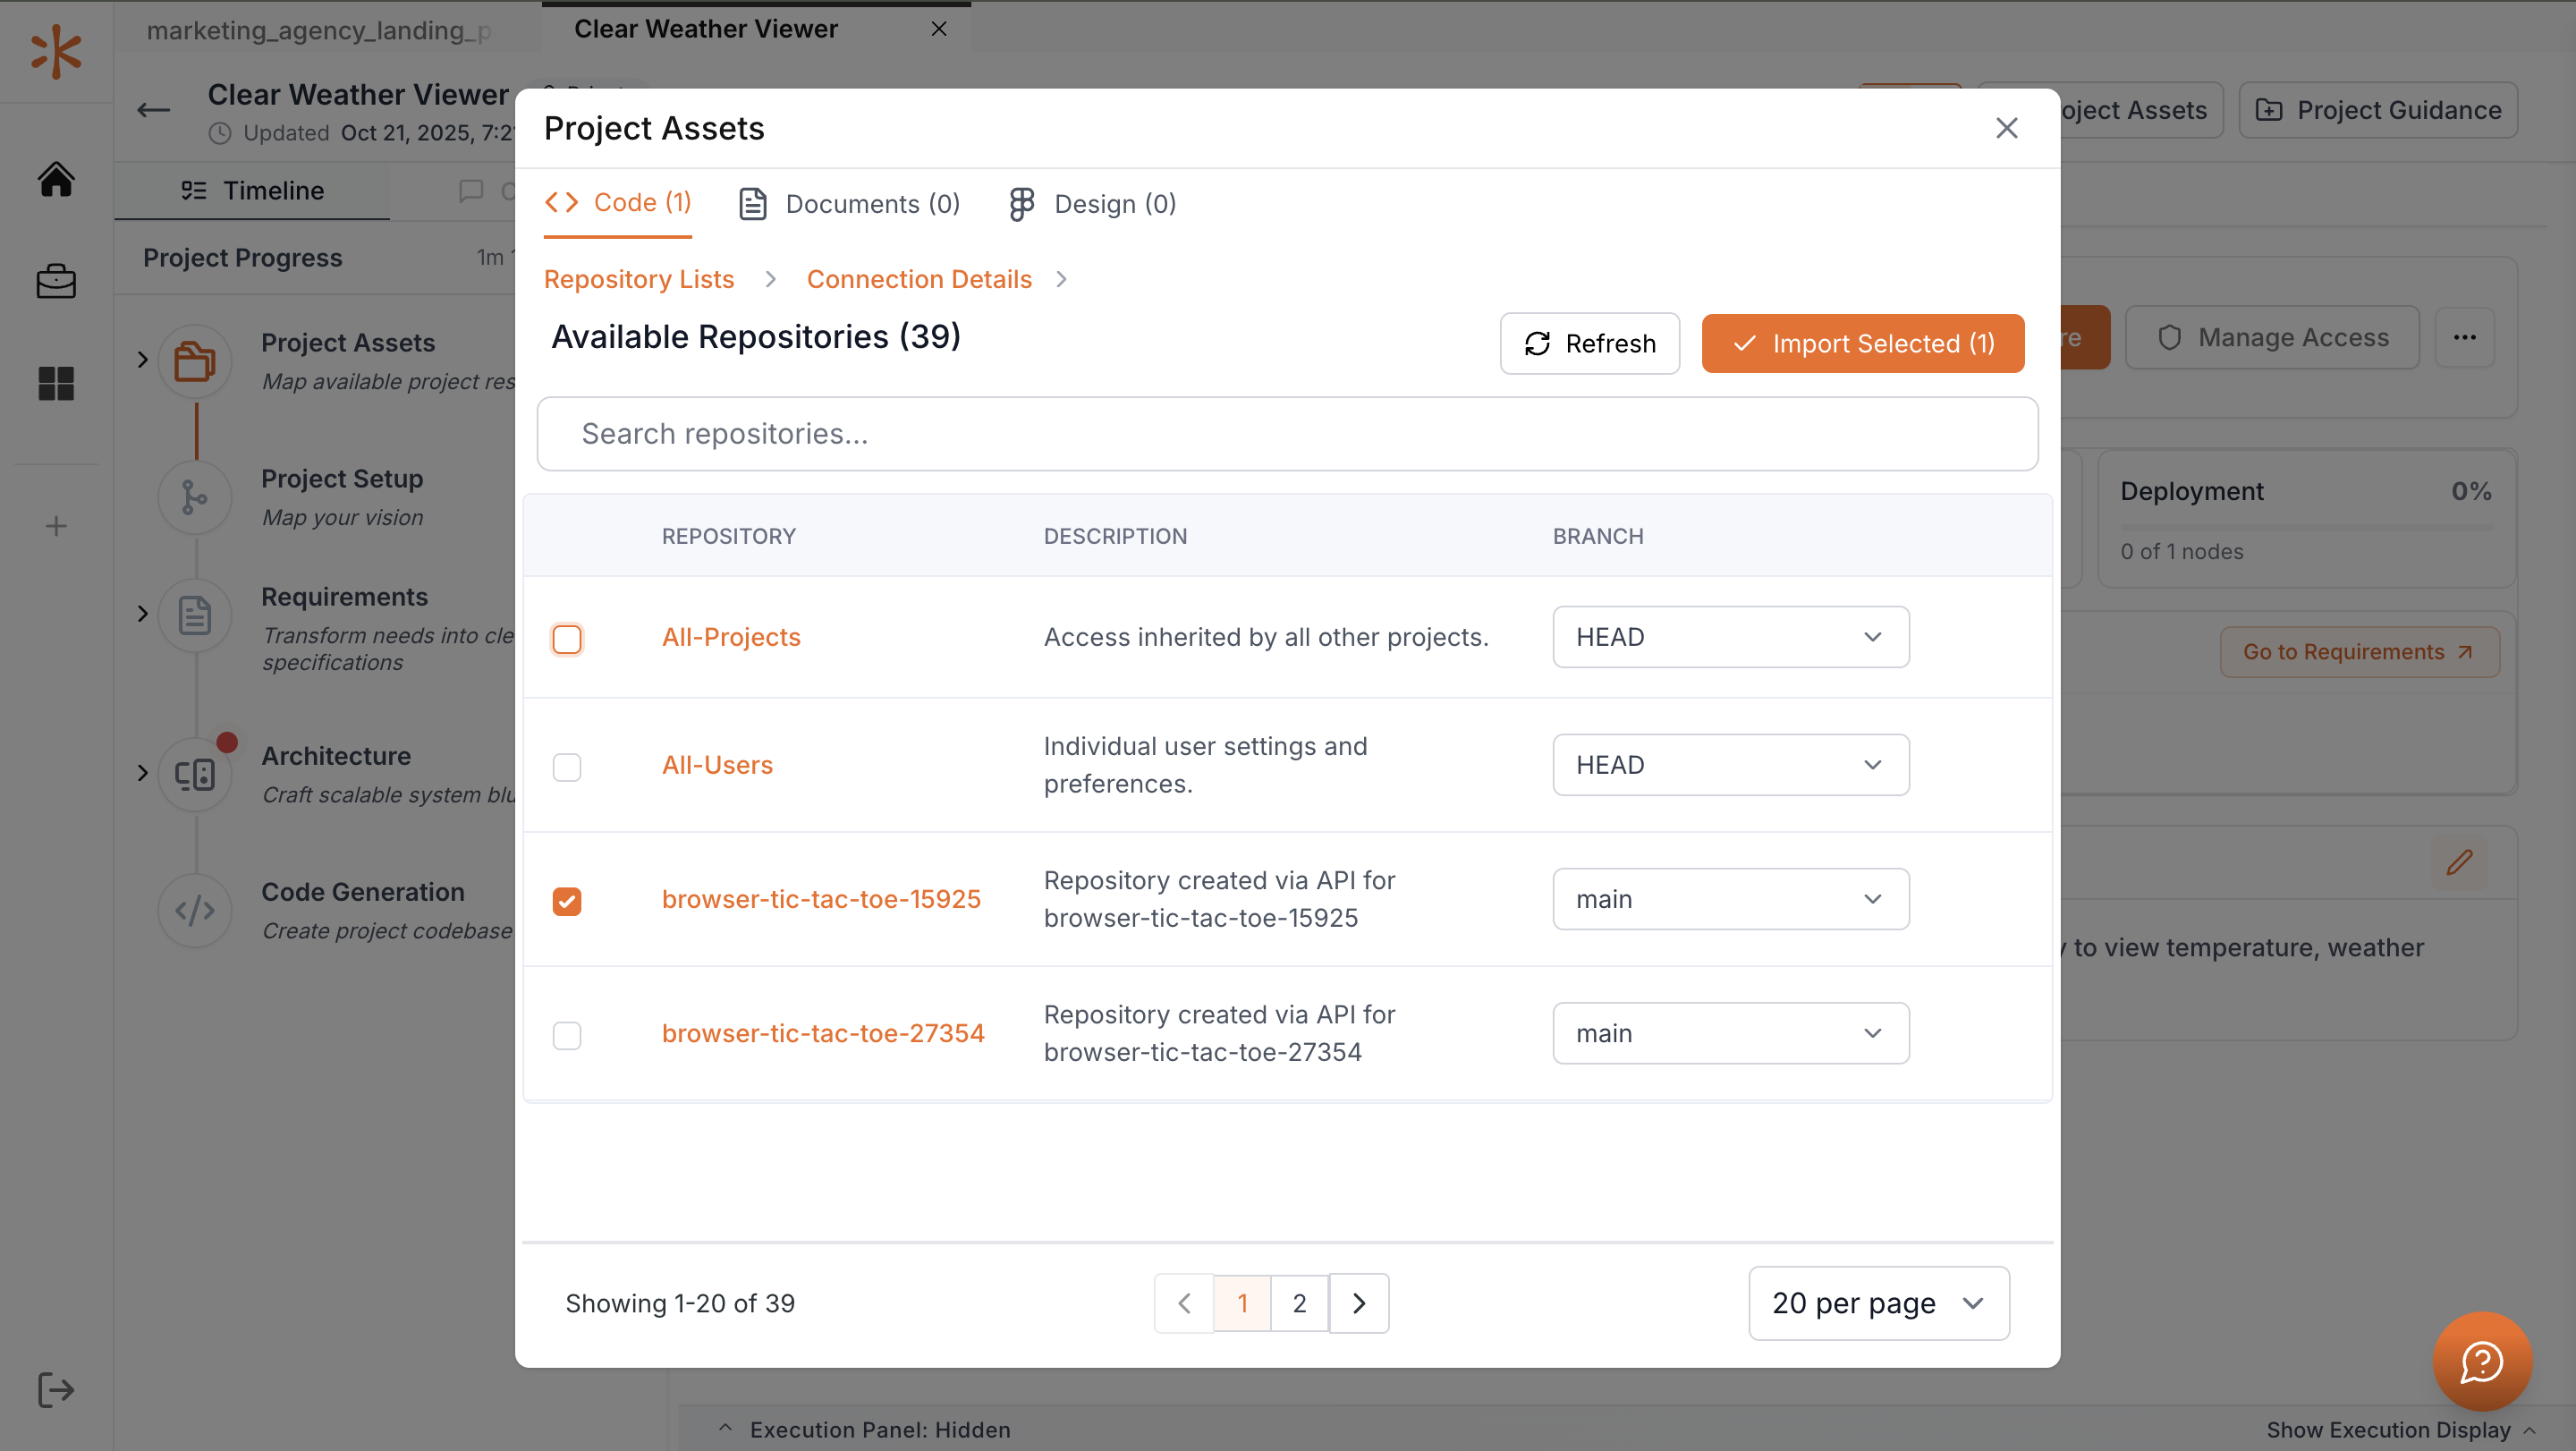
Open Project Assets
In the top-right corner of the dashboard, click the Project Assets button. This will take you to the asset management area of your project.
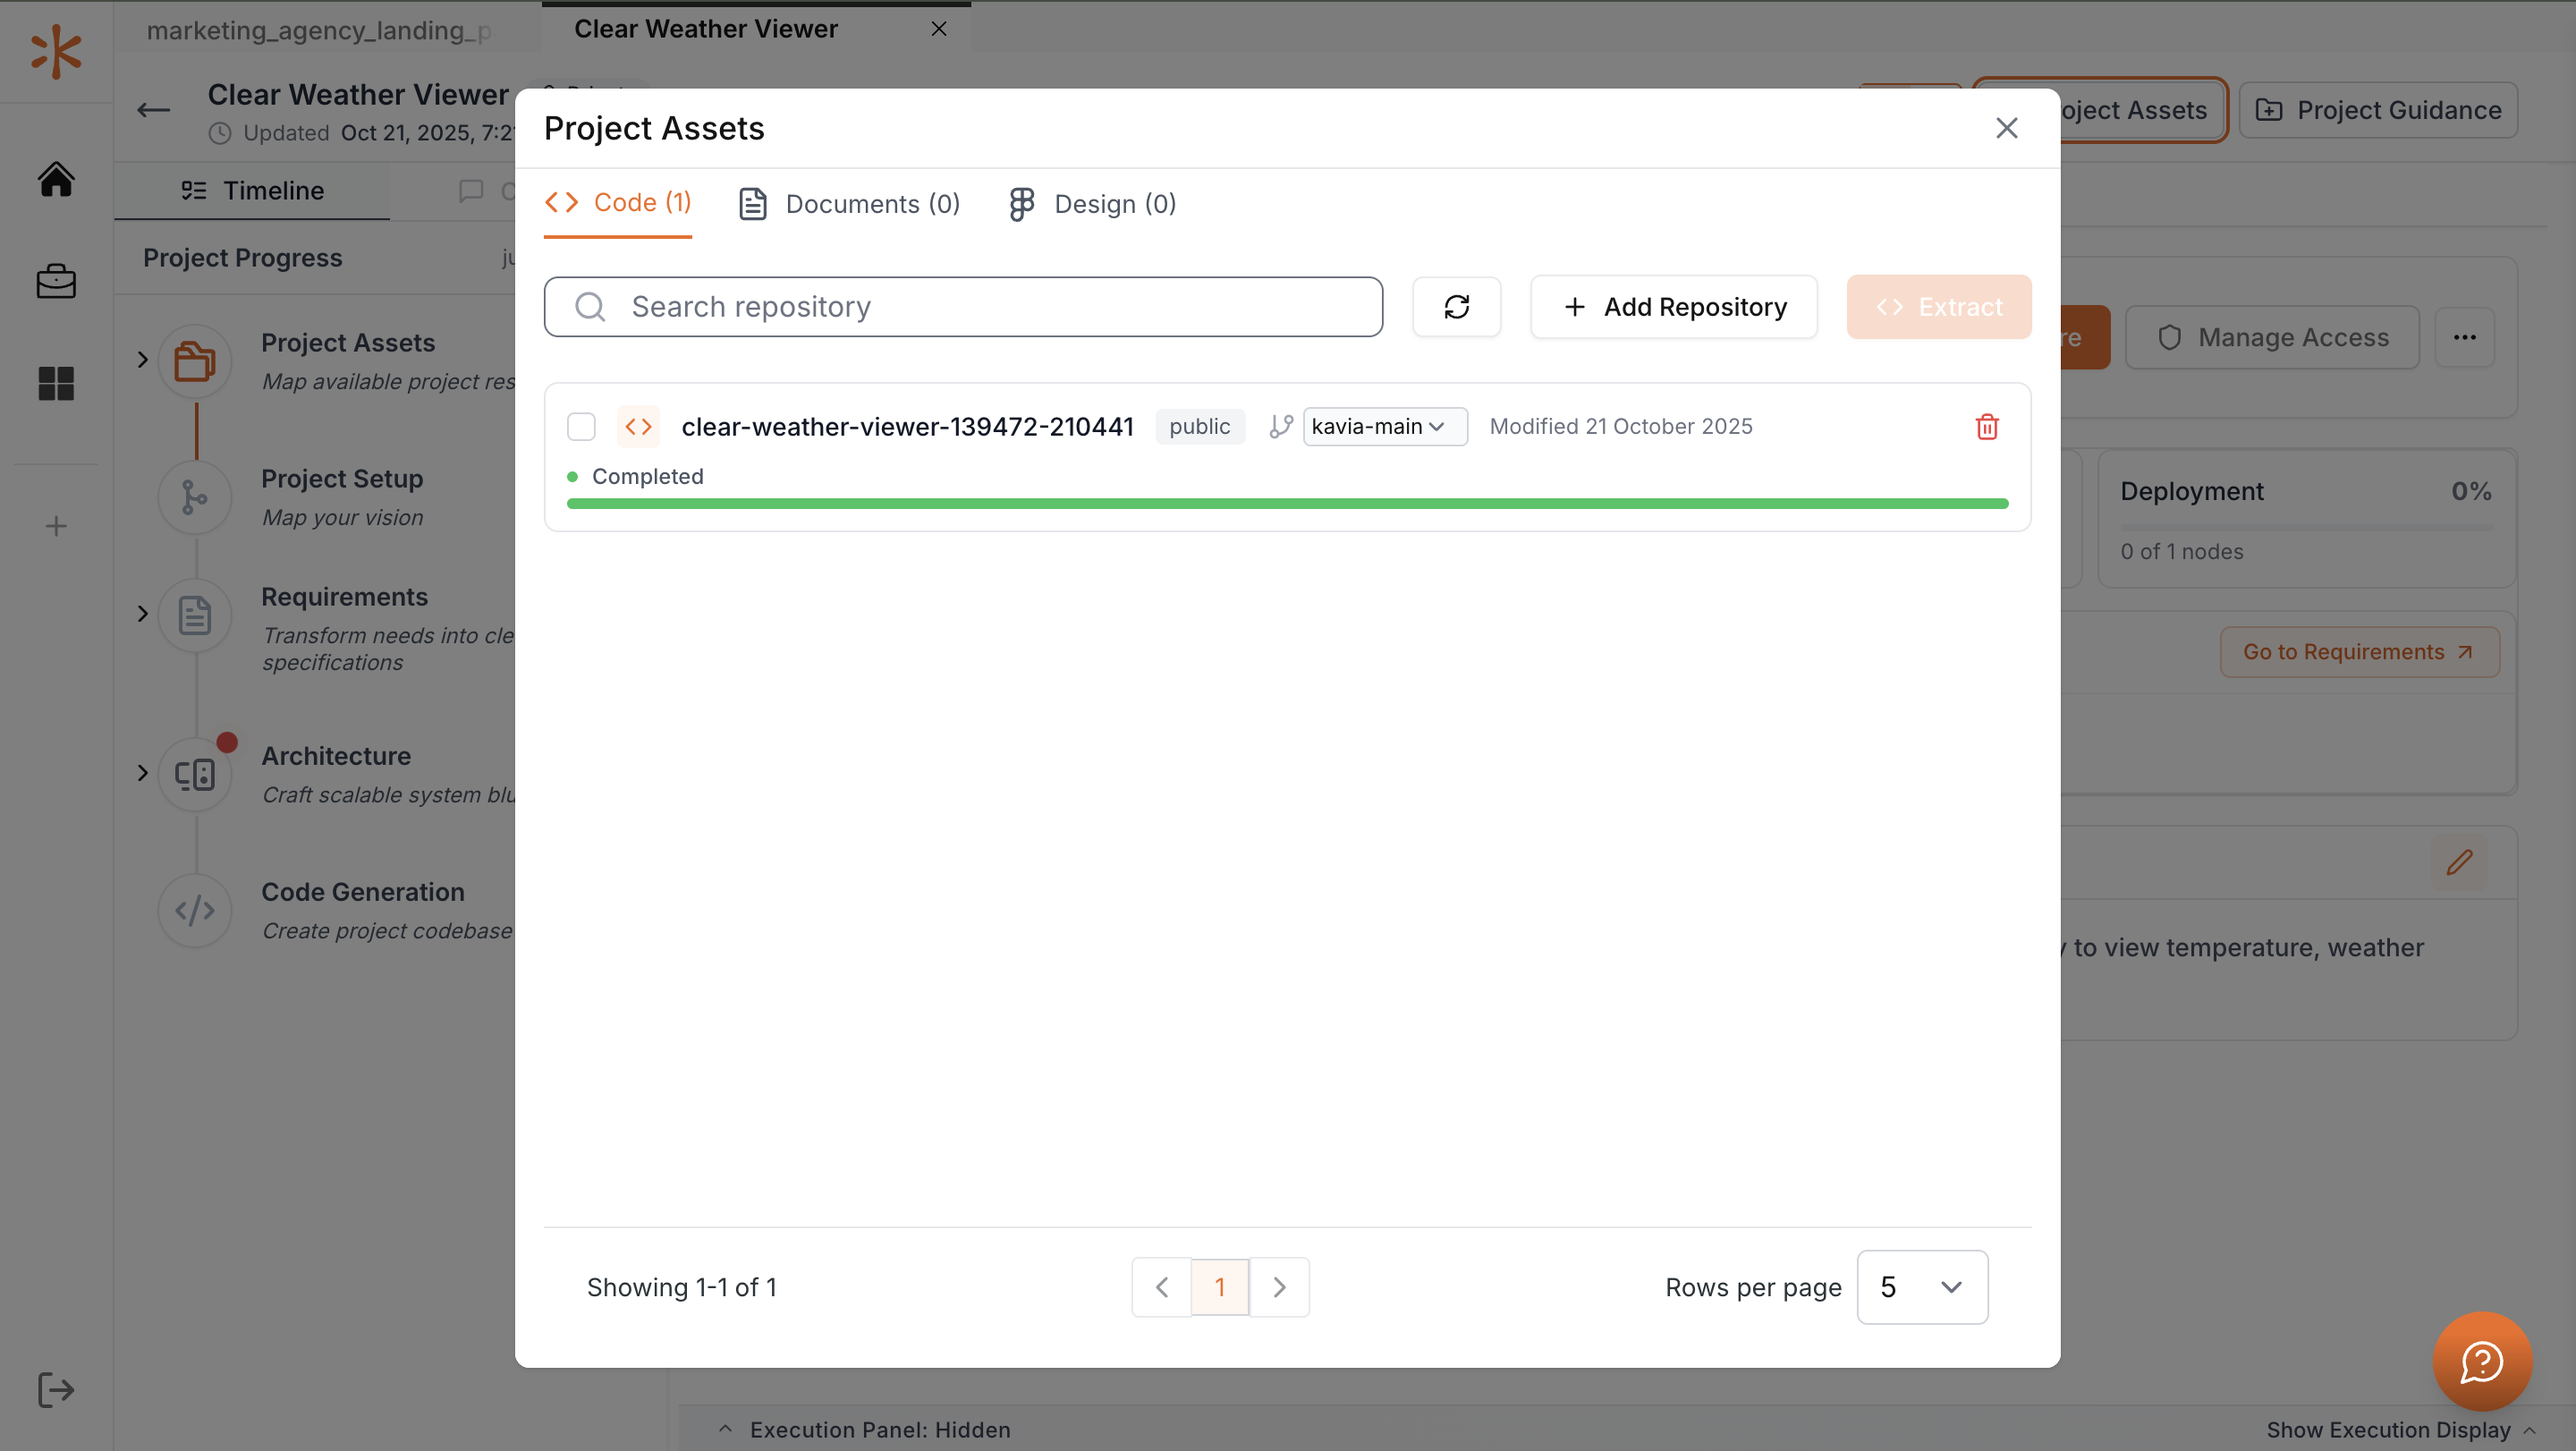
6
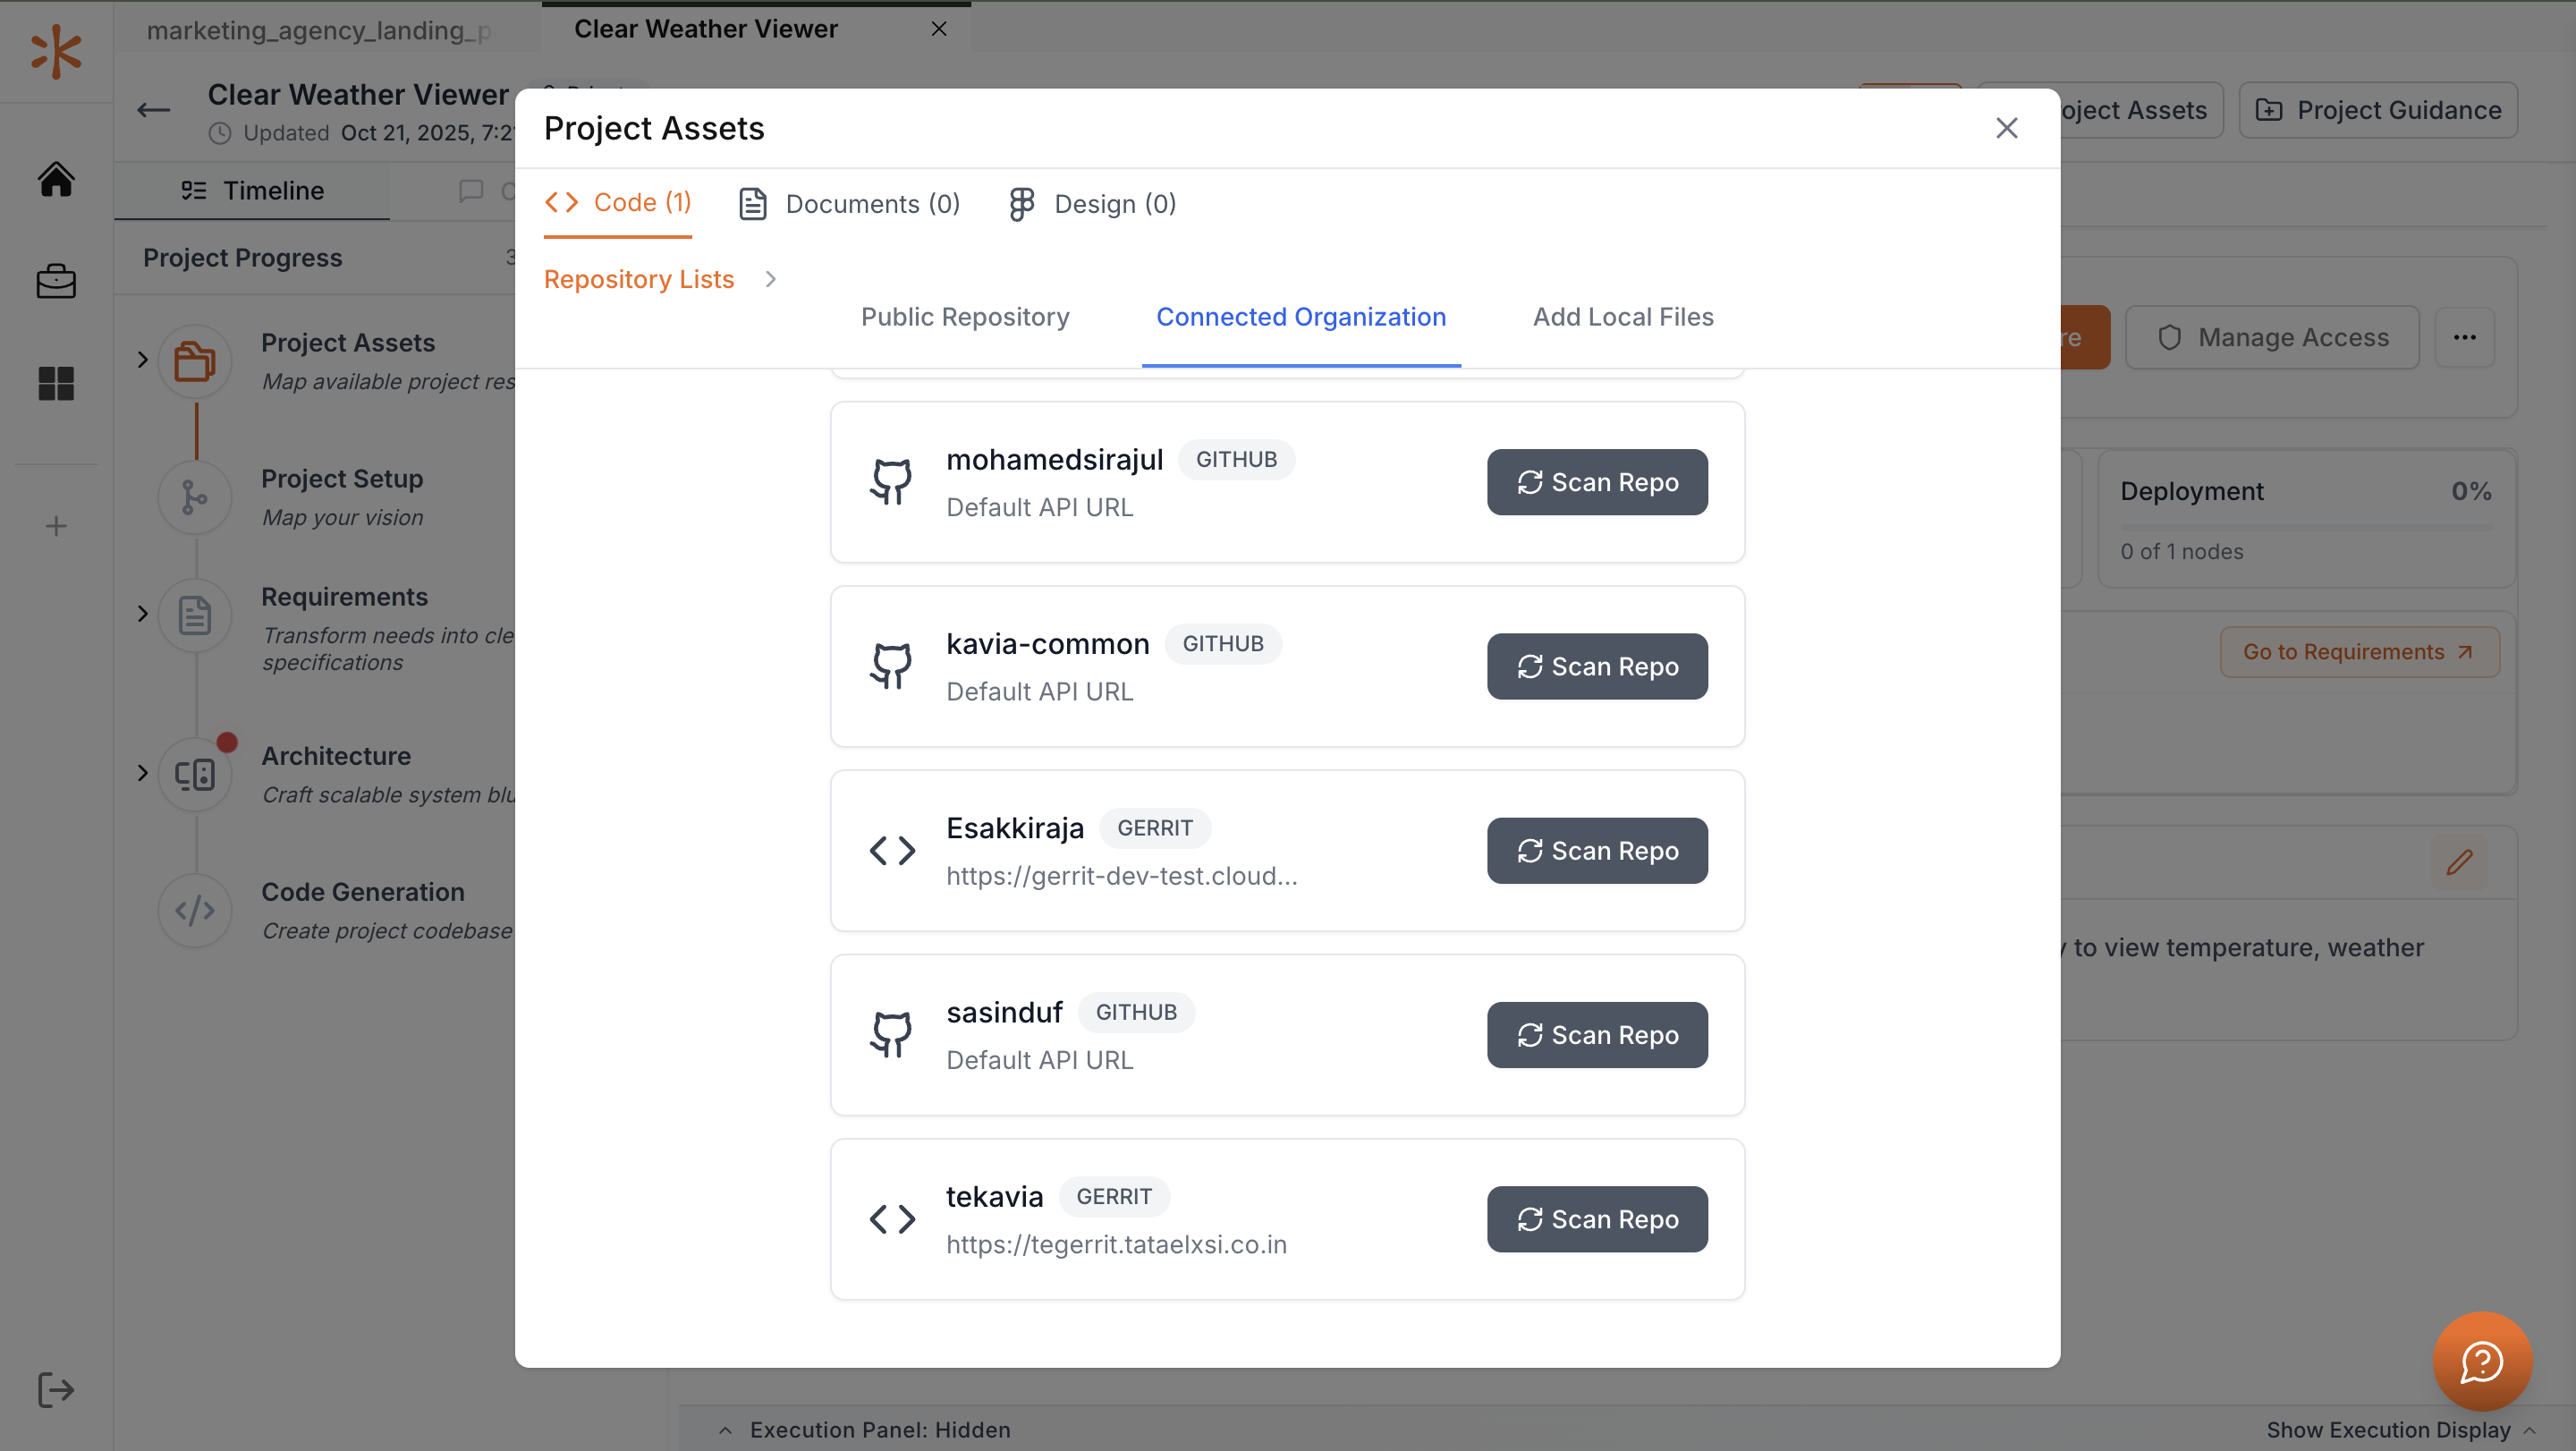
Add a repository
Click Add Repository and navigate to the Connected Organization tab. Here, you’ll see the Gerrit account you previously connected. Click Scan Repo to let Kavia list all repositories available under that account.
7
Import repositories
After the scan completes, select the repositories you wish to use and click Import Selected. Kavia will begin scanning and importing those repositories into your project.
8
Wait for synchronization
Kavia will show progress as it fetches repository data and completes the import. Once finished, your project will be fully connected to the selected Gerrit repositories, allowing version-controlled development inside Kavia.